
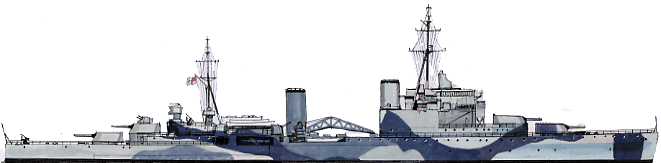
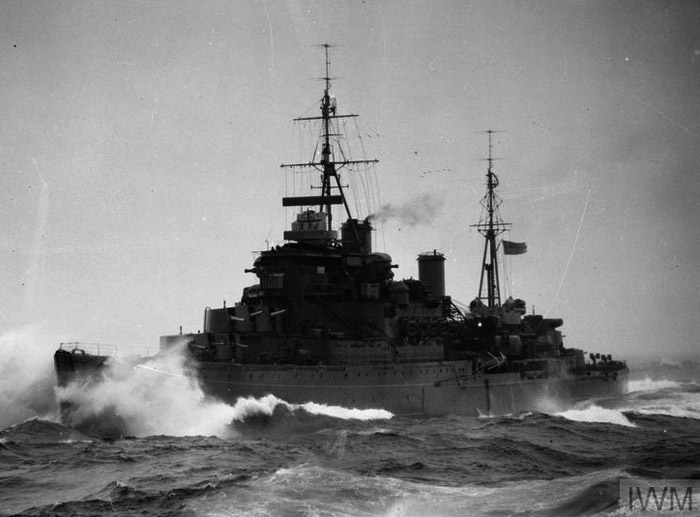
Fiji (“Crown Colony”) class Cruisers
 United Kingdom (1939-42)
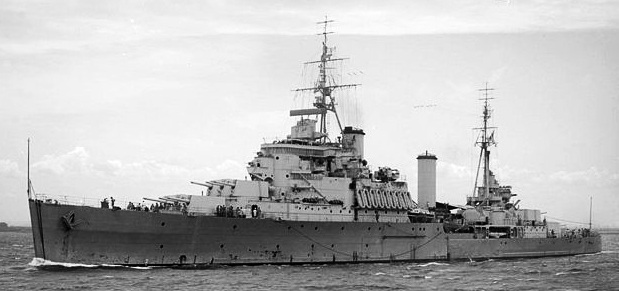
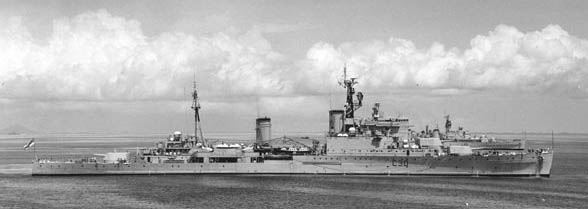
HMS Fiji, Nigeria, Mauritius, Kenya, Trinidad, Jamaica, Gambia, Bermuda, Ceylon, Uganda, Newfoundland
The new generation British light cruisers
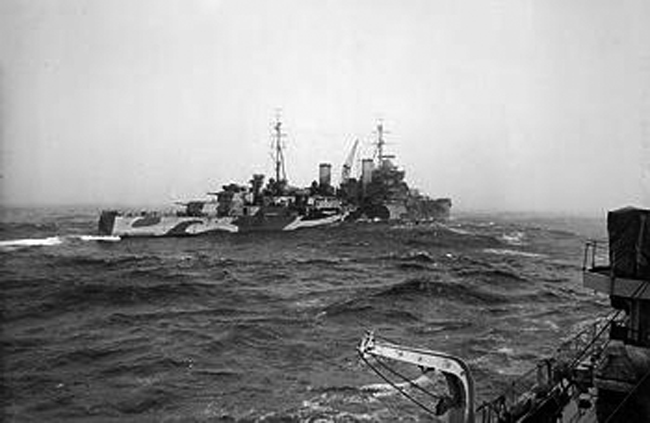
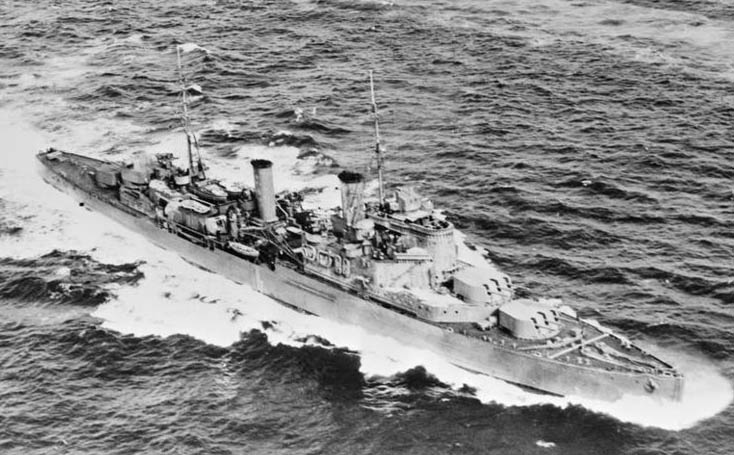
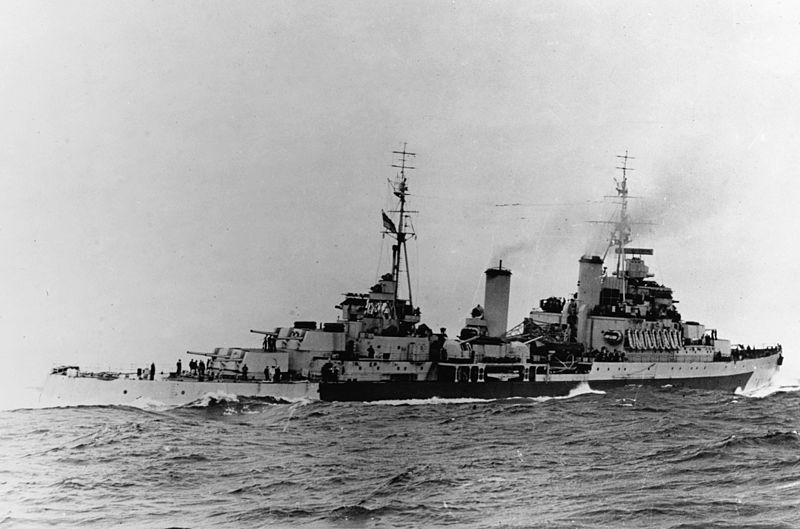
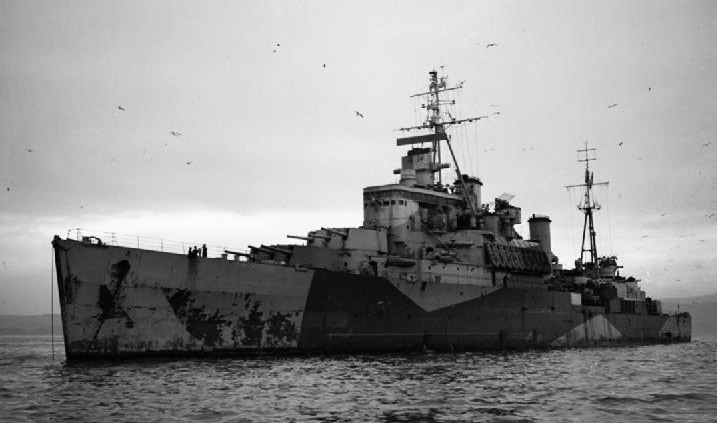
The Crown Colony class cruisers (1939) were designed as smaller “Town” class according to the second London treaty of 1936, shortened, narrower and with a transom stern to gain weight. They were built in two groups, the Fiji and Ceylon sub-group (last completed in July 1943). With the same armament, but slightly slower, they were less popular than the Town class and proved not upgradable on the long run. However some saw quite a distinguished service, like HMS Jamaica, driving off Admiral Hipper and Lützow in 1942 and participating in the sinking of the battleship Scharnhorst in 1943. Fiji was lost during the Battle of Crete, and Trinidad in the Barents sea. The others saw cold war service under various flags, until 1986 for the last one.
Genesis of the ‘Crown Colony’ class
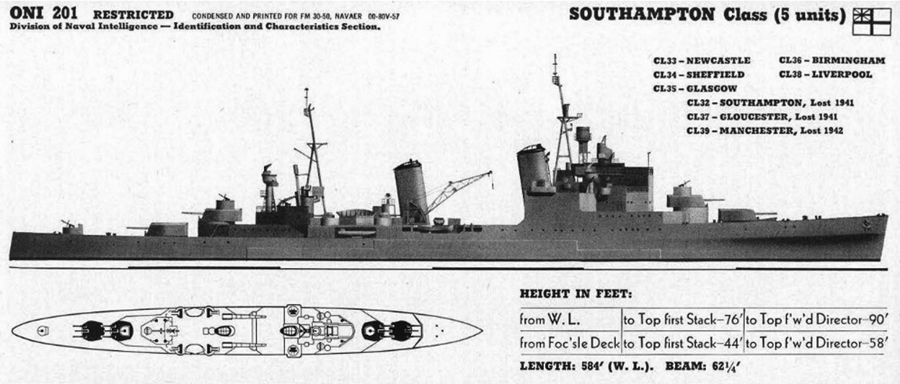
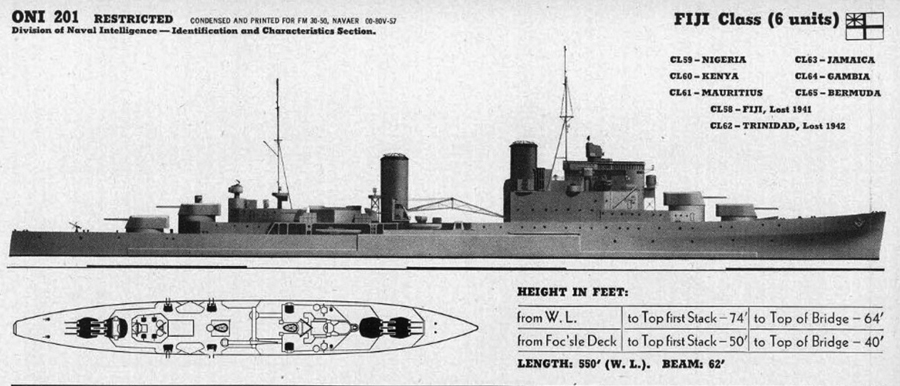
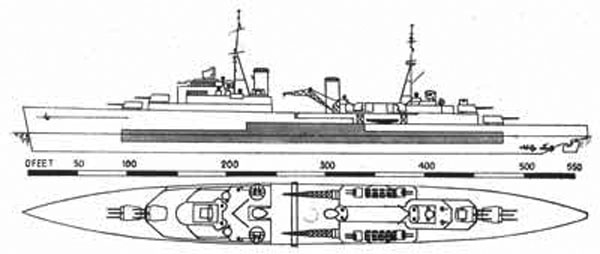
ONI plates, comparison between the Town and Colony class
The Fiji class were designed within the frame of the limitations enforced by the 1936 Second London Naval Treaty which imposed to all signatories limitations on cruisers. Notably the treaty limited max tonnage (standard) reachable for a light cruiser, which was initially defined by the 1922 Washington treaty as large as 10,000 tons, and have it curtailed to 8,000 tons displacement. Heavy cruisers were no longer allowed at this point. Externally however, their design was largely inspired by the last one, the 1936 Town-class cruisers.
But like the Minotaur class following in 1942, they accomodated the same armament, but on a 1,000-ton less displacement. They were criticized as being very tight designs built in war emergency conditions so that the limited updating that can be done postwar curtailed their service life, notably a 62-foot beam only, critical for displacement.
To accelerate design studies, the admiralty wanted essentially a shorter Gloucester class (Town subgroup) vessel, but shorter and lighter. This considerably accelerated development as soon as the class was authorized in 1938, leaving little time to improve massively on the design. Rather, engineers search how to keep the military value of the design intact while loosing a massive 2,000 tonnes. It appeared soon indeed that the sacrifice of a single turret was not acceptable, so everything was bet on a shorter hull and revised accomodations.
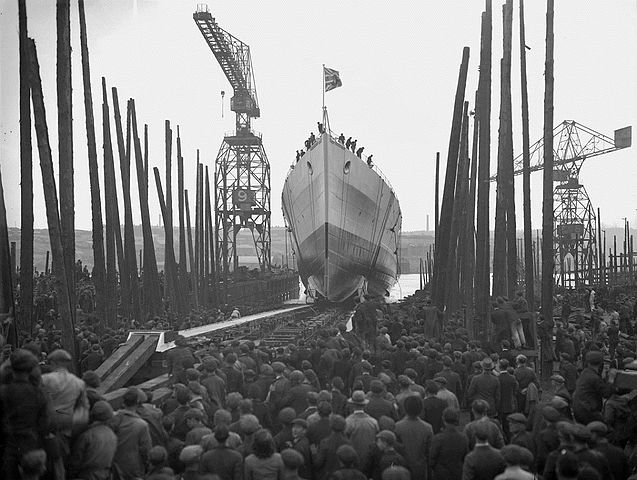
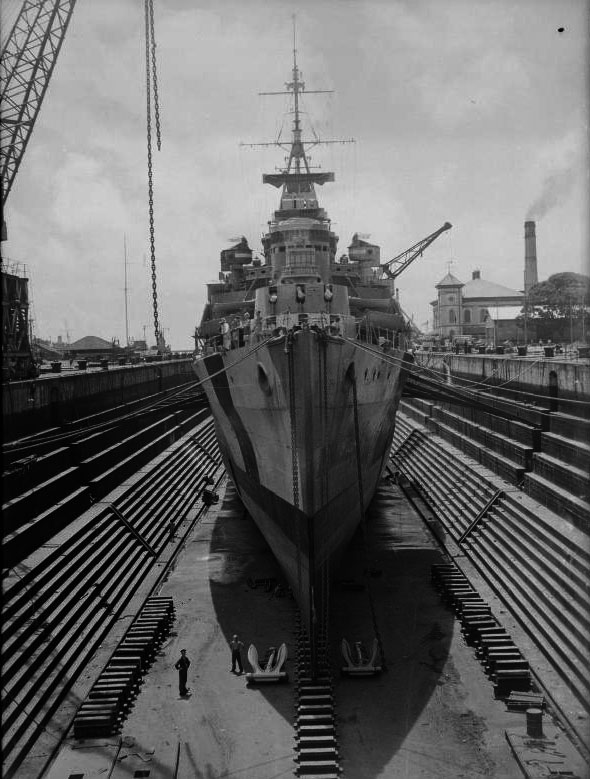
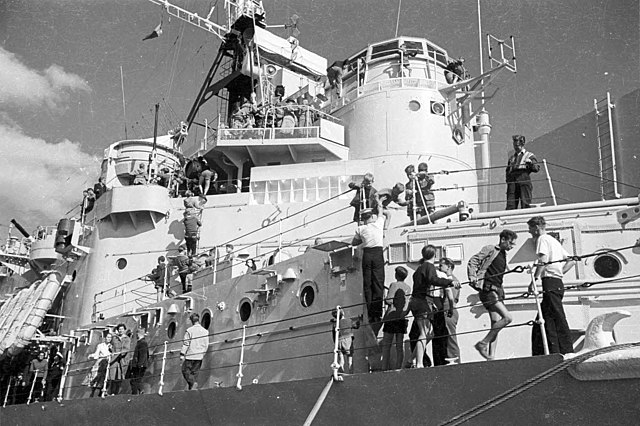
Launch of HMS Uganda
One of these solutions was to adopt a transom stern. This solution was already tested, and allowed interesting hydrodynamic properties while saving displacement. It was disastrous on the old minelayer cruiser HMS Adventure, but worked well on the recent French cruisers of the La Galissonnière class. The other “solution” was to adopt straight funnels, instead of raked. It seems a detail, but it simplified production and offered the same air draft for a lesser weight. Masts were also made straight. It was proven that at the speeds these ships adopted, generally below 30 knots, wind resistance did not made such difference.
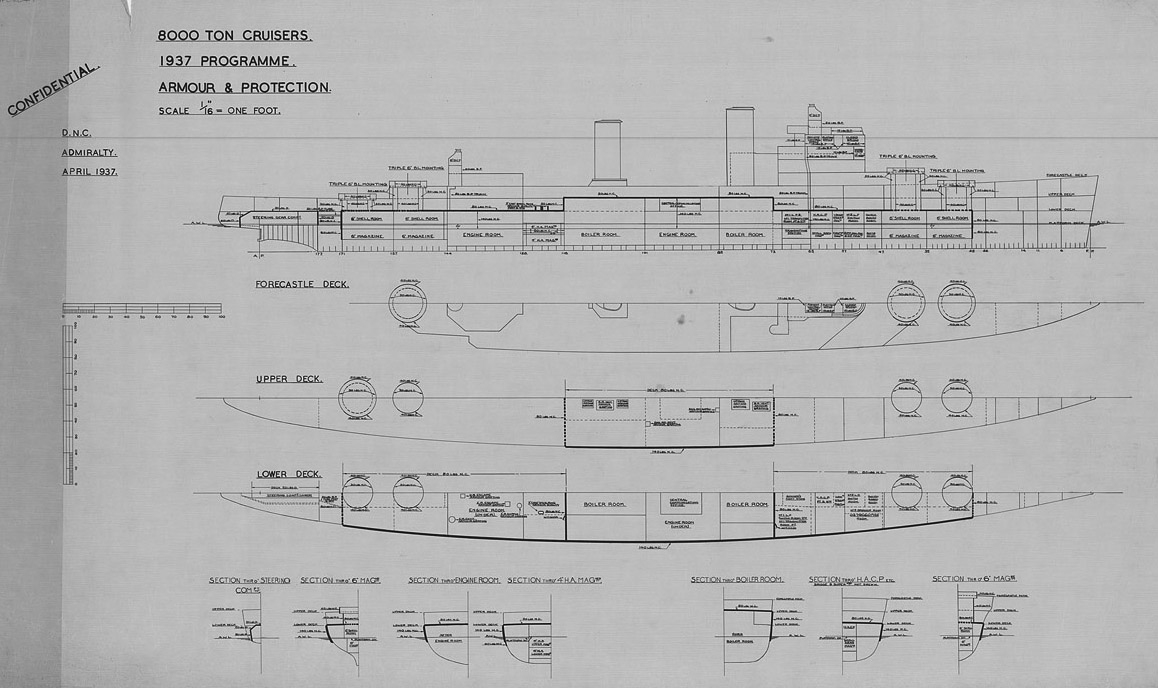
Another solution found by engineers was to revise the armour scheme, which was shorter and lighter due to the shorter hull and closer barbettes, but it was now better distributed, increased on specific locations, like the main ammunition spaces, while decreased for belt, down to 3.5 and 3.25 in in the machinery spaces.
Yet another solution was found with the armament: The 6-inch Mk XXIII gun turrets were the same, as the ammunition spaces, identical to the Edinburgh group, but the aft turrets was lower (the barbettes that is). However the Fiji were caracterized by their new “long turret version”, 25 tons heavier than the Group 1 & 2 Town class 150 tons model. It was also further cramped. Ammunition supply for the secondaries (4-inch) was improved and there was no complicated conveyor system, gaining space and weight. However as a result of all this, the Fiji class left little space for improvement and were not especially liked by the crew, being cramped.
Design of the Fiji class
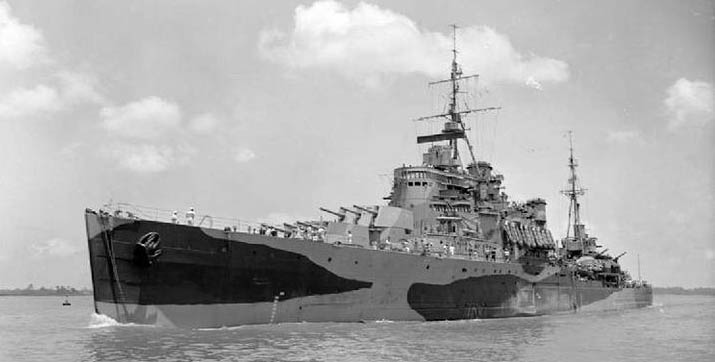
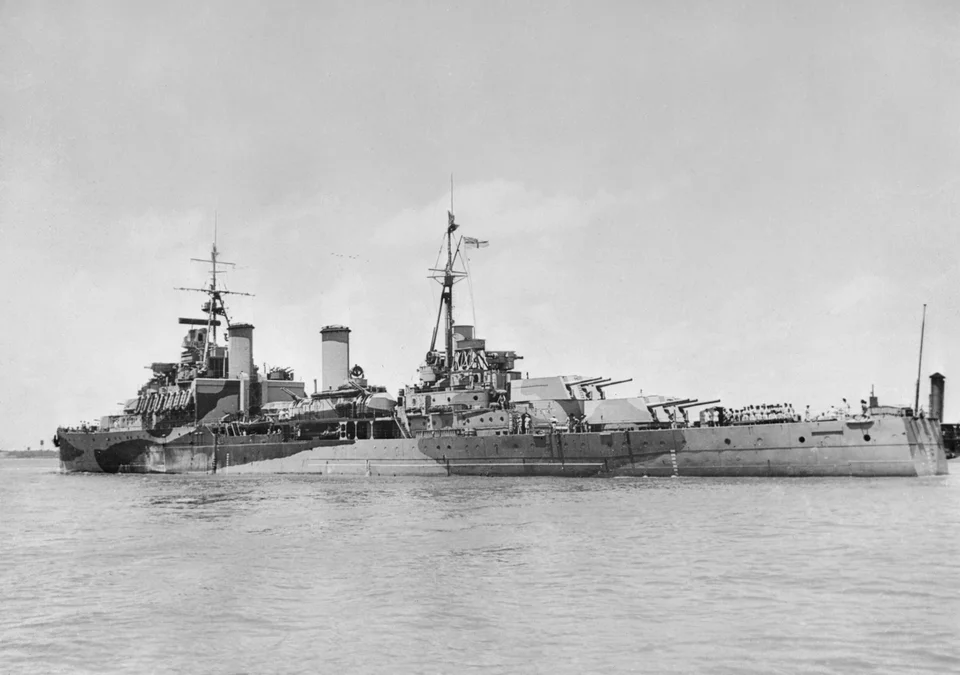
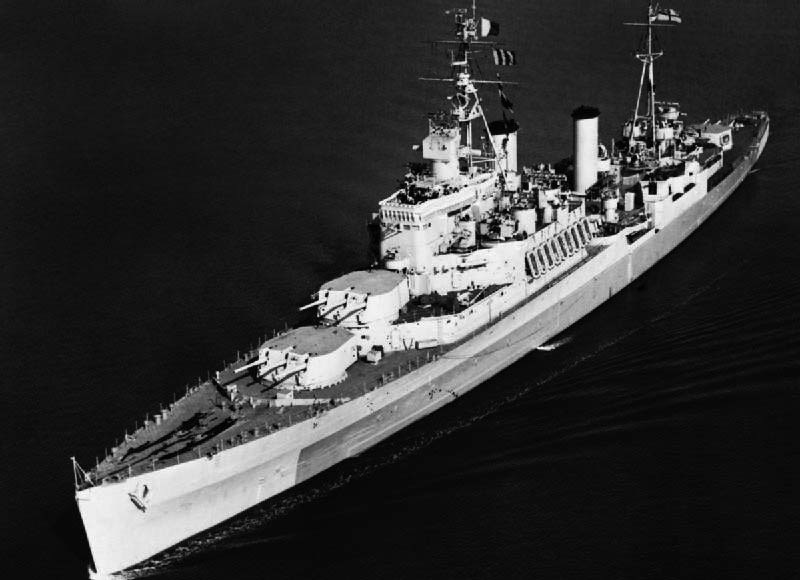
The Fiji’s class hull was shortered and fitted with a transom stern as said above and so measured only 555 ft 6 in (169.32 m) long overall or 38 ft (164 m) between perpendicular (versus 591 ft/180 m or even 613 on the Edinburgh), considerably reducing their oveall displacement: 8,530 long tons (8,670 t) standard and 10,450 long tons (10,620 t) fully loaded (versus 11,540/11,930/13,175 tons standard on the Town class). The beam was reduced at 62 ft (19 m) versus 64 ft 10.8 in (19.8 m) on the Gloucester sub-class (but it was the same as th early Soutahmpton class). The draught however was much lesser at 16 ft 6 in (5.03 m) compared to 20 ft (6.10 m) to 22 ft 7.2 in (6.89 m) on the Edinburgh class.
The silhouette recalled the previous Town as well, engineers indeed retook all the specifics of the previous ships, notably a large island bridge forward, but it was narrower at the deck level in order to allow circulating around, not the case of the Southampton class, which reached the whole beam. This also save weight, but made the superstructure more cramped. Other wise the general design was very imilar. The large superstructure, divided by the forefunnel, housed hangars for two seaplanes (generally Walrus type), with the transverse catapult aft, served by two cranes installed amidships, abaft the aft funnel. The next section was devoted to AA armament, secondary 4-in guns and light AA, followed by the quarterdeck with the aft tripod mainmast and a small bridge supporting the aft fire control tower.
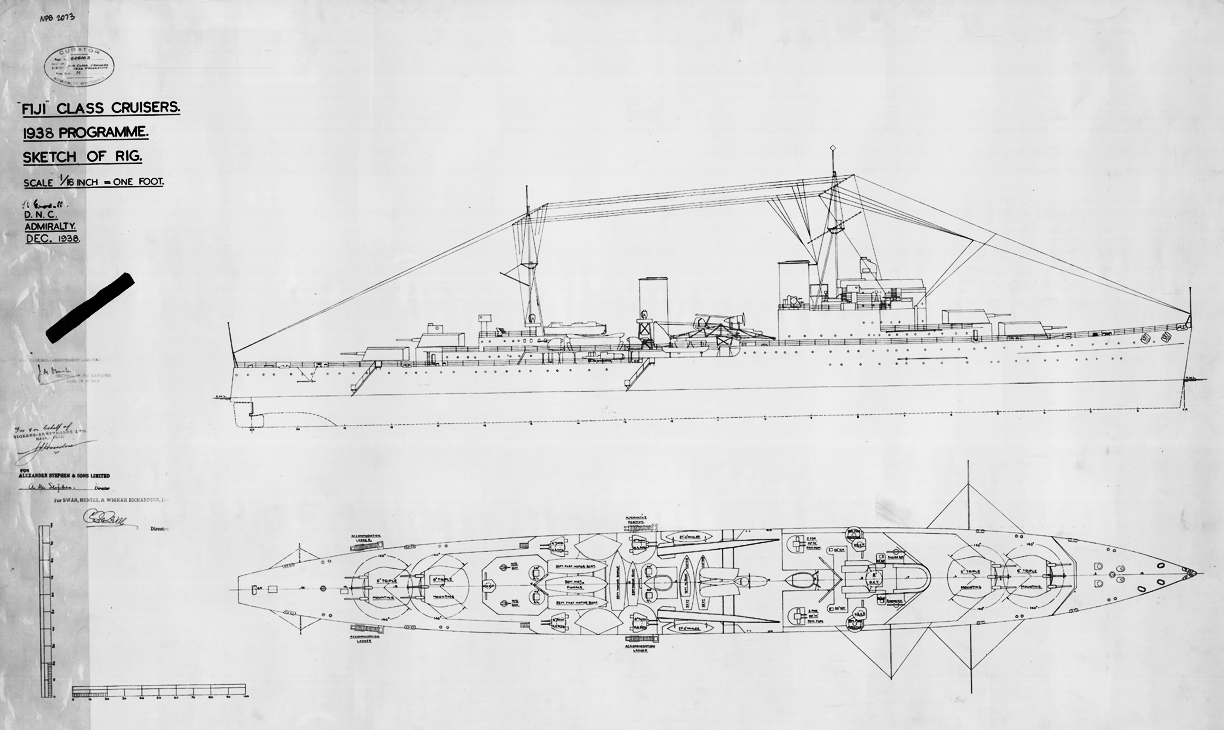
Elevation plan and general overvoew, cutout interrior sections in the original 1937-38 blueprints.
Protection
Seeing both classes together made appear obvious a difference, as the armour is much shorter on the Fiji class. It was composed of the proper waterline belt armor, which was lower compared to the Town class, and extended all the way between “A” and “Y” barbettes. Above it was a second upper belt extending between the foremast level to the aft funnel. The Armoured belt between “A” to “Y” barbettes was connected to the upper deck, abreast the boiler rooms and fore engine room, to the main deck abreast the aft engine room, command center and ammo magazines. It was 3.5 inches (89 mm) abreast the magazines and 3.2 in (83 mm) abreast machinery. This main armored belt was closed by a 2 inches (51 mm) bulkhead forward, and a 1.5 inches (38 mm) bulkhead aft. The armoured deck was 2 inches (51 mm) thick on the vertical surfaces, but with 1.25 inches (32 mm) to 1.5 inches (38 mm) slopes over the steering gear. The transom stern was protected by a 1.5 inches (38 mm) plating. To save weight there was no conning tower, a conclusion also reached by the USN.
- Belt: 3.25 – 3.5 in (82-89 mm)
- Main armoured deck: 2 in (51 mm)
- Turrets: 2 in face and side, 1 in roof and back (25 mm)
- Bulkheads: 2 in fwd, 1.5 in aft (38 mm)
Powerplant
Essentially the same plant as in the “Town” class, but slightly less powerful, the Colony class were propelled by four shafts, driven by four 4 geared steam turbines, fed by four Admiralty 3-drum boilers, for a total output of 72,500 shp (54,100 kW). This was 82,500 shp (61,500 kW) on the Gloucester/Edinburgh classes, and even less than the Southampton class. As a result, despite a lighter dispacement, they reached just a top speed of 31.5 knots (58.3 km/h; 36.2 mph) – versus 32.25 again on the Gloucester/Edinburgh and it was one knot less than the Southamptons. However choice was made to increase their range, which reached 10,100 nmi (18,700 km; 11,600 mi) at 12 knots (22 km/h; 14 mph), versus 5,300 at 13 knots on the previous class, almost double. An enormous advantage for long range overseas stations as intended.
Armament
Main: 4×3 6-in/50 Mk23
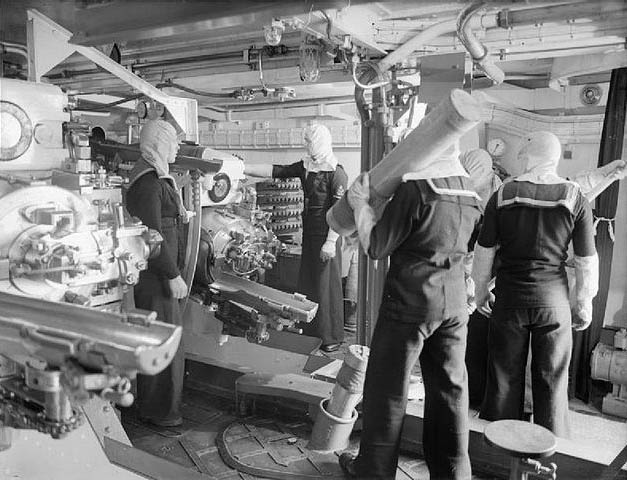
HMS Jamaica, 6-in gunners inside the turret
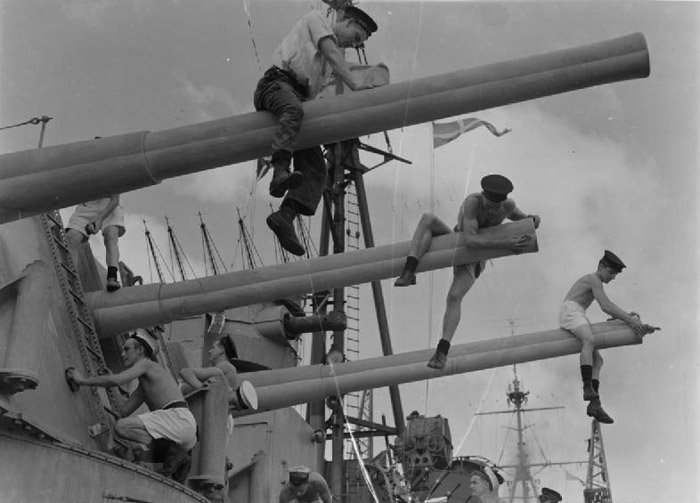
The famous BL 6-inch Mk XXIII naval gun had been very successful piece dof ordnance that saw plently of service before, during, and after WW2 on many classes. They were introduce don the Leander class and also daopted by the Arethusa, Town, Fiji and Minotaur class. These were 300 in long (7.6 m) barrel only, weighting 7 tons, and firing a 112 Ibs (51 kgs) shell at 2760 fps and maximal range of 25,480 yards (23,300 m) but with relatively poor accuracy. At 24,500 yd (22.4 km), 41° elevation (maximal 45) the shell flew in 71 sec to target at a 56° 27′ descent curb, with an impact velocity of 1,159 ft/s (353 m/s).
It had a 4.5-metre jacket with a hand-operated Welin breech block, loading with Cloth bags of cordite. Barrel life was around 1100 rds. Loading was done up to +12.5 degrees and in theory it was possible to fire at 60° on the Mark XXI turret. The Mk XXIII used the “long trunk” ammunition hoist system, and a good gunnery crew, in the new Fiji turret could easly deliver 5 rpm.
It should be noted that all three last ships were ommitted their “X” superfiring turret with extra AA and other Colony clas underwent this removal as well during the war.
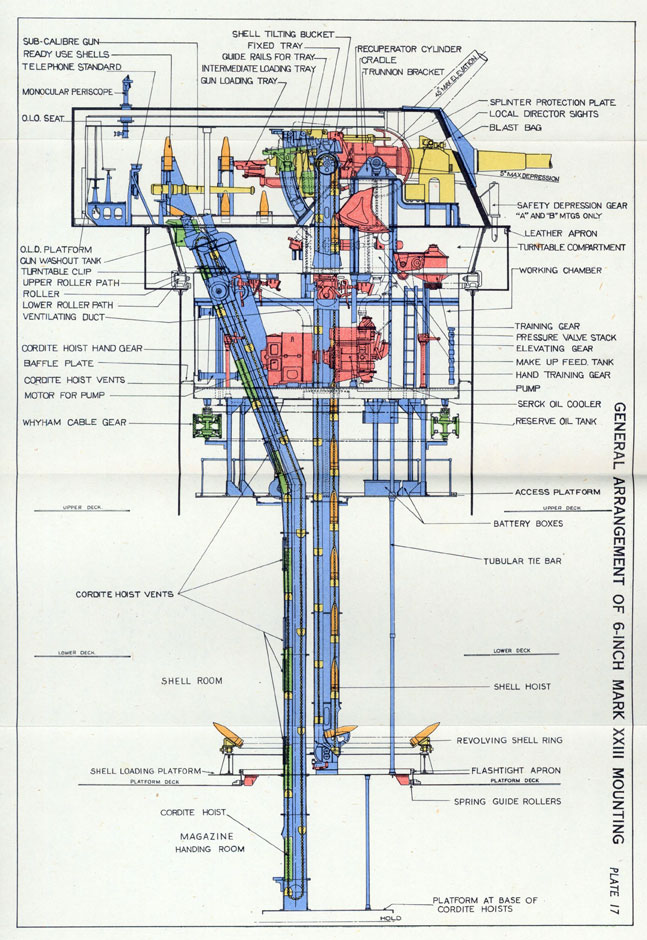
BL 6-in Mark XXIII cutaway and elevation diagram
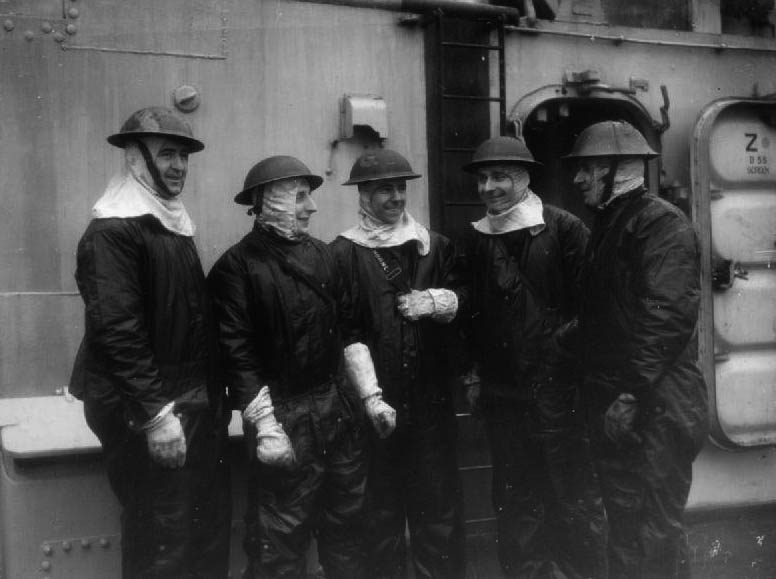
The crew of HMS Mauritius cleaning the guns and turrets.
Secondary: 4×2 4-in/45 QF Mk16 HA
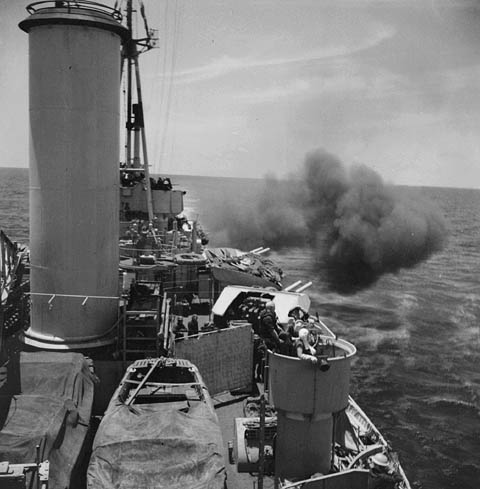
HMS Uganda, 6-in and 4-in firing
Another great “classic” from 1936 widely used in the Royal Navy and staple of the light dual purpose battery found on cruisers of that era. They came in two twin turrets placed amidships on either side of the cruisers, close to the aft mainmast. The 4-in (101.6 mm) had the following caracteristics:
- Barrel & breech 4,495 lb (2,039 kg), 180 inches (4,572 mm) (45 cal) long
- Shell: Fixed QF 35 pounds (15.88 kg) HE 38.25 pounds (17.35 kg) S.A.P.
- Breech: vertical sliding-block hydro-pneumatic recoil 83 cm (33 in)
- Elevation dependent -10° +80° on H.A. (mark XIX mount)
- Traverse 360° mounting dependent
- Rate of fire: 15–20 rounds per minute
- Muzzle velocity: 2,660 feet per second (811 m/s)
- Maximum range: 19,850 yards (18,150 m) at 45°
- AA Ceiling: 39,000 feet (11,890 m) at 80°
AA armament:
![]()
–4×8 2-pdr pompom: Another typical ordnance choice, the “compact”, quadruple barrel Vickers 2-pounders (40 mm) on Mark VII mount was less performing than the Bofors, but not manually loaded with clips but rather a short steel-link belt, ensuring a longer burst.
- It could reach a rate of fire of 115 rpm at 700-732 m/s (2,300 – 2,400 fps)
- Effective firing range, ceiling: 3,960 m (13,300 ft)
- Maximum surface range: 6,220 m (6,800 yd)/701 m/s (2,300 ft/s)
–2×4 0.5 in HMG: This classic quad-tandem heavy machine gun mount (photo) was standard on cruisers and even capital ships in the late 1930s. Two were present on the early batch of four cruisers, then eliminated in 1942-43 for 20 mm Oerlikon AA guns. Belt-fed, they were capable of 500–600 rpm at 2,540 feet per second (770 m/s) muzzle velocity, and reach a target at 9,500 feet (2,900 m) of ceiling or a reach of 4,265 yards (3,900 m) in maximal elevation.
Torpedo armament:
HMS Jamaica, torpedo crew smiling. They finished off KMS Schanhorst at the battle of the North Cape.
The Colony class had two triple banks with 21″ (53.3 cm) Mark IX* or IX** torpedoes located on the broadside, between the aft funnel and mainmast, on deck. They were often removed past 1944 to gain in stability and install better AA or extra equipments.
The Mark IX specs, first designed in 1928, entering service in 1930, widespread on cruisers from the Kent class (County class) and destroyers, the Mark IX* had the following caracteristics:
- Weight 3,732 lbs. (1,693 kg); lenght 23 ft 10.5 in (7.277 m)
- 750 lbs. (340 kg) TNT, and 805 lbs. (365 kg) Torpex 1944
- Settings Mark IX* 11,000 yards (10,050 m)/36 knots
or 14,000 yards (12,800 m)/30 knots
- powered by a Burner-cycle engine, 264 hp @ 41 knots
Depth Charges
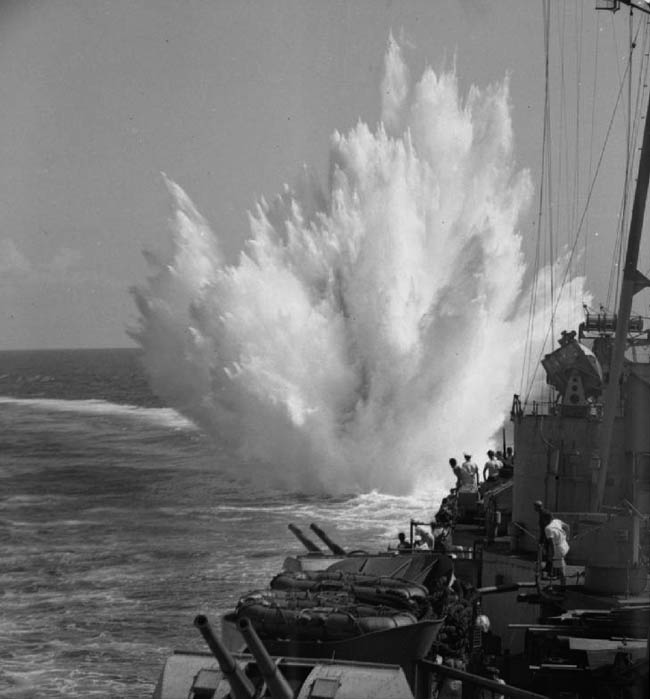
HMS Ceylon dropping depth charges
The cruisers were also provided depth charges, although projectors were preferred to racks; Indeed, the only default of the transom stern was to create a dangerous inwards wake turbulence that can “swallow” back the depth charge. So the rack was certainly more at an angle and with a “lip” at the end of the rack overhanging the stern for added speed, and distance when falling. They gradually had ASDIC installed from 1940, of the Type 132, as UHF-DF direction finders, and at the very end of the war in the Pacific even ‘S’ and radars that can act as jammers. When the cruisers had Asdic, the depht charge stowage was augmented to fifteen. It was six normally, in two stern racks, three in each. From February it was not uncommon to see in addition some depht charge throwers also installed and from late 1944, the Asdic was modernized to the type 149 when possible. All the class was fitted with the Type 132.
Variations in armament
HMS Ceylon in 1943
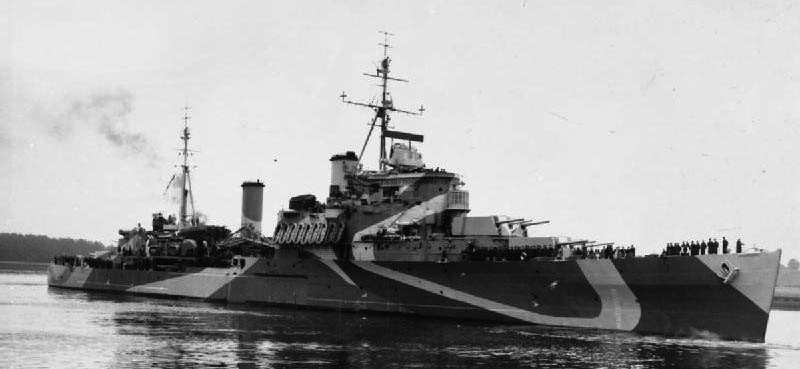
There were consiredable variations in equipments, from the same basic design over time as the class was built from 1938-39 but delivered from mid-1940 to mid-1943.
Fiji, Nigeria, Mauritius had the four triple 152mm/50 BL Mk XXIII found on any other vessels of the class, but Uganda, Newfoundland and Ceylon had three turrets when completed.
The secoondary DP armament always comprised four twin 4-in or 102mm/45 QF Mk XVI on all vessels of the class and sub-class. Only the firing control changed.
Its in AA that the greatest variety was found: Two quadruple 40mm/39 (2pdr) QF Mk VIII pompom was the standard until Uganda, where a third one replaced “X” turret.
Lastely, the torpedo armament: It was also constant, with two triple banks from the first to the last ship. It’s for the light AA there was the most changes: The early vessels, until HMS Jamaica had two quad 12.7mm/62 (0.5 in) Vickers AA heavy machine guns. In 1942 they were recoignised as completely obsolete and replace when posble with 20 mm AA guns or single Bofors.
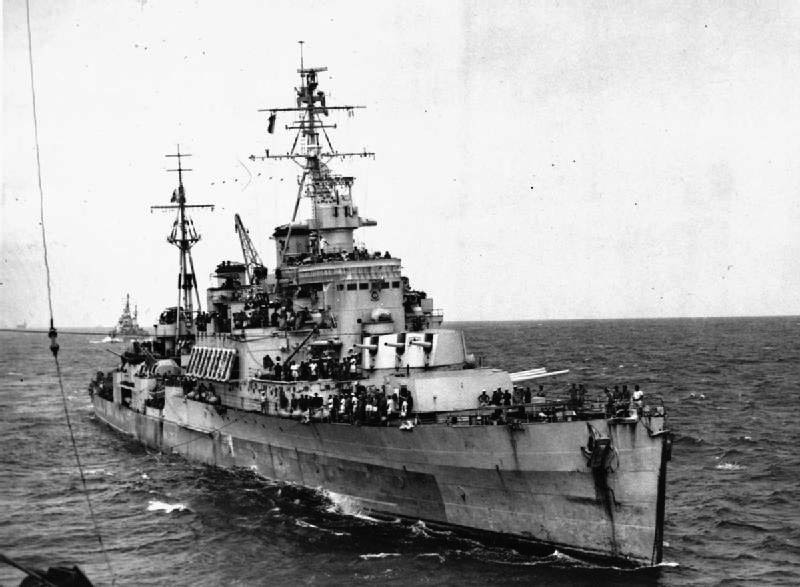
HMS Jamaica was the first with four single 20mm/70 Oerlikon Mk II/IV installed. Gambia had two single 40/39 2pdr QF Mk VIII, Bermuda ten 20mm/70 Oerlikon Mk II/IV, Uganda ten twin 20mm/70 Oerlikon Mk II/IV, Newfoundland eight twin 20mm/70 Oerlikon Mk II/IV as Ceylon, making HMS Uganda the most formidable in AA defense, with twelve 40 mm “Pompom” and twenty 20 mm AA. Imprssive in the Western theater, it was still weak to answer the Kamikaze threat in the far east in 1944-45. However due to the ship’s tight design there was little room for improvement.
Radars and Fire control systems
Fiji, Kenya, Nigeria, Mauritius were fitted with the “early suite”, the type 279 and type 281 radars.
From HMS Bermuda, with Gambia, Jamaica and Trinidad, a new suite was installed with the type 272, type 273, type 281, type 284, and type 285 radars
HMS Uganda was completed late and given a modified suite (type 272 and type 281, type 284 and type 285 radars) in which the type 273 was discarded.
HMS Ceylon and Newfoundland among the last completed added the type 283 radar to this mix. Of course all these were discarded in cold-war refits, when new sturdier lattice masts were installed for much heavier and more capable first warning aerial radars. Better fire control systems were also installed for the main artillery and DP as well. The 40 mm Bofors became standard and had their own fire control. Only the 20 mm Oerlikon still relied on the always reliable “Eyeball Mark I”. They were removed during the cold war as obsolete.
Onboard Aviation
Supermarine Walrus Mk.I general overview. This was the most common model.
2 aircraft were carried due to the only two hangar available at the time. On the single catapult D-IV-H it was still possible to disconnect and move the carrying chariot to the center and then strap an extra plane under a wide tarpaulin, but still, sea salt and crossing waves could have damage it. Almost half the cruisers served in the very harsh conditions of the northern route to the Arctic and ice was also a factor. There was not any practical reason to have a disabled plane that had to be pushed out to the sea for the benefit of one well protected inside the hangar. Most photos of the class underway always shows the catapult free, so we can assume only two planes were always carried in hangars and only exited it for a launching. No plae was ever installed on HMS Fiji or Kenya, and removed altogether in 1944. This freed the space of both hangars.
The general consensus about the models carried, according to data and photos were the Walrus, Swordfish, and Seafox. On HMS Newfoundland, there were still two aircraft but they varied wildly, including in addition to the above, the Kingfisher, Sea Otter and Seamew (under lend-lease).
Fairey Seafox: Although the reference can be found on navypedia, photos don’t show it. The Seafox was introduced in 1937 as the very last classic observation biplane of the RN, succeeding the Fairey IIIF. It was probably planned at the design stage in 1938 as “fresh” but replaced as the shps were completed in 1940, retired to second line duties.

Fairey Swordfish: The main attraction of the floatplane version was its reliability, excellent observation posts, and capability to carry a torpedo. A combination of a Walrus for observation/artillery spotting and torpedo plane was quite potent, however there is no photo showing a catapulted Swordfish with a torpedo under the belly. Photo evidence of those onboard Colony class ships is also hard to come by.
Walrus prepared to the catapulted on board HMS Mauritius
Wartime armament & sensors modifications
Late modernizations (1944)
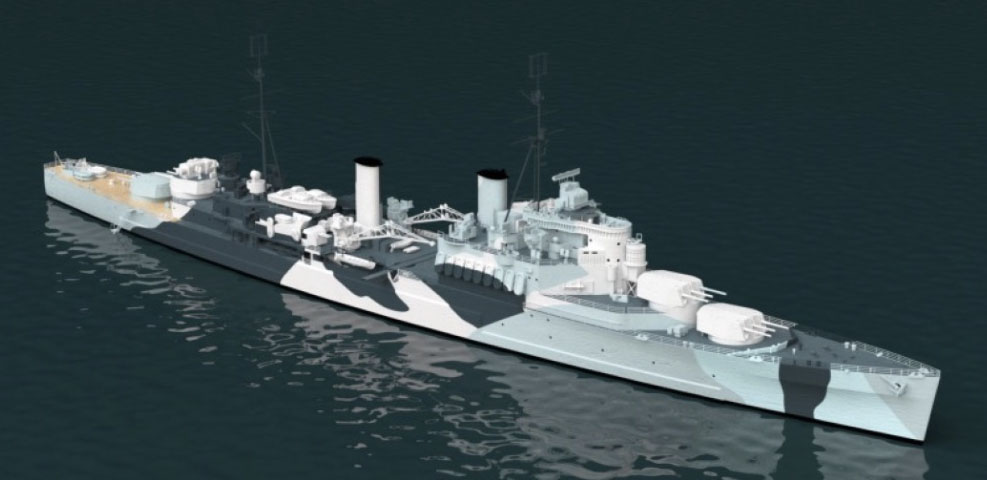
Late Colony class scheme
In december 1942 one of the most radical upgrade was for HMS Kenya, which received two single extra 20mm/70 AA plus six twin Mk II/IV and the type 279 and type 281 radars completed by the new type 281B, type 282, and type 285 radars. In 1943, modifications made on Mauritius, Nigeria, Gambia, Jamaica, Bermuda, Newfoundland, and Kenya consisted in adding mostly twin 20mm/70 Oerlikon Mk II/IV AA guns, ans in a unique case, single 40mm/56 Bofors Mk 1.2. Radars were also upgraded, The type 273, 283 and 281B radars being adopted.
In December 1944, HMS Uganda was the first to inaugurate a new radar suite, comprising the type 274, type 277, type 293 radars. By that time, all were equipped with a variable number of 20 mm AA guns but they kept in most case heir quad 40mm/39 2pdr QF Mk VIII pompom. Kenya was the first to be quipped, in April 1945, with twin Bofors 40mm/56 Mk VIII/IX. This was modified in August with three twin Mk VIII/IX, and eight single Bofors Mk III. it was realized at that stage, this was by far the most efficient short range AA avilable, and 20 mm guns were rarely added, or removed altogether.
The last example was HMS Newfoundland which in January 1946 had the same main and secondary artillery but two quad 40mm/60 Mk 2 Bofors and three quadruple Mk VII Bofors pls teh same wartime ten twin 20mm/70 Mk V and two single Mk III, plus their torpedo tubes.
Post-war modifcations:
From January 1946, HMS Bermuda had the new type 273 and 274, 277, but also the type 281B, and type 293 radars (plus the 285). Newfoundland was revised the ame way. Nigeria was the first to receive two of the new fire control Type 275 radars in 1954, battle tested in Korea. They were fitted on Newfoundland after the war in 1956 and on Ceylon, the last upgraded, two Type 262 radars were installed instead.
A good example of armament modernization was HMS Gambia which final light anti-aircraft armament in 1958 comprised nine twin 40 mm Bofors, in positions giving them wider angles of fire, plus NATO-supplied US Mk 63 and SPG-35 radar fire control systems, and for the 4 inch mounts they were replaced as on the remaining Baltimore-class cruisers, which 3-in were more accurate than the Mk.XIX twin 4-inch guns. All ships received twin Bofors, of a modernized Mk.5 type, more accurate and faster.
Old author’s illustration of HMS Gambia, 1942 North Atlantic
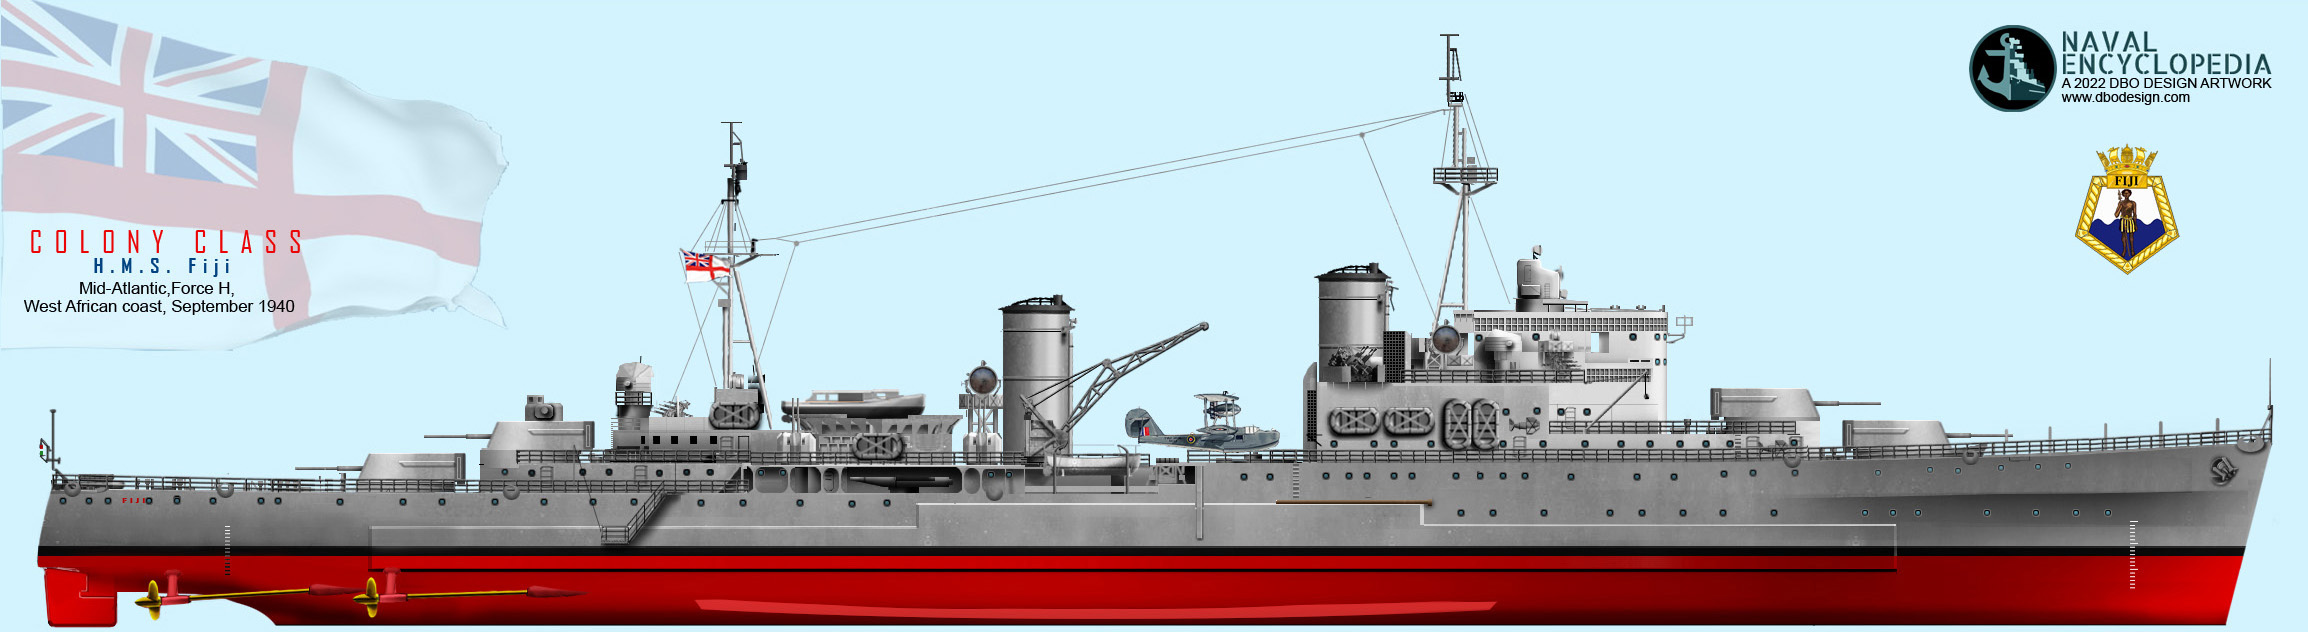
New HD illustration of HMS Fiji, Force H, mid-Atlantic, West African Coast, September 1940. More to come, and the full poster !
⚙ HMS Fiji 1940 specifications |
|
| Dimensions | 169,3 x 19 x 6 m (555 x 62 x 16 ft) |
| Displacement | 8,530 t. standard, 10,450-11,270 t. FL |
| Crew | 730 peacetime, 920 wartime |
| Propulsion | 4 shafts turbines Parsons, 4 Admiralty 3-drum boilers, 72 500 cv. |
| Speed | 31.5 knots (58.3 km/h; 36.2 mph) |
| Range | 10,100 nautical miles (18,700 km; 11,600 mi) at 12 knots |
| Armament | 4×3 6-in (152 mm), 4×2 4-in (102 mm), 2×4 40 mm AA, 2×3 533 mm TT, 2 seaplanes. |
| Armor | Belt 83, turrets 51, Bkhds 51 mm (3-1/4, 2, 2 in). |
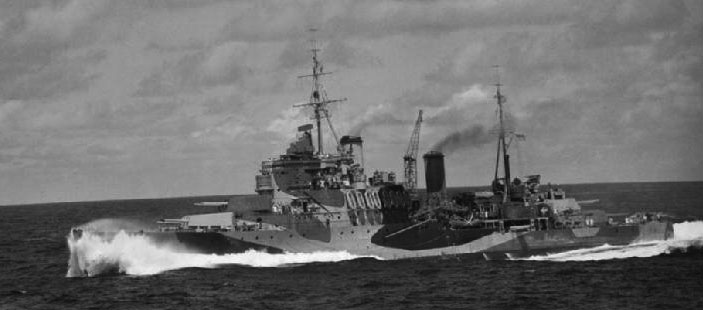
HMS Mauritius underway
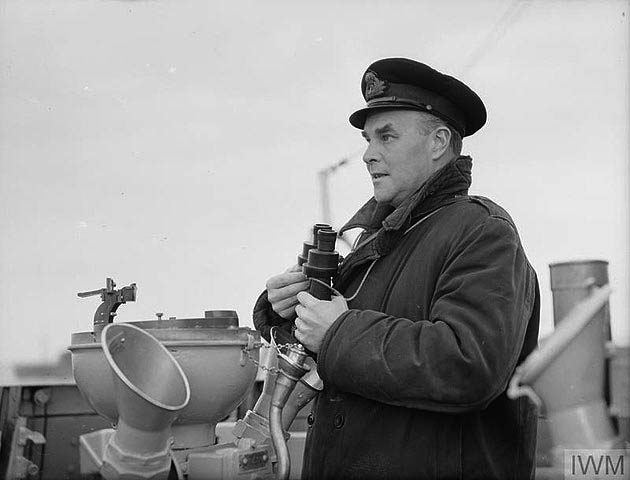
Captain GTS Stevens, RVZN 12 May 1942
Kenya in the arctic circle – IWM
Mauritius in drydock
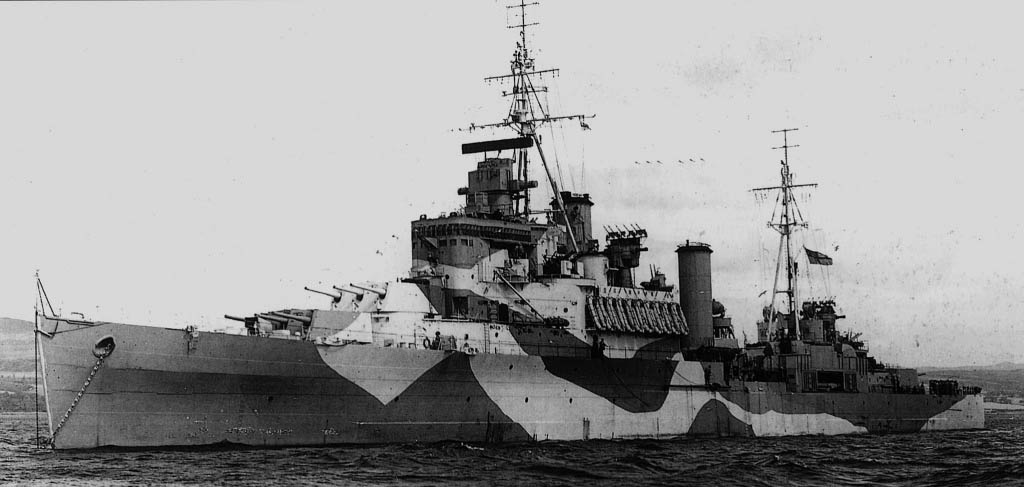
Gambia underway
Bermuda, side viw underway
Trinidad on the point of refuelling at sea
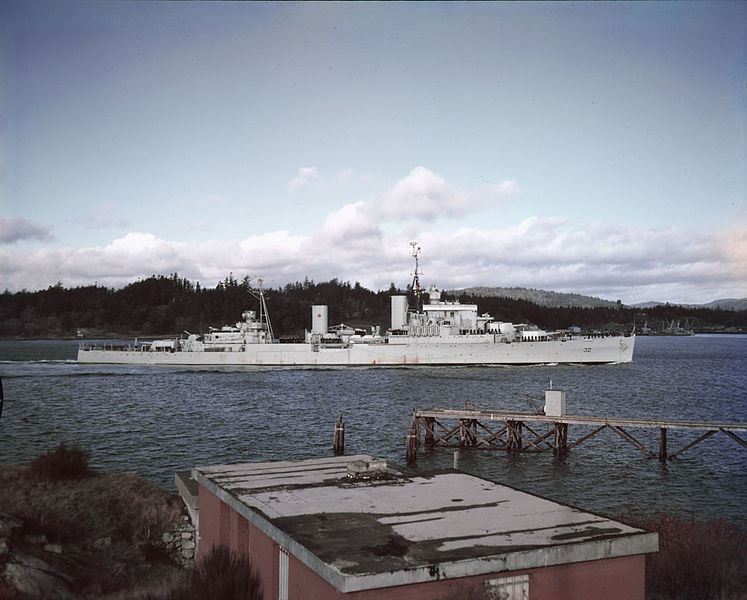
HCMS Uganda at sea 1945
_tsingtao_22-27_September_1945.jpg)
USS Stevens and HMS Bermuda in Tsing Tao, China, 22 September 1945.
Links/sources
Books
J. Gardiner Conway’s all the world’s fighting ships 1921-1947.
Brown, D. K. & Moore, George (2003). Rebuilding the Royal Navy: Warship Design Since 1945.
Colledge, J. J.; Wardlow, Ben & Bush, Steve (2020). Ships of the Royal Navy: The Complete Record, Seaforth Publishing.
Crabb, Brian James (2014). Operation Pedestal. The Story of Convoy WS21S in August 1942.
Friedman, Norman (2010). British Cruisers: Two World Wars and After. Seaforth Publishing
Murfin, David (2010). “AA to AA: The Fijis Turn Full Circle”. In Jordan, John (ed.). Warship 2010.
Raven, Alan & Roberts, John (1980). British Cruisers of World War Two. Annapolis
Rohwer, Jürgen (2005). Chronology of the War at Sea 1939–1945: The Naval History of World War Two
Whitley, M. J. (1995). Cruisers of World War Two: An International Encyclopedia.
Links
About the AA seven turret version of the Colony class
silverhawkauthor.com: HMCS Uganda, Quebec and Ontario
Bermuda on hmsgangestoterror.org
Photo coll. on culturepics.org
on gb-navy-ww2.narod.ru
Colony clas torpedoes on navweaps.com
on world-war.co.uk
hmsgambia.org
On wikipedia
On laststandonzombieisland.com
Full logs of HMS Fiji on uboat.net
Same for Jamaica
Same for Nigeria
Video: Drawhinfels about the Crown Colony class
Video: Crown Colony Class Cruisers, Dr Alex Clarke
The model corner
L’arsenal maquettes, Jamaica 1/700
Compared to the Town class, the Colony received little attention from model makers. HMS Jamaica however proved a more popular subject. HMS Kenya was covered also by White Ensign model at 1/350. With a little bit of work this enables any ship of the class at both scales which is better than nothing.
“Colony class” query on scalemates search engine
On fleetscale, hull and accessories, 1/128 scale
An RC model of Gambia
Jamaica 1/350 scratch
Rare French kit from l’arsenal, 1/700 HMS Jamaica 1942
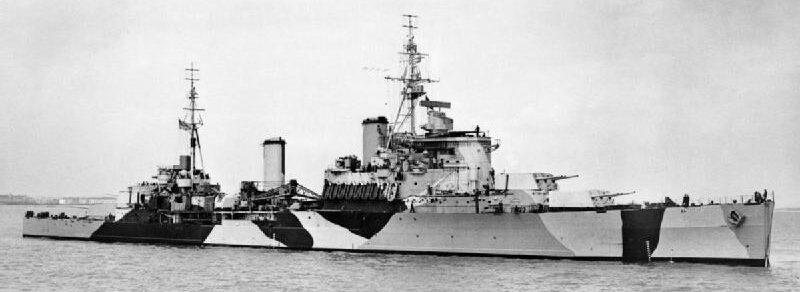
 HMS Fiji (May 1940)
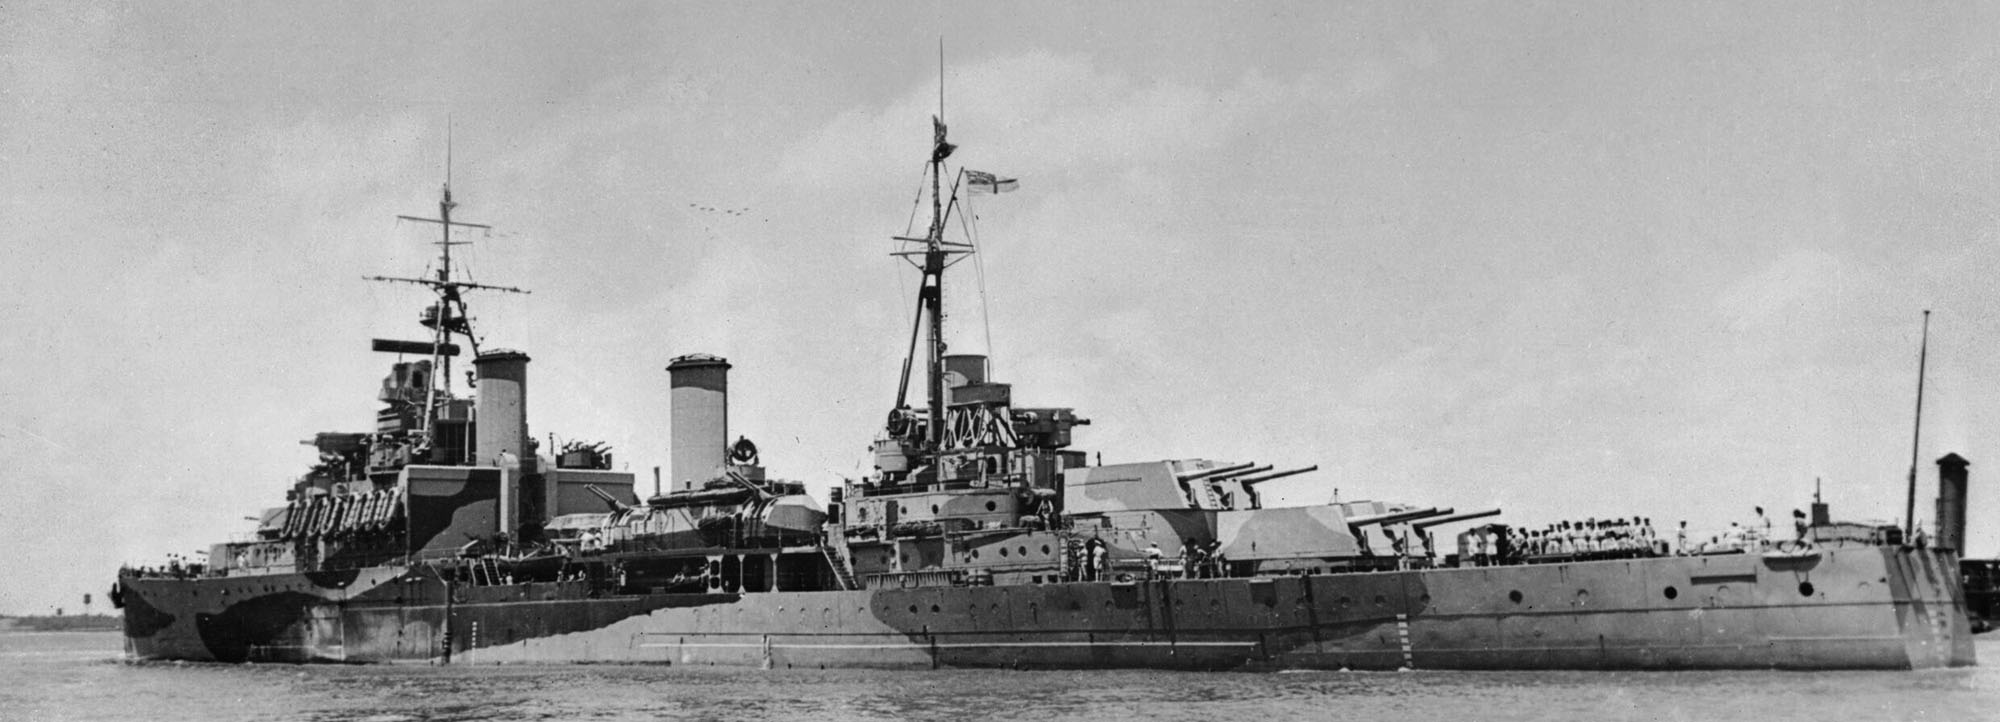
HMS Fiji, 28 August 1940
Early Service
HMS Fiji, laid down by John Brown (Clydebank) on 30 March 1938, launched on 31 May 1939, was completed on 5 May 1940 as the lead ship of the class. On 31 August she was called for the African Atlantic coast, in Operation Menace, the attack on Vichy-French held port of Dakar, but as she was underway to join the fleet, she was ambushed and torpedoed by U-32, on 1st September. Her repairs in UK lasted for six months. Her forward boiler room and forward funnel were destroyed, and an adjacent compartment flooded. She limped back at 11 knots, listing to port and this obliged the salvage tem to throw overboard all the ammunition from the forward turrets and portside torpedoes to regain some balance. Her repairs at last were useful in that she was fitted with the brand new Type 284 gunnery radar and two more quadruple Vickers 0.50-inch AA.
Back in action by March 1941, she patrolled the Denmark Strait, looking for German commerce raiders trying to sneak into the north sea. She however missed the heavy cruiser Admiral Scheer on 26–27 March just caoming back from a mission. In early April 1941 she was sent to join Force H, Gibraltar. Her mission however was to block German heavy ships stationed at Brest. She also support convoys to Malta in late April. On 5 May, Force H escorted anther large convoy, this time to Alexandria, Operation Tiger. Force H departed mid-way leaving the Eastern Mediterranean Fleet took over but Fiji only resplenished and departed Girbraltar soon afterwards for home.
Battle of Crete
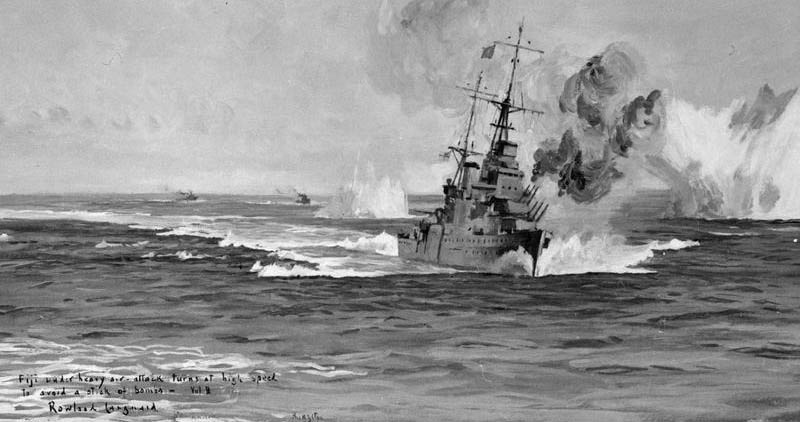
December 1942, panting of Lt. Cdr R. Langmaid, HMS Fiji under attack
British intel knew about an airbone or combined assault on Crete, on 17 May, and so nitified Admiral Andrew Cunningham to have all his ships ready for action of the 15th. Force B was created with HMS Fiji as flagship and Gloucester. They were given the west sector of Crete. Paratroopers arrived from 20 May and Force B was underway to join Warspite and Valiant the following morning but soon were caught in a massive Luftwaffe attack.
The first wave however had little effect but having the AA crew well trained. Cunningham then ordered his cruisers to disperse and join any troop convoys in the Aegean they could. Force B was attacked however again on 22 May and if Fiji escaped unscathed, near misses were close enough to knock out her aft AA director. Gloucester was also badly shaken. They later Force A1 (Rear Admiral H B Rawlings) and Force D (Rear Admiral Irvine Glennie) with Ajax, Orion and Dido, later ordered to report on their levels of remaining anti-aircraft ammunition, which appeared low. Fiji had only 30% and Gloucester 18%. Forced B-D were ordered back to Alexandria but Gloucester and Fiji (Force A1) remained behind.
At 12:25 while 20-30 miles west of Antikythera (later the site of the discovery of the first computer), they received a request from Rear Admiral Edward Leigh Stuart King to assist the damaged HMS Naiad and Force C. They arrived there around 14:00 and the most senior Admiral King took command. Fiji and Gloucester were detached to provide AA support alongside the destroyers Kandahar and Kingston. The latter departed to assist Greyhound, sunk at 13:50. Known where his cruisers were, Cunningham wonder why King was unaware of Fiji and Gloucester being almost devoid of AA ammunition. At 14:13 messages were exchanged and King eventually recalled both cruisers around 14:57.
The Luftwaffe attacked for several hours and around 15:30, Fiji exhausted all its 4-in ammunition, with only her firing practice rounds left. She tried to protect Gloucester at 15:50 when they were soon framed by many near-misses and four struck Gloucester. Fiji dropped life rafts to assist her but was soon forced to depart with the two remaining destroyers as the “sky was black with planes”. At 19:00 a Me Bf 109 fighter dropped a bomb which hit the cruiser amidships, flooding her forward boiler and engine rooms, and she took a severe list, but still maintained 18 knots.
Soon another Bf 109 hit her with another bomb, and she took more flooding, listing at some point to 30 degrees. Abandon ship was ordered at 19:30. The destroyers picked up most of the crew after dark and recovered almost all of them. Cunningham would later complain about the loss of the two ships to First Sea Lord, Sir Dudley Pound s a lack of communication led to these avoidable losses. From there, all British cruisers were instructed to communicate when their ammo level fall to 40%, prompting a retreat.
HMS Nigeria (September 1940)
HMS Nigeria
HMS Nigeria was of the first batvh ordered in December 1937. She was lad down at Vickers Armstrongs, Walker, Newcastle on 8 February 1938, launched 18 July 1939 and commissioned on 23 September 1940. After sea trials and a short shakedown cruise with interneive taining, her first assignation was with Home waters, and next, off the Scandinavian coast. On 28 June 1941, HMS Nigeria operated against German blockade runner. In company of the screening destroyers HMS Bedouin, Tartar and Jupiter, she intercepted the German weather ship Lauenburg thanks to her HF/DF (thick fog), north-east of Jan Mayen. This was an important event: The crew abandoned ship after the fist shots, so she was boarded, leading the party to find Valuable codebooks as well as parts of the Enigma machine. A complete one was captured later onboard German submarine U-110 (9 May 1941).
In July 1941, HMS Nigeria became the flagship of Force K (Rear Admiral Philip Vian) leading two expeditions to Spitsbergen, to ascertain the situation in September to land troops. She escorted the troopship, SS Empress of Australia, loaded with Canadian troops and demolition experts for Operation Gauntlet. They evacuated Norwegian and Soviet personnel, destroyed coalmines and fuel stocks. Neaby Bear Island was also assaulted leading to the demolition of the local German weather station. HMS Nigeria and Aurora intercepted soon after a German convoy, and she sank the German training ship KMS Bremse, suffering serious damage after striking a mine, at her bow. Therefore she was repaired in Newcastle.
A distant view of Nigeria stopped and on fire after being torpedoed
HMS Nigeria next was sent to the Mediterranean and on 12 August 1942 took part in the largest convoy to Malta to date (Operation Pedestal), as flagship of the close escort group (Admiral Harold Burrough). On her way she was ambushed by the Italian submarine Axum (Acciaio class), struck by a single torpedo. Damage was considerable (and she lost 52 men), there was flooding but she managed return to Gibraltar with three destroyers in escort. Admiral Burrough before that was transferred on HMS Ashanti to continue operations.
However there was only limited capacity in Gibraltar -as in UK- so she was repaired enough to head for the the United States. After several months in drydock, and a refresher cruiser, she operated off the South African coast to have the crew worked out for more operations in the frontline. On 12 March 1943 she picked up 30 survivors from the just sunken American merchant James B. Stephens (8 March 1943) by U-160 north-east of Durban, south africa. HMS Nigeria afterwards was sent to join the Eastern Fleet in February 1944. Her most notable action was the raid on Sumatra. She served as an escort until December 1945. Back home she was refitted and started her new cold war career as the first modern Indian cruiser, INS Mysore (C60), eventually scrapped in 1986.
HMS Mauritius (January 1941)
HMS Mauritius during the invasion of Anzio, March 1944
HMS Mauritius was built at Swan Hunter, Tyne and Wear, Laid down on 31 March 1938, Launched on 19 July 1939. She was completed on 4 January 1940 and soon was sent to the far east. She had an internal degaussing system due to the common threat of magnetic mines at the time. The latter was defective and to strong apparently as it induced severe corrosion to the ship’s fire main made of copper. She was even declared unfit for action and had to be repaired at Simonstown (South Africa), and Singapore, then Plymouth. The cruiser joined the Eastern Fleet in 1942 until April 1943, when she was sent to reinforce the Mediterranean Fleet. She underwent extra repairs after a grounding, so she was operational in June 1943. She participated in the landings in Sicily in July 1943 as part of Support Force East, and bombader objectives along the coast during the allied progression.
In September 1943, she was part of the covering force, for the Salerno landings. She also provided sometimes vital coastal bombardments to hold the line. In December, she was transferred to the Bay of Biscay for anti-blockade-runner patrols (Operation Stonewall), huntng down blockade runners escorted by U-Boats. She spotted and captured ot sunk none however. She was recalled back to the Mediterranean, to participate in Operation Shingle, the Anzio landings (January 1944). She stayed along the coast for on-demand shellings and in between patolled and escort convoys.
In June 1944, HMS Mautitius was sent back home and prepared to operate in the channel. She covered the landings in Normandy (D-Day) as part of Force D, assigned to Sword Beach. After the beachhead was secured, she carried out offensive patrols off Brittany, mopping up departing German shipping in the area, notably coming from Bordeaux and Nantes. With screening destroyers, she sank “Sperrbrecher 157” during the night of 14-15 August. She also took a central part in the little-known battle of Battle of Audierne Bay, sinking five Vorpostenboote (Militarized Trawlers), on 22/23 August. Back to Home Fleet, she covered the carrier raids along the Norwegian coast (notably missions to destroy Tirpitz). She also participated in many anti-shipping strikes in the area. She also took a central part in the 28 January 1945 (27/28 Januarynight and morning) with HMS Diadem, engaing a flotilla of German destroyers. Z31 was badly damaged in it. She was later refitted at Cammell-Laird between February 1945 and March 1946 and started a new cold war career.
HMS Kenya (August 1940)
HMS Kenya underway
HMS Kenya was built at Alexander Stephen and Sons, Glasgow, Scotland, launched 18 August 1939, commissioned on 27 September 1940. After some uneventful escort missions until May 1941, she was part of the massive hunt to try to catch KMS Bismarck in the Atlantic, as part of the 2nd Cruiser Squadron from Scapa Flow. On 3 June 1941, Kenya and Aurora spotted and sank the German tanker Belchen, caught up supplying German submarines in the Atlantic, and just moored with U-93 in the Davis Straits.
In September-October 1941, she participated in Operation Stonewall. The goal was to intercept U-boats escorting outbound blockade runners in the Bay of Biscay. She was in the Mediterranean, escorting a convoy to Malta Operation Halberd, 24 September-1 October. Next, Kenya and Sheffield intercepted the blockade runner Rio Grande bound for Japan, escorted by U-204. The transport escaped but later Kota Pinang was sunk (3 October), west of Cape Finisterre. She was attacked by the Luftwaffe on 27–28 March also.
Next, she was assigned to carry a commando raid against installations on Vågsøy Island off the Norwegian coast. Mountbatten had her repainted in pink as studies shown it was the best possible camouflage for this far north and under light conditions of the raid hour. For this was nicknamed “The Pink Lady”. Another version is that this color also blended in with the pink marker dye of the German shells, preventing spotters to see the splashes position. After the raid, she was back to Scapa Flow in early January 1942.
Soon after, she escorted Arctic convoys from March to May 1942. On 22 March (she was just finished escorting PQ12 to Murmansk), the cruiser was apparently loaded with 10 tonnes of Russian bullion bound for Britain, confirmed by recent research into declassified State Department records. This was a payment to the US for loans and war materials.
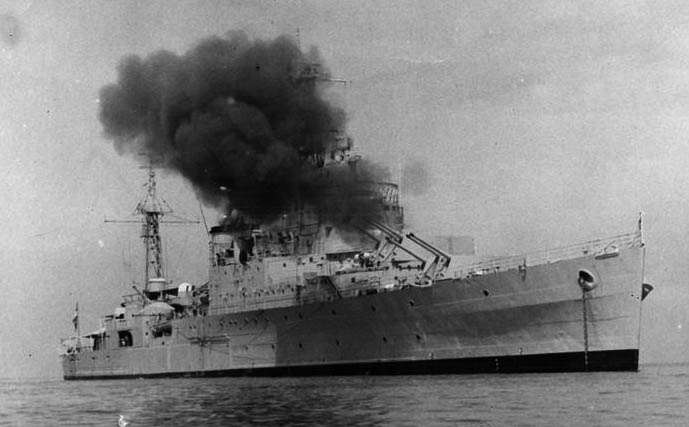
HMS Kenya under attack, 1942
HMS Kenya was back later in the Mediteranean, to participate in Operation Pedestal, in August 1942. She escorted 14 merchant ships to Malta, with the largest escort force ever assembled during the war on the British side, with no less than comprising 2 battleships, 4 aircraft carriers, 7 light cruisers and 26 destroyers. On 11-12 August, both the Luftwaffe and Regia Aeronautica launched ar raid, all fought off. It was a sucess, with just 1 merchant ship and 1 destroyer lost in action (and later HMS Eagle to an U-Boat on 11 August).
To deal with a certain route called “the narrow”, heavily mined between Sicily and Tunisia, battleships were not used for escort, nor aircraft carriers. However a lighter force of cruisers and destroyers was mustered called Force X, to escort new convoy to Malta, especially on the last leg of 300 kilometres (190 mi). As part of Force X was HMS Kenya, which repelled firce air attacks in the night of 12 August 1942 and the 13 as well. They were also ambushed by submarines and motor torpedo boats. At some point the Italian submarine Alagi (Bronzo class) successfully torpedoed Kenya. A torpedo hit blown off her bow entirely. The crew blocks all water entries in the forward bulkhead and she was reduced to 25 knots on her way.
Two cruisers and eight merchant ships were lost in total during this fateful action of 12/13 August. The transports Rochester Castle, Port Chalmers, Melbourne Star, Brisbane Star and the oil tanker Ohio reached Valletta harbor, while Kenya became de facto flagship of Force X. The force later left Valetta under cover a Malta’s fighter screen, and Kenya then led Force X back to Gibraltar, repelling more air attacks on her way.
Her repairs kept her out of action until the end of the war. She was to join the America and West Indies Station (8th Cruiser Squadron) in October 1946, but soon placed in the reserve for a modernisation in 1945–1946. She had now only the standard twin 40 mm AA mounts, updated surface radars, including long-range early-warning radar, new fire controls for the AA and replaced HMS London on the Far East station. She would be refitted again in 1949 and aprticipate in the Korean war, before being paid off in 1958 and scrapped in 1962.
HMS Trinidad (October 1941)
HMS Trinidad 1942
HMS Trinidad had a short and intense career showing once more how much the northern convoy route was an impossibly dangerous one. She was built at HM Dockyard, Devonport, laid down on 21 April 1938, launched 21 March 1941, commissioned on 14 October 1941. She escorted the Convoy PQ 13 in March 1942, seeing and intense surface action with German Narvik-class destroyers. She hit and damaged Z26, being at some point close enough to launch a torpedo attack. One was a dud, possibly because the icy waters. Trinidad’s own torpedo limped across the water at a slow speed, eventually crossing the path of HMS Trinidad as she was performing evasive zigzags. The blast killed 32 men. Later she was towed clear of the action, proceeding towards Murmansk. On her way she was spotted and torpedoed by U-378, although the latter was also spotted and attacked by HMS Fury. On arrival, HMS Trinidad entered the drydock for partial repairs, enough to steam home.
This was scheduled on 13 May 1942. She was escorted by the destroyers HMS Foresight, Forester, Somali and Matchless. The convoy escort was also acting as a distant covering force. She steamed at 20 knots (37 km/h) all the way, but soon the Germans spotted her and launched a massive air attack; About twenty or more Ju 88 bombers fell on her on 14 May 1942. Despite accurate dive bombing and her slow speed, all missed, except one. The heavy bomb struck near her previous damaged area, starting a massive fire. Not only the explosion killed Sixty-three (including 20 survivors from Edinburgh) but fire damage was soon out of control. After hours of firefight, the captain made the ultimate decision to evacuate and scuttle her. The following 15 May 1942, fully evacuated, she was torpedoed by HMS Matchless with eight torpedoes, sinking in the Arctic Ocean off North Cape.
HMS Jamaica (June 1942)
HMS Jamaica anchored, 18 Sept. 1943
HMS Jamaica was laid down on 28 April 1939 at Vickers-Armstrongs (Barrow-in-Furness), launched 16 November 1940, completed 29 June 1942. Her first mission was to provide distant cover for Convoy PQ 18, in September 1942. Next, she was assigned to Centre Task Force in order to take part in Operation Torch. During operations she was unsuccessfully torpedoed by the Vichy French submarine Fresnel. Next, as the beachheads were secured and the situation was resolved in North Africa, she was scheduled back to the Arctic convoys. However after the disastrous PQ 18, they had been suspended, but scheduled to resume on 15 December, with Convoy JW 51A.
HMS Jamaica and Sheffield were assigned to it, with several escorting destroyers as “Force R” (Rear-Admiral Robert Burnett). The convoy was not spotted and arrived without issue at the Kola Inlet on 25 December. From there, she sailed back home to resplenish and take orders. For most of her career she operated in the tedious but dangerous work of northern convoy escorts, confronted with the best the Kriegsmarine surface force had to offer. Her late service in the far east was short and uneventful, but she had a brilland post-war conduct off Korea. Her motto was “Non sibi sed patriae” (“Not for oneself, but for one’s country”), and she earned in Korea the nickname “The Fighting J” and “The Galloping Ghost of the North Korean Coast”.
Battle of the Barents Sea (December 1942)
As Force R sailed out from Kola, on 27 December they were to meet Convoy JW 51B in the Norwegian Sea for the arctic leg, but the latter had been diverted, but catch southwards while trying to avoid a major storm. Several ships separated from the pack, confusing radar operators at Force R, unsure of the true location of the convoy. They ended 30 miles (48 km) north of the convoy on 31 December. This was quite unfortnate at this was just as the German cruiser Admiral Hipper attacked the convoy.
The latter was bravely held at bay by HMS Onslow, HMS Obedient, HMS Obdurate and HMS Orwell, creating smoke and launching torpedo attacks. Admiral Hipper however later returned to gunnery range, but at that stage, spotted y Force R that just arrived before noon. Scheer was hit by three 6-in shells from both Jamaica and Sheffield. Two German destroyers which accompanied her (Z16 Friedrich Eckoldt and Z4 Richard Beitzen), lost in the dark and bad weather, misidentified Sheffield as Admiral Hipper, and closed in to offer their protection. HMS Sheffield was not long to correctly indentified the target and opened fire when sure of a hit: The cruiser sank almost immediateky Friedrich Eckoldt at poin-blank range of just 2 miles (3.2 km). HMS Jamaica however was further apart and unsuccessfully engaged Richard Beitzen, but missed. It was a hour later thet they spotted Lutzow and Admiral Hipper, opening fire but with no hit as darkness fell within minutes. Force R nevertheless shadowed by radar the German ships for hours before loosing contact. HMS Achates and HMS Bramble were sunk but the convoy made it after all this into Kola Inlet, intact which was nothing short of a miracle. Force R remained there to escort Convoy RA 51 back home and were relieved there by HMS Berwick and HMS Kent.
HMS Jamaica was back to the Home Fleet at the start of 1943 for a small refit, gaining six twin 20 mm Oerlikon (0.8 in) AA, four single. All these months she escorted a variety of convoys on the dangerous Murmansk road, and in November 1943 escorted RA 53B, JW 54A, JW 54B and RA 54B, never engaged. On 15 December 1943, she was assigned to Force 2, with HMS Duke of York and four destroyers in distant cover for Convoy JW 55A, under command of Admiral Bruce Fraser, C-in-C, Home Fleet, flagship Duke of York. They escorted the convoy all the way to Kola, largely uneventful, and they were back home on 18 December, making a stop to refuel in Iceland.
Battle of North Cape (26 December 1943)
Admiral Fraser received intel from “Ultra” that a German sortie led by KMS Scharnhorst was on its way to prey on the Convoy JW 55B. German aerial reconnaissance spotted the convoy on 22 December. Imediately Scharnhorst and five destroyers (4th Destroyer Flotilla) scrambled to the spot on 25 December. They were themselves spotted on the morning of 26 December by the British which dispatched the covering force (HMS Belfast, HMS Sheffield, HMS Norfolk, four destroyers) whereas Force 2 (HMS Jamaica, Duke of York) approached from the south west in a pincer move, trying to bar all way back to Scharnhorst. The later soon turned to make it for her base at Altafjord after exchanging fire with the British cruisers. In the morning, she was spotted by Duke of York’s Type 273 radar 45,500 yards away. As soon as the latter was at gunnery range she opened fire, 30 min. later, and Jamaica followed as soon as she was also in range, a minute after. She hit Scharnhorst with her third broadside, ceasing fire after 19 salvos: Schanrhorst indeed was faster than both and managed to escape.
But she was crippled: One lucky Duke shell, of her last volley, penetrated her Number One boiler room, reducing her speed enough for the faster British destroyers to catch up. They placed themselves in ideal attack range for a torpedo attack and made four torpedo, using a pincer tactic to foil any evading turn. This was the final straw, and Schernhorst was slowed enough that Jamaica and Duke of York caught up in turn, opening fire again at 10,400 yards (5.9 mi; 9.5 km). But it took them about 20 minutes to sink her, so much so that HMS Jamaica was called for the coup de grace. She fired three torpedoes, hit twice, as a third misfired and made another pass on the other broadside for the remainder, one hitting. She was finished off by more destroyers torpedoes. After the battle she went home for an overhaul, and well earned crew’s rest.
Further convoys and the raids on the Tirpitz
In February–March 1944, HMS Jamaica covering Convoys JW 57, JW 58 and RA 58, and in the last case, was detached to escort HMS Victorious, launching an air strike against KMS Tirpitz as part of Operation Tungsten. It was not successful, but more were to come. In July 1944, with Operation Mascot, she covered the carriers HMS Formidable, Furious and Indefatigable for another attack as she the “lonely queen of the North” was now berthed in Kaafjord.
Afterwards she returned to escot duties, escorting the Convoys JW 59 and RA 59 in August and September 1944, and after retuning home received a major refit in October 1944, lasting until April 1945. Like the others she had her ‘X’ turret removed with a more powerful AA (five quad, four single 2-pdr pompom, four single 40 mm Bofors, two twin, six single 20 mm Oerlikons, new radar suite. On 6 June 1945 as the war was practicaly over in Europe, she carried King George VI and the Queen on a visit of the Channel Islands (Guernsey and Jersey) just liberated from German occupation. Jamaica next was assigned to the 5th Cruiser Squadron, sent to the East Indies Fleet in September 1945 as the fighting was far from over there. She was later transferred to the 4th Cruiser Squadron after the war ended, and later reassigned to the North America and West Indies by August 1948. C44 cold war career started in Korea, and ended in 1957 in the Mediterranean. She probably was the most famous cruiser of the class and would have been best preserved.
HMS Gambia (February 1942)
HMNZS Gambia in the Pacific, 1945
HMS Gambia was built at Swan Hunter, laid down on 24 July 1939, launched on 30 November 1940 and commissioned on 21 February 1942. After training with the home fleet, she was not at first to take part in in the East Indies operations or the British Eastern Fleet, and never did, at least under the RN flag. Instead she however operated with the Indian Ocean fleet, taking part in the Battle of Madagascar in September 1942. On her way to the east, she escorted convoys in the Indian Ocean, but returned nevertheless to home waters, stopping in her namesake colony, where she was visited by local West African Chiefs in full regalia.
After a refit in Liverpool in June-September 1943 she was assigned to the RNZN (New Zealand), becoming HMNZS Gambia and replace other cruisers of the fleet, HMNZS Leander and HMNZS Achilles, both damaged in the Pacific. Discussions with the Admiralty proceeded fast and she was recommissioned at Liverpool on 22 September 1943. Her first new captain was William-Powlett, DSC, RN. A few officers in her staff but around 3/4 of the ratings were actual New Zealanders.
On 3 October 1943 she was visited by New Zealand’s High Commissioner, made post-refit sea trials, and a shakedown cruiser, spending ten days attached to the 1st Cruiser Squadron, based in Scapa Flow. She was back to Plymouth on 5 December 1943, teaming with HMS Glasgow and HMS Enterprise, commencing anti-blockade runner patrols in the Bay of Biscay (December 1943), the little-known Operation Stonewall. She spotted and raced to catch the German blockade-runner Osorno as well as another, but failed to sink both.
HMNZS Gambia underway in 1945
At last, HMNZS Gambia was sent to the British Pacific Fleet. In February 1944 she was en route to the Indian Ocean whe ntasked to search for blockade runners in the Cocos Islands area. After being assigned to the BPF carrier Task Forces, she participated in a serie of raids against oil installations and airfields in Sumatra notably. She also raided Okinawa and its neighbouring area, Formosa and Japan home islands. She notably bombarded the Japanese city of Kamaishi, on 9 August 1945 and apparently after the surrender, attacked by a Japanese kamikaze just after the ceasefire was announced. She had the honor to be present on 2 September 1945, in Tokyo Bay as the Surrender was signed.
HMS Bermuda (August 1942)
HMS Bermuda
HMS Bermuda was built at John Brown & Company, Clydebank Naval yard, number 568, laid down on 30 November 1939, launched on 11 September 1941 and commissioned on 21 August 1942. She trained for two motnhs and sent to support Operations of the the North Africa campaign, starting with Operation Torch, as part of the 10th Cruiser Squadron.
Teamng with HMS Sheffield, from Force H she targeted a small coastal fort when attacked by Italian torpedo bombers, repelling them without being hit. Later during Operation Torch, she covered landing at Bougie, coming into heavy air attacks again, but remaining unscathed. After this, she was sent back to the Atlantic, escort more convoys via the Bay of Biscay. From June 1943, she transported herself men and supplies in a quick raid to Spitsbergen, denying the Germans to land on this strategic island. She participated in ASW operations in the Bay of Biscay, but also the North Atlantic, and made more convoy escorts, inclusing with the northerrn Convoys to Murmansk (the dreaded Arctic road). Battered by the elements and her crew fatigues, she eventually returned to Glasgow, in June 1944, for a refit.
During this refit, she saw her ‘X’ turret removed, as other cruisers of the class, but also new radars installed and extra AA. Next, she was sent to the Pacific, from May 1945. She arrived in Fremantle on 1 July, replenishing and moving on to Sydney, her operating base. After exercises with the Far East East (which included the battleship HMS Anson) her crew learned about the atomic bombings of Hiroshima and Nagasaki. Soon after Japan surrendered and HMS Bermuda headed for the Philippines to recover POWs on 23 August. However on 6 September she was pparently attacked by Japanese aircraft not knowing about the end of the war. Her first trip was disembarked her POWs to Shanghai, for later repatriation. After which she made another suc runs and came back to UK to be disposed of. fter modernization her cold war career would end on 26 August 1965.
HMS Ceylon (July 1943)
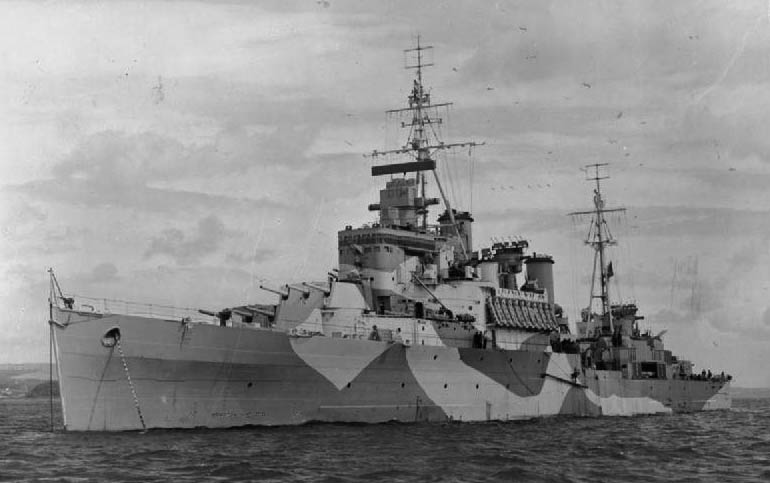
HMS Ceylon 1943
HMS Ceylon was built by Stephens at Govan, launched on 30 July 1942, completed on 13 July 1943. She trained two months in the Home Fleet before her transfer to the 4th Cruiser Squadron, Eastern Fleet. There, she made the long trip to the Pacific and took part in carrier raids, alternated by shore bombardments and patrols: She first took part in Operation Diplomat (An allied naval training operation in March 1944 with the British Eastern Fleet). Next, Operation Cockpit (Raid on Sabang April 1944). In November 1944 she was automatically transferred to the newly created British Pacific Fleet (BPF). From Trincomalee, she took also part in the raid on Pankalan Bradan (16 January 1945) and soon Operation Meridian, the Attack on Sumatra also in January 1945. She stayed in the area until May 1945, and by then sent for the last operations from the Indian Ocean. She shelled the Nicobar Islands, and remained as an escort for the last far east British operations until October 1945, returned home for a refit and start a new cold war career.
HMS Ceylon postwar
HMS Uganda (January 1943)
HMS Uganda underway
HMS Uganda was launched at Vickers-Armstrong, Walker yard, on 7 August 1941, commissioned on 3 January 1943, followed by training until March 1943, in Scapa Flow. HMS Uganda protected a first convoy to Sierra Leone, watching a possible sortie of several German Narvik-class destroyers based on the French coast and ready to pounce in the Bay of Biscay. She made two such convoy sorties without incident. Later she escorted the ocean liner RMS Queen Mary, carrying PM Winston Churchill and his staff to Washington for an important meeting. The whole trip for safety was done at 30 knots (56 km/h; 35 mph), until they reach Naval Station Argentia in Newfoundland, very low on fuel at this point. Back home, she headed for Plymouth and a short refit.
Uganda in Sicily
Next it was decided to reinforced the Mediterranean Sea with her, used as an escort, with the largest troop convoys of the war, bound to Sicily and Operation Husky. In July 1943 as part of the 15th Cruiser Squadron she fired at dawn on 10 July 1943 o Italian and German positions. Close support taks followed during the allied progression along the coast, with major bombardments until Sicily was entirely conquered. HMS Uganda teamed with three cruisers and six destroyers (Support Force East, with HMS Orion and Mauritius, the monitor Erebus). They were called for specific targeting daily by the famous British Eighth Army (“desert rats”). On 10 August she teamed with the Dutch gunboat Flores to fire on axi positions north of Reposto. On 12 August she teamed with the monitor Roberts and the Dutch gunboats Scarab and Soemba, firing on various positions along the east coast.
Uganda’s Italian campaign
For Operation Avalanche, on 9 September 1943, she took part in a dawn bombardment over Salerno, as part of the Northern Attack Force and covering the British X Corps. After the landings success, she helped repelling a German counterattack and maintaining the beachhead. Her captain in fact decided to have her closer inshore, to provide direct naval gunfire support. Her AA gunners alao had to repel Luftwaffe attacks, notably a raid with the new FX 1400 radio-controlled and the Hs 293 glider bombs. She was unscathed until at 14:40, 13 September, she was hit by one such 1.4 tonne glide bomb Fritz X. It was launched by a Dornier 17 from KG 100.
The propelled ordnance passed through all her seven decks before detonating below her keel. The concussion was such it extinguished all her boiler fires, but nearly “broke her back”. In addition to sixteen men killed outright, she started to sink, taking 1,300 tons of water. Damage control (Lieutenant Leslie Reed) did wonders howwever and managed to contain the flooding. Later that day she was even able to relaunch a boiler and steam out, with a remaining engine out of harm, to be towed afterwards to Malta by USS Narragansett. There, she would undergo previsional repairs, before being able to exit the Mediterranean and join a US shipyard. She arrived at Charleston in South Carolina for full repairs.
She had just one propeller working and her bottom torn down, as most decks in between when she limped in the drydock on 27 November 1943. Her two aviation hangars were removed at this occasion, estimated redundant with radar and used for radio and radar fittings and extra crew facilities. But her career in the Royal Navy would soon end even before she was out.
HMCS Uganda’s new life
While under repair, the Government of Canada approached the British Government for a transfer of the HMS Uganda for the Royal Canadian Navy (RCN). It was agreed, and the official transfer took place on Trafalgar Day, 21 October 1944, at Charleston. There, she cruiser was renamed HMCS Uganda, keeping the British colony name. Her first Canadian captain was Rollo Mainguy (later became Naval Staff chief officer) and other prominent officers, including the then young Lieutenant John Robarts, future Premier of Ontario. The rest if the crew was composed of veterans of RN service, coming from every province in Canada and Newfoundland, but with 87% reservists from the RCNVR and RCNR.
She soon departed Newfoundland on 31 October 1944 for UK (where she was further modified), tasked for the Pacific, joining the British Pacific Fleet based south of Sakishima Gunto, with the 4th Cruiser Squadron. After a month training and acclimatizing there, (by the way she was not “tropicalized”). On her way to the east she stopped in January in Gibraltar, Alexandria, Aden and Colombo, Fremantle, arriving at last on 4 March 1945.
There, she became flagship for the RCN, heading to Sydney for her first mission with Task Force 57 BPF. At the time, she carried the best radar and aircraft identification capabilities of the whole fleet and on 10 April 1945, tis proved instrumental during early operations. After the strike against Sakishima Gunto was cancelled, she was retasked to attack Formosa (Taiwan), from 11 to 13 April 1945. She was next sent to attack as previously planned Sakishima Gunto, on 15–20 April.
Next, the BPF was sent to Leyte Gulf and TF 57 there repelled a massive kamikaze attack. This gave the occasion to the crew to test their metal and she not only was able to very effectively direct AA fire but also interception throughoyut the battle. Later she would take part in the whole Okinawa campaign, receiving battle honours, but also Truk. At some point she became the first canadian ship that close to Japan, stationed for operations 300 nautical miles (560 km) to the east. In May 1945, TF 57 attacked again Sakishima Gunto while repelling furious kamikaze attacks, with two aircraft carriers damaged and forced and another nearly crippled.
On 4 April 1945, the Canadian government decided to change the rule as ask those serving on the Pacific to re-volunteer, while bbeing eligible for 30 days leave in Canada, before deployment which severely disrupt HMCS Uganda’s crew on 7 May 1945. The captain ordered a poll over this recent news, which highlighted widespread discontent amongst the crew. Many complained of the poor living conditions and no proper Canadian identity. 605 out of 907 decided to leave, most feeling they onlyu agreed to hostilities against Nazi Germany, not Japan. When the poll result was known, the British Admiralty was furious, but nevertheless, the cruiser was still deployed with the same disgruntled crew in June-July. Embarrassed, the Royal Canadian Navy offered to replace Uganda with the AA FLAK-ship HMCS Prince Robert refitted in Vancouver, but this never took place. After taking part in Operation Inmate against Truk, she was tasked in June 1945 to bombard the island of Dublon. In July 1945 she was reaffected to Task Force 37 and escort carriers hittings the Tokyo area, until relieved on 27 July by HMS Argonaut, leaving the US 3rd fleet.
Fer her long trip home, she proceeded to Eniwetok, Pearl Harbor for refuelling and then Esquimalt, having en route a boiler liner collapsing, in need of repairs. Whe she arrived on 10 August Japan had surrendered and she remained on the Pacific coast soon after, as a training vessel until paid off on 1 August 1947, RCN reserve. She would have a cold war career as HCMS Quebec 14 January 1952, completely modernized in between, and served until 1956.
HMS Newfoundland (January 1943)
HMS Newfoundland, 10 May 1944
HMS Newfoundland was built by Swan Hunter, launched on 19 December 1941 and completed in December 1942, commissioned in January 1943. She Joined the 10th Cruiser Squadron of the Home Fleet. In February-March 1943 she became flagship of the 15th Cruiser Squadron based in the Mediterranean. The Regia Marina was still a threat at that point, as the Luftwaffe. On the night of 13/14 July 1943, she participated in the opening of the Sicily Campaign -Operation Husky), providing effective support for 1st Parachute Brigade. By accurate gunfire she destroyed German defenses and allowed the GIs to secure the Primasole Bridge, a vital crossroad linking Catania with Syra.
By 23 July 1943, she spotted and torpedoed by the Italian submarine Ascianghi, one of the last British ships victim of the Regia Marina in WW2. Some authors however contradict this and attribute this torpedoing to the German submarine U-407. The torpedo struck aft very close to her rudder. Fortunately, HMS Newfoundland had a good ASW protection, and just one crewman was killed in the direct area of the blast, several others wounded. The cruiser’s rudder however was completely blown off. She was asssited and towed for temporary repairs in Malta. She used her propellers afterwards, and her crew devised “jury rigged” sails installed between her funnels so that she can still veer and steam to the Boston Navy Yard. There, she underwent major repairs that would last until the end of the year.
In early 1944, freshly re-commissioned, HMS Newfoundland had no longer use in the Mediterranean and was sent in the Far East. She was to transit via Suez when moored in Alexandria, an exploding air vessel destroyed a torpedo in the port tube. This caused severe damage, but only one casualty. Repairs took place in the harbour, before she was able to proceed, and entered service with the British Pacific Fleet (BPF).
Her first mission was to assist the Australian 6th Division fighting in New Guinea, providing gunnery support during the Aitape-Wewak campaign. The rest of 1944 and up to 14 June 1945 happened with a variery of missions but no notable event. As part of the BPF task group she participated in a massive, and last attack of the Japanese naval base at Truk: Operation Inmate.
On 6 July 1945, HMS Newfoundland left Manus (Admiralty Islands) with the BPF for her last campaign in the Japanese home islands. On 9 August 1944, she bombarded the city of Kamaishi. Later she took part in a landing to capture the naval base at Yokosuka. The war ended a few days after and the cruiser had the honor of being part of the British delegation present in Tokyo Bay during the surrender ceremony oonboard USS Missouri. Like most allied vessels she was part of the British version of “Magic Carpet” and repatriated British POWs to Britain. She was back in Britain in December 1946 and her cold war career started soon.
The Fiji class in the cold war
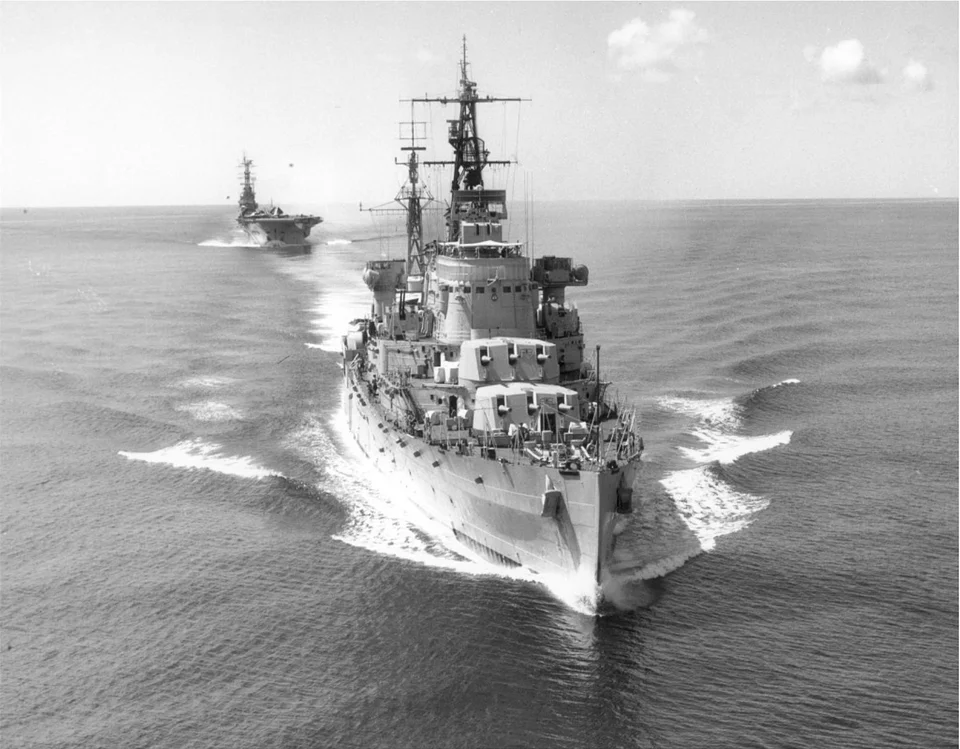
HCMS Ontario in the cold war
First off, the class was upgraded considerably to serve an additional fifteen to twenty years and even far more in some cases. They were criticized after the war as too cramped, with thin side armour. None was really modernized as the result of stability issues and space onboard. Apart Nigeria which kept its X turret they nevertheless served often in distant stations, often as flagships. Some were rebuilt in the line of belftast, with covered or rebuilt bridges and CRBN directors, new modern Bofors AA. All had lattice masts and new radars and FCS suites. Mysore, Ceylon and Newfoundland were modernized the same way as the southamptons. In peruvian service they were called Almirante Grau and Coronel Bolognesi, sold to Peru in 1959, while HMS Nigeria was sold to India as INS Mysore in 1957.
The bridge of HMS Jamaica in Kiel, 1957, as open ship.
HMS Nigeria survived the war as the only Colony-class cruiser maintaining her ‘X’ turret, removed in 1954. In 1954, she was sold to India and rebuild as HMS Newfoundland with, according to some sources, the electronics and radar intended for HMAS Hobart and abandoned. On 29 August 1957, she became officially INS Mysore and collided with the destroyer HMS Hogue in manoeuver, but stayred in service for 28 years, decommissioned on 20 August 1985, probably among the few last survivors of the class by then.
HMS Mauritius served in the Mediterranean station afte the war, was in the Corfu Channel Incident in 1946 with the 15th Cruiser Squadron. Recommissioned and modernized in 1949 she served with the 1st Cruiser Squadron also in the Mediterranean until May 1949. Until 1951 she was stationed in the East Indies Station (4th CS), and back home was decom. in 1951 and placed in reserve in 1952, until 1965, sold for BU.
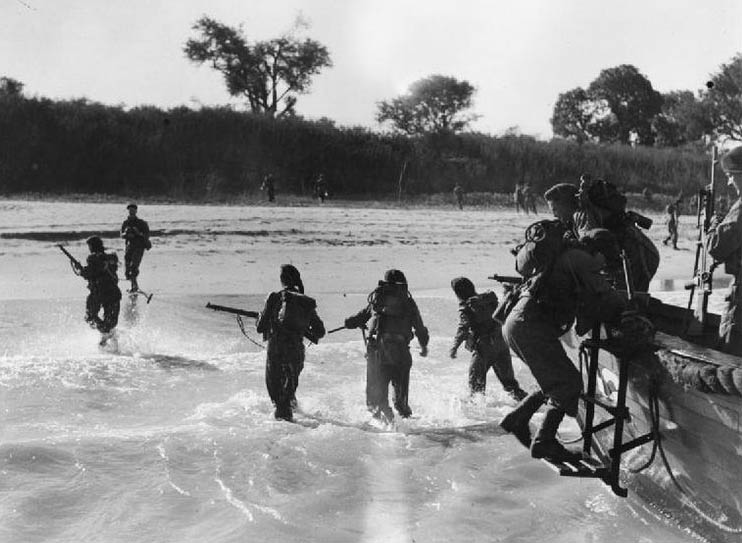
Royal Marines of Kenya dashing ashore as their wooden hulled assault craft touch down on the beach at Cheduba, South of Ramree, Burma.
HMS Kenya was in the America and West Indies Station (8th CS) from October 1946, but was placed in reserved afterwards, was modernized in 1945–1946 with notably the new twin 40 mm AA mounts, updated radar/fire control and reactivated to replace HMS London at the Far East station in 1949. She also took part in the Korean War. In March 1951, she bombarded Choda Island before a 200 ROKA troops landing.
She patrolled off Inchon and on 11 April left Sasebo to search for a communist aircraft shot down. In april she shelled Inchon for 10 days and made further raids on the area this summer, was refitted at Singapore and left the Far East Station on 17 November. She notably intervened in Burma during an insurrection. She had an overhauled at Malta, stopped at Gibraltar and made it home in December. From 1955 she replaced after a preiod in reserve HMS Superb on the West Indian station. She was placed again in reserve in 1958, sold for BU in 1962.
Jamaica was underway when the Korean war broke out on 25 June 1950, and with HMS Black Swan met USS Juneau off the east coast to fire on advancing North Korean troops. On 2 July she intercepted a North Korean supply convoy from Chumunjin and fought off the escorting MTBs and MGBs. Next she shelled numerous coastal targets until hit by a 75 mm (3 in) artillery shell killing six, wounding five. On 15 August, she bombarded Kunsan. Next she took part in preparatory bombardment of Wolmi-do before a landing, and later supported the southern flank for the 1st Marine Regiment. With USS Rochester they were strafed at dawn by two Yakovlev fighters, killing one sailor, but both were shot down.
Flagship, Reserve Fleet from May 1953 to 1954 she served later in the Mediterranean Fleet, 1st Cruiser Squadron, and was modernized in Chatham Dockyard. She shot the movie “Battle of the River Plate” playing HMS Exeter, and later took part in Operation Musketeer in November 1956 (Suez crisis). She covered the landing of Royal Marines at Port Said, but naval gunfire support was denied by the cabinet. Placed in reserve in September 1958 she was sold for BU in November 1960.
Gambia was back from the far east in Portsmouth on 27 March 1946, was refitted, recomm. on 1 July 1946, 5th CS, Far East Fleet. She was back in UK on 6 January 1948, and in January 1950, assigned to the 2nd CS, Mediterranean, until October 1954. In between with HMS Bermuda she brought aid to the Greek island of Zakynthos struck by an earthquake. She later took part in a Fleet Review for Queen Elizabeth II. She became flagship, 4th CS, East Indies Station. She was refitted again and from 1957 served in the Persian Gulf, flagship C-in-C East Indies (Vice Admiral Hilary Biggs). Next she served in late 1958 with the 1st Cruiser Squadron, Mediterranean, then Far East from December 1959, relieving Ceylon in the Red Sea. The last months of 1960 she served in the South Atlantic and Home Fleet. Placed in reserve her crew was reassigned to HMS Blake and she was decomm. and BU in 1968.
Bermuda remained in the Far East as flagship, 5th CS until 1947. She was back home for a refit at Chatham , reserve, then recomm. in 1950 for the South Atlantic station, flagship C-in-C until 1953 (Vice Admiral Peveril William-Powlett). Next she served with the Mediterranean Fleet and with Gambia assisted Zakynthos island. In 1956 she was refitted at Palmer’s, Hebburn on Tyne, as HMS Gambia: Enclosed bridge, US Mk 63 directors, new 4 in mounts, new Twin Mk.5 40mm mounts, all repositioned. She made many execrizes with other NATO navies and in 1958, reinforced the fleet off Cyprus during the civil unrest. She later relieved HMS Tiger in the Mediterranean Fleet and as decommissioned in 1962, BU 1965.
Ceylon served in the Portsmouth Command in 1946-1950, then the 5th, 4th CS, the Far East, East Indies stations. She participated in the Korean War. In poor condition she was refitted back home from March 1955 to July 1956, gaining a new Type 960 long range air warning radar and 277Q height finder radar, plus UA-1 ESM system, Mark 63 FCS and and 18 Bofors 40mm guns Mark 5 and Mark 7 (single). The Mark 5 had Simple Tachymetric directors. She returned to the Mediterranean in 1956, participating to Operation Musketeer, dealing with Egyptian batteries at Port Said.
She also served as an air direction picket, and continue on station until 1959 but in December she was sold to Peru. As it came only three years after modernisation, captain Frank Twiss, complained on the hasty sell. She was trabsferred on 9 February 1960 as Coronel Bolognesi and served until May 1982, scrapped in Taiwan in 1985.
Uganda as a Canadian cruiser served in the Korean War and back home for combined exercizes with the Royal Canadian Air Force and Royal Canadian Navy. Before the war she had been refitted and modernized at Esquimalt, fully recommissioned on 14 January 1952 as HMCS Quebec (C31). For the rest of her career, see the cold war canadian Navy. She was BU in Japan in 1961.
HMS Newfoundland off the coast of Malaya firing coldwar
Newfoundland was initially in reserve, used as training ship (HMS Imperieuse stoker’s establishment) then was refitted for 20 month at Plymouth in 1951, the most extensive of any Colony or Town-class cruiser. She received a brand new new electrical susyem, new fire control systems, complete overhaul of her machinery, a brand new bridge, NBC capabilities, new lattice masts, 960 radar, 275 and MRS-1 fire controls for the twin and single 40mm mounts. She was Recommissioned on 5 November 1952, flagship 4th Cruiser Squadron, East Indies. She notably bombarded Malayan National Liberation Army targets near Penang in June 1954.
Back in the Mediterranean, she took part in Operation musketeer. Just as it was about to be started on 31 October 1956, she spotted the Egyptian frigate Domiat, cruising South of the Suez Canal towards the Red Sea, ordering her to heave to. Domiat refused and opened fire, which caused damage and casualties (1 killed, 5 wounded). With HMS Diana, Newfoundland returned fire and sank the frigate, but rescued 69 survivors; She later served in the Far East until paid off in Portsmouth on 24 June 1959. She was sold to the Peruvian Navy on 2 November 1959 as Almirante Grau, later Capitán Quiñones (1973), hulked in 1979, static training ship in Callao and later BU.
 Latest Facebook Entry -
  X(Tweeter) Naval Encyclopedia's deck archive
 Instagram (@navalencyc)


 French Navy
 Royal Navy
 Russian Navy
 Armada Espanola
 Austrian Navy
 K.u.K. Kriegsmarine
 Dansk Marine
 Nautiko Hellenon
 Koninklije Marine 1870
 Marinha do Brasil
 Osmanlı Donanması
 Marina Do Peru
 Marinha do Portugal
 Regia Marina 1870
 Nihhon Kaigun 1870
 Preußische Marine 1870
 Russkiy Flot 1870
 Svenska marinen
 Søværnet
 Union Navy
 Confederate Navy
 Armada de Argentina
 Imperial Chinese Navy
 Marinha do Portugal
 Mexico
 Kaiserliche Marine
 1898 US Navy
 Sovietskiy Flot
 Royal Canadian Navy
 Royal Australian Navy
 RNZN Fleet
 Chinese Navy 1937
 Kriegsmarine
 Chilean Navy
 Danish Navy
 Finnish Navy
 Hellenic Navy
 Polish Navy
 Romanian Navy
 Turkish Navy
 Royal Yugoslav Navy
 Royal Thai Navy
 Minor Navies
 Albania
 Austria
 Belgium
 Columbia
 Costa Rica
 Cuba
Cuba Czechoslovakia
 Dominican Republic
 Haiti
Haiti Hungary
 Honduras
 Estonia
 Iceland
 Eire
Eire Equador
 Iran
Iran Iraq
Iraq Latvia
 Liberia
 Lithuania
 Mandchukuo
 Morocco
 Nicaragua
 Persia
 San Salvador
 Sarawak
 Uruguay
 Venezuela
 Zanzibar
 Warsaw Pact Navies
 Bulgaria
 Hungary

 Bundesmarine
 Dutch Navy
 Hellenic Navy
 Marina Militare
 Yugoslav Navy
 Chinese Navy
 Indian Navy
 Indonesian Navy
 JMSDF
JMSDF North Korean Navy
 Pakistani Navy
 Philippines Navy
 ROKN
ROKN Rep. of Singapore Navy
 Taiwanese Navy
 IDF Navy
 Saudi Navy
 Royal New Zealand Navy
 Egyptian Navy
 South African Navy


 Ukrainian Navy