
 Kaiserlichesmarine vs
  Royal Navy
A missed second Jutland
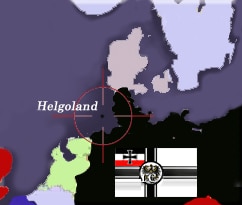
The island of Heligoland, at the outposts of the German coast, was the object of another minor engagement after Jutland. This was an attempt to lure out the German fleet by attacking lighter ships, but the germans being too cautious, it ended as an inconclusive action, unsatisfactory for both Germans and British.
 In short: German minesweepers who used to clear british minefields in the bay were intercepted by light cruisers HMS Calypso and HMS Caledon. At the sight of their smoke on the horizon the minesweepers fell back on the two battleships on duty, the SMS Kaiser and SMS Kaiserin, under Rear Admiral Ludwig von Reuter. Both cruisers requested by wireless telegraphy the support of the first battle cruiser squadron (HMS Glorious, HMS Courageous, HMS Tiger, HMS Renown, HMS Repulse), commanded by Admiral Sir Charles Napier. Both cruisers briefly engaged the battleships, before Calypso received a 280 mm hit on the forecastle, razing the bridge and killing all officers present. The second cruiser wisely sailed off of the engagement while the German squadron, at first chasing, retreated cautiously themselves at the sight of the black plumes of Napier’s own squadron, through its own minefields losing an escorting TB in the process.
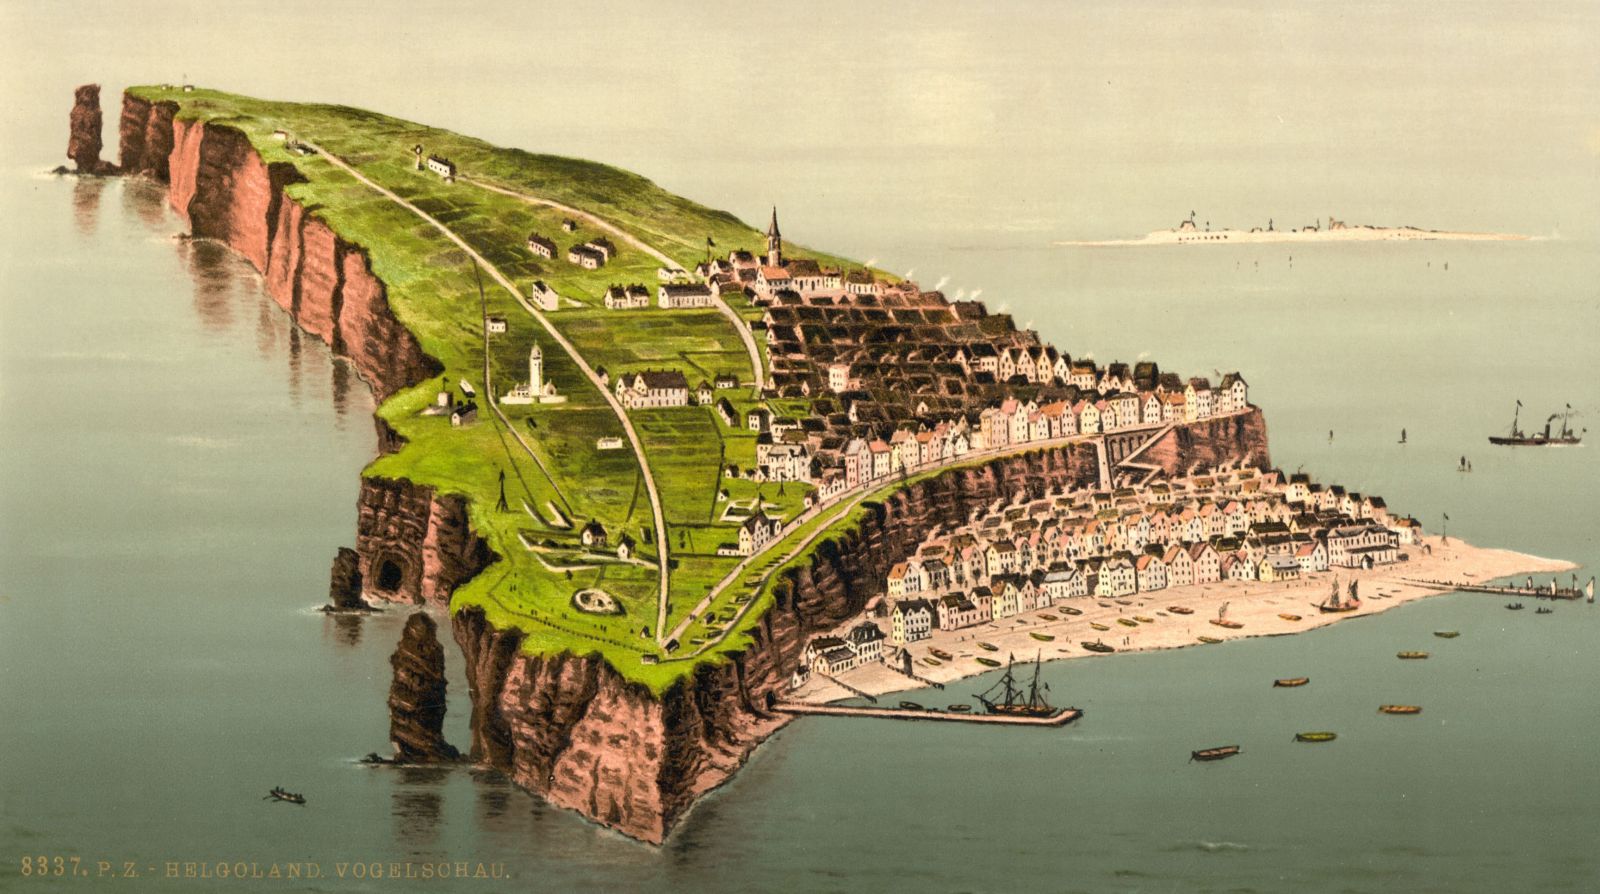
The island of helgoland prior to its tranformation into a military base
Motivations
One of the trigger for the operaton was Admiral Sir David Beatty (then Commander-in-Chief of the British Grand Fleet) own will to revenge the recent German Navy’s successful raid on the Scandinavian convoy on 17 October 1917 (exaclty one month ago). Therefore he decided to send a strong force of cruisers under Vice Admiral Trevylyan Napier to attack German minesweepers and their escort, in the hope to lure out reinforcements, while his other backup fast battlecruisers were ready for action. British Naval Intelligence was made aware indeed of the wide effort made by the germans to clear British minefield in their backyard, under orders by Ludwig von Reuter.
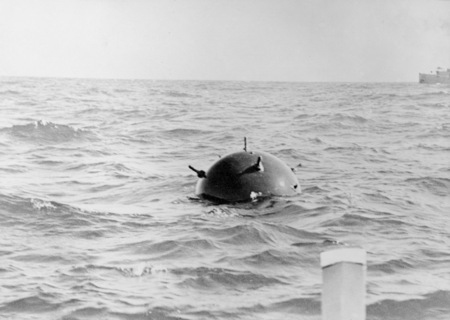
British mine in the north sea – Imperial War Museum archives (AMW)
british minefields
The rocky island of Heligoland, before the war a popular touristic destination, later transformed into a military outpost, advanced naval base with fortifications and long range artillery, was the most obvious target in the vicinity of the German west coast (North sea coast). Once already, in 28 August 1914 admiral Roger Keyes tried to lure out German light force in the area and do battle. What followed was called the first battle of Heligoland bight, which saw an engagement of cruisers, TBs, destroyers, and two battle cruisers.
The British hoped to repeat the feat of 1914 although the past action was somewhat inconclusive. In 1917, the British finally started an effective minelaying of the Heligoland Bight, a very long endeavour (and risky, so close to the enemy) because of the neglect British minesweepers were in (not favoured like the “big cats”), and after many delays, the first reliable British mine was itself copied from a captured deriving German model. Mining the Heligoland Bight hampered greatly German coastal defence, 150 nautical miles off their coast, an area denial that they had a hard time to accept. These minefields indeed effectively cut off the Hochseeflotte from the North Sea, even the U-boats until then engaged in the battle of the Atlantic, as a response to the blocus. Therefore the German navy made minesweeping in the area an abosolute priority, straining on ships and crews.
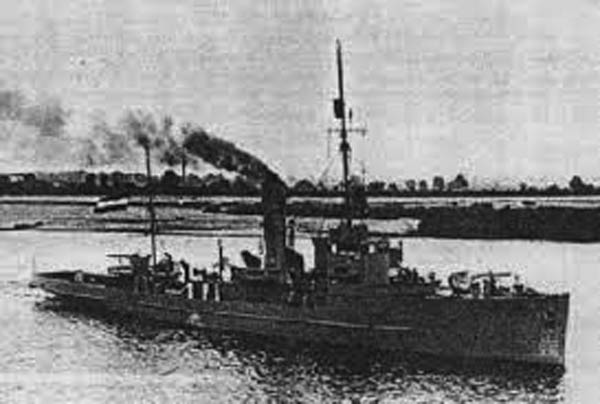
German M15 class minesweeper
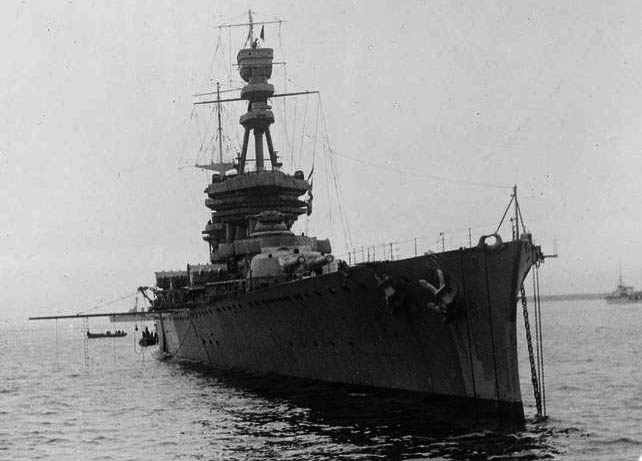
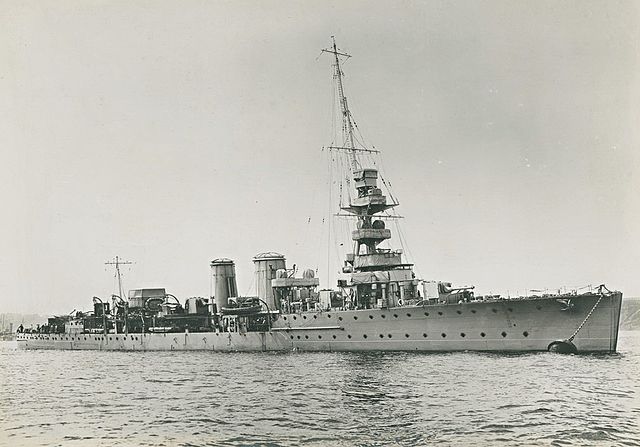
SMS Königsberg, damaged during the engagement.
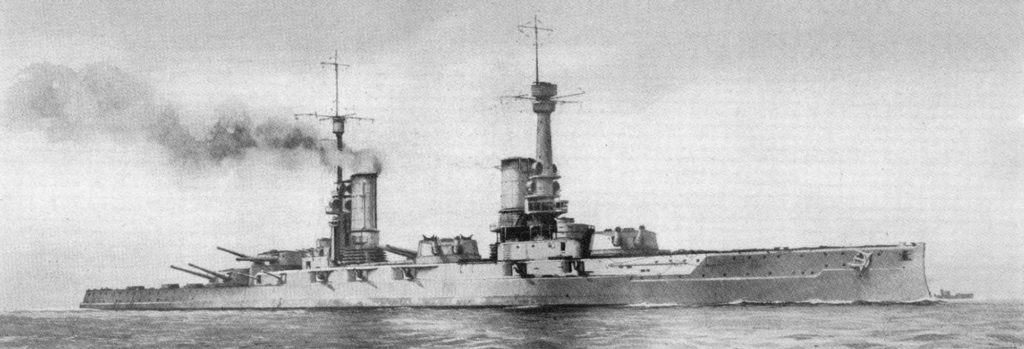
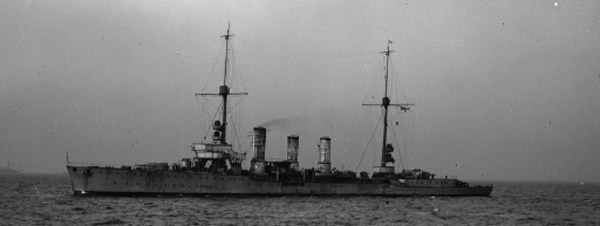
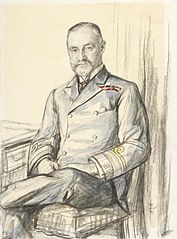
Drawing of the SMS Kaiser
Creating Opportunities
The British Admiralty intelligence new that these minefields had another advantage: German minesweepers needed to be protected by larger units, potentially with quick reinforcements. With always the overall duty to bleed the german Navy, the Royal Navy had there an opportunity that could not be missed. The Germans deployed 14 minesweepers in the area, two mine destroyers, with an escort by of eight torpedo boats and four light cruisers. This fleet was commanded by Rear-Admiral von Reuter , which placed his mark in the SMS Königsberg. The battleships Kaiserin and Kaiser provided backup at 60 miles southeast of the site. Beign dreadnought, they were relatively fast, still. The British approached at the first daylights on the 17 of November 1917, two cruisers covered from the west by the First Battle Cruiser Squadron. In backup the First and Sixth Light Cruiser Squadrons and attached destroyer flotillas, and behind the latest, fast “light battlecruisers” Courageous and Glorious under Vice-Admiral Napier orders. However the danger was, only a selected few had a complete knowledge of the position of all minefields: The Grand Fleet’s commander-in-chief and the battle cruisers commander, Vice-Admiral Pakenham. Napier’s knowlegde was about the older “Line A” but what he knew about “Line B” of minefields was sketchy at best, as thoese were the most recent British minefields. “Line C” was effectively a no-go zone and he had strict orders to avoid it. The light cruisers own charts did not included the Line C that related to to older, ineffective British mines which had been laid long ago.
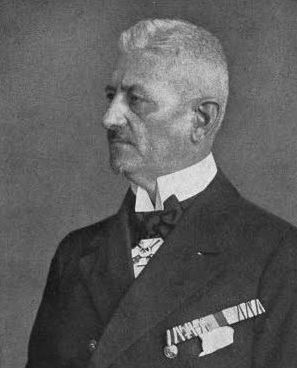
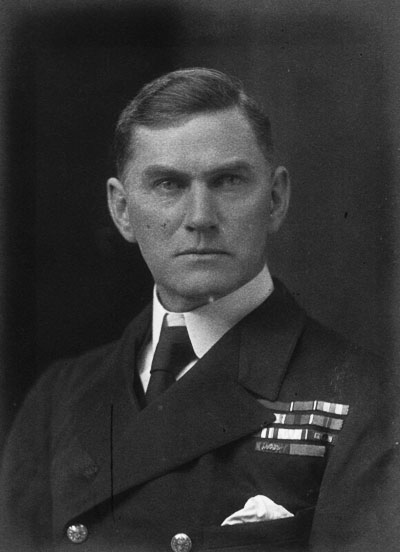
Rear-admiral Ludwig Von Reuter
The battle – first phase
Contact was made with the rising sun, revealing the German’s ships silhouettes over the horizon, far away as the weather was fine. Battlecruisers Courageous and Glorious quickly spotted the enemy light cruisers while the Sixth Light Cruiser Squadron went for the minesweepers. However Napier, perhaps too cautious, restrained his speed to 25 knots whereas his battlecruisers coukd reach 30, the only capital ships worldwide capable ot achieving this. But his ships started to pummel the German anyway, and the latter quicky were surrounded by impressive 15-inch shells falling around in the crisp morning light, and all German units were ordered to make smoke and were hidden within 15 minutes. Von Reuter capitalized on this to delay his withdrawal, ensuring his light fleet to steam cautiously between British minefields back home. The British were effectively stopped by thick smoke, which could conceal any possible threat, including U-boats or TBs in ambush. Napier reached Line B just before 08:40, but turned northeast to go around the smoke, and resume the chase, leaving the Germans escaping cwith a gain of four miles.
Light battlecruiser HMS Glorious
Meanwhile, HMS Repulse (Rear-Admiral Phillimore) took the lead as well as the light cruisers, both being warned by Pakenham about Line B. At 09:08 Pakenham eventually issued a general recall but Napier went on until HMS Cardiff, Caledon and Royalist were hit by Von Reuter. The latter hoped to cripple them just enough to allow his nearby battleship to catch up and finish them off. Battle cruisers Hindenburg and Moltke finally were scrambled at 08:40, followed by two battleships. This approaching force gave some advanced clues by the flyby of a reconnaissance floatplane that tried to strafe and bomb the British ships in the process. HMS Galatea was struck by a torpedo that failed to explode, but the British assumed it was from an U-boat and some ships thought they spotted submarines, a reccurent fear since the sinking of three armoured cruisers at the beginning of the war.
Rear admiral Richard Fortescue Phillimore
The battle – second phase
At last, at 9h30, the “Royal couple” as they were dubbed, SMS Kaiserin and Kaiser arrived in sight of von Reuter, reassured. Captain Grasshof (SMS Kaiserin) however had orders only to cover the retreat and not engage despite opportunities to destroy several British cruisers. Von Reuter however was not that cautious and attempted to order Grasshof to advance northwest. His signals were not received correctly and the German battleships turned east instead, at the frustration of von Reuter which resumed his retreat instead of turning to face off the British advance. The British light cruisers maintained contact throughout, and soon the battleships were able to engage them. Calypso’s bridge had been wiped out, technically “cutting the head” of the cruiser. Meanwhile, by 09:32 Napier reached Line C, turned south, ordered the HMS Repulse to stop but ingnoring the position of light cruisers of Line C, he resumed the chase, protecting them and dissuading the Germans to “finish the job”, now joined by four destroyers. HMS Repulse in the process scored a hit on SMS Königsberg, starting a serious fire, reducing her speed. Von Reuter went on southeast but the action was over, as British cruisers seeing the battleship’s salvoes, turned away, compounded by a sudden fog that compromise any further exchange. Battlecruisers Hindenburg and Moltke eventually found Von Reuter retreating and did not ventured farther. The whole German fleet turned northwest after being catch up by two extra battleships in the afternoon. The British fleet was back home.
Vice-admiral Trevylyan-Napier
Conclusion
In all, the battle had mobilized 1 battlecruiser, 2 light battlecruisers, 8 light cruisers, 10 destroyers on the british side and on the german side, 2 battleships, 4 light cruisers and 8 destroyers, protecting 14 minesweepers. As a result, 1 british light cruiser was badly damaged (but survived) while on the opposite side, 1 minesweeper was sunk and 1 light cruiser damaged. These were meagre in view of what forces were engaged, fuelling some resentment from the general staff and the public as a whole, in particular in the British opinion.
HMS Calypso, badly hit during the engagement. Her entire bridge was destroyed by a 6 inches hit.
The battle appear nowadays as a lost opportunity from both sides in fact, perhaps overly cautious. The Germans for their part wasted the opportunity created by the arrival of the Kaiserin and Kaiser. They could have destroy all three British cruisers, and successfully engage even the Glorious, Courageous or Repulse that were not armoured for the fight. On their side, the British widly critized Napier for his lack of boldness, although many understood the risk of hitting a non-charted minefield and loosing recent, state-of-the art battleships. The most bitter critics despite his failings to used properly the Courageous and Glorious speed. On the other hand, Pakenham critized the risks taken by Phillimore in Repulse, whereas Admiral Beatty supported him. The press would later expose the deficiencies revealed during this actions, perhps incorrectly directed at the Admiralty rather than the Grand Fleet. In the end the most obvious result of this was the dismissal of First Sea Lord, Admiral Jellicoe only six weeks later.

Drawing of the second battle of Helgoland – British cruisers under fire, made by Wyllie, William Lionel in 1917 Source
 Latest Facebook Entry -
  X(Tweeter) Naval Encyclopedia's deck archive
 Instagram (@navalencyc)


 French Navy
 Royal Navy
 Russian Navy
 Armada Espanola
 Austrian Navy
 K.u.K. Kriegsmarine
 Dansk Marine
 Nautiko Hellenon
 Koninklije Marine 1870
 Marinha do Brasil
 Osmanlı Donanması
 Marina Do Peru
 Marinha do Portugal
 Regia Marina 1870
 Nihhon Kaigun 1870
 Preußische Marine 1870
 Russkiy Flot 1870
 Svenska marinen
 Søværnet
 Union Navy
 Confederate Navy
 Armada de Argentina
 Imperial Chinese Navy
 Marinha do Portugal
 Mexico
 Kaiserliche Marine
 1898 US Navy
 Sovietskiy Flot
 Royal Canadian Navy
 Royal Australian Navy
 RNZN Fleet
 Chinese Navy 1937
 Kriegsmarine
 Chilean Navy
 Danish Navy
 Finnish Navy
 Hellenic Navy
 Polish Navy
 Romanian Navy
 Turkish Navy
 Royal Yugoslav Navy
 Royal Thai Navy
 Minor Navies
 Albania
 Austria
 Belgium
 Columbia
 Costa Rica
 Cuba
Cuba Czechoslovakia
 Dominican Republic
 Haiti
Haiti Hungary
 Honduras
 Estonia
 Iceland
 Eire
Eire Equador
 Iran
Iran Iraq
Iraq Latvia
 Liberia
 Lithuania
 Mandchukuo
 Morocco
 Nicaragua
 Persia
 San Salvador
 Sarawak
 Uruguay
 Venezuela
 Zanzibar
 Warsaw Pact Navies
 Bulgaria
 Hungary

 Bundesmarine
 Dutch Navy
 Hellenic Navy
 Marina Militare
 Yugoslav Navy
 Chinese Navy
 Indian Navy
 Indonesian Navy
 JMSDF
JMSDF North Korean Navy
 Pakistani Navy
 Philippines Navy
 ROKN
ROKN Rep. of Singapore Navy
 Taiwanese Navy
 IDF Navy
 Saudi Navy
 Royal New Zealand Navy
 Egyptian Navy
 South African Navy


 Ukrainian Navy