
Raids, Landings, Air-sea Battles and classic Naval battles of the second world war
This section is dedicated to the second world war naval battles, 1939-1945. The conflict was global on even a larger reach geographically (like the asian and pacific front) and fleets were way more balanced, naval battles and campaigns, including amphibious operations or the intensity of the battle of the Atlantic and new theaters of operations.
- 2nd Battle of the Atlantic (1940-44)
- Battle of Hanko (1941)
- Battle of Midway (4-7 June 1942)
- Dunkirk (26 May-4 June 1940)
- Operation C3 – Herkules – The Axis planned invasion of Malta (1942)
- Operation Vado (13-14 June 1940)
- USN WW2 Amphibious Operations
Summary:
Schleswig-Holstein in Dantzig (1er Septembre 1939)
Graf Spee raid (13-19 dec. 1939)
Norwegian campaign (april 1940)
Mers-el-Kebir (6 july 1940)
Battle of Punta Stilo (9 july 1940)
Tarento raid (11-12 nov. 1940)
Cape Matapan (27-28 mars 1941)
Battle of Kerkenna (16 april 1941)
Bismarck raid (18-27 may 1941)
Battle of Crete (may 1941)
Bataille of the Atlantic (1939-45) Main article
Great Syrta battle (22-23 march 1942)
Pantelleria (15 june 1942)
Operation “Pedestal” (11-12 aug. 1942)
Italian specs ops and Flotilla X-Mas (1940-43)
British Amphibious operations and ships (portal)
Axis amphibious ships and landings (German and Italian)
Malta’s axis invasion plan (Operation Herkules/C3)
Operation Husky (July 1943)
Anzio (Jan. 1944)
D-Day (June 1944)
Anvil-Dragoon (August 1944)
An introduction
This second industrial war, twenty years after the “war to end all wars” saw former naval powers reaching a new height in their development, like the Japanese Imperial Navy. The most crucial aspect was the discrepancy of forces in 1940, after the French defeat: Only the Royal Navy stood, facing the German Kriegsmarine and Regia Marina, while the attitude of the French fleet, neutral but ambiguous, was eliminated in July as a possible threat.
Both the US Navy and IJN remained neutral to this point. In early 1942 however, it was not the case anymore: After crippling the US Navy at Pearl Harbor, the Japanese were free to roam through the pacific, and conquer immense territories in a short period, only stopping short of Australia and India. In this process, the local Dutch and British Royal Navy ships, as well as the Australian navy were also crippled or eliminated altogether. In WW1 both the Japanese and Italian navies stood with the entente.
The central powers mostly counted in the large Kaiserflotte, whereas the Austro-Hungarians and Turkish fleets were quite limited, both trapped in their respective seas, the Adriatic and black sea. The Russian navy was also more considerable than the Soviet fleet in WW2 and due to the territories were largely unoccupied, could take on a more active part in naval operations.
By the fall of 1943 however, reverse started: The Kriegsmarine surface fleet was crippled, limited to Norway and th Baltic, as the Regia Marina, soon to surrender to the allies, while the US Navy stepped into the Mediterranean for a total mastery of this theater.
In the Atlantic, the U-Boat threat was better managed, as new escorts were delivered daily by the US, Canadian and British Yards, and losses compensated by even more numerous Liberty-Ships and Victory ships. In the Pacific a slow reconquest of the whole theater began from southern atlantic islands such as guadalcanal and progressed towards the isles of Japan. In 1944 already, the Philippines were taken in the largest naval air battle of the war, crippling what was left of the Imperial Japanese Navy.
From May 1945, the Royal Navy, freed from the Atlantic, could return in force in Asia and help supporting SW asian territories to be retaken.
Differences with WW1 naval battles
Hybrid forms of warfare were what distinguished best both conflicts: In WW1 naval air battles were limited to planes doing reconnaissance over a front or an enemy fleet and amphibious operations were limited also in scale and largely improvized.
The attack on Tsingtao was perhaps the first, earliest combined arms assault, with naval support, aviation spotting, and landings in 1914.
Naval Air Battles
Although all belligerents used seaplane carriers during WW1, only one, Great Britain, pushed the concept up to the first seaborne attack, from the converted battlecruiser HMS Furious. In 1939, nearly all nations had either specialized seaplane carriers and/or aircraft carriers.
At that stage battleships still ruled, at least the minds of naval staffs around the globe, but the potentialities of naval air warfare were well understood and have ardent supporters in each navy. In 1939, an aircraft carrier could deploy not planes for reconnaissance, which were carried by battleships and cruisers already and made soon obsolete by radars, but rather striking planes, used for an offensive role: Bombers (dive ones in particular), torpedo-planes and fighters to protect them and destroy those of the enemy. The great air-naval battles such as Midway, or Santa Cruz, air attacks of naval bases like Taranto and Pearl harbor were totally new and contributed to place the aircraft carrier as the de facto new capital ship.
Amphibious operations
There was a single well known amphibious landing, at Gallipoli. In reality, many small-scale amphibious landings took place in many parts of the Front but it was nothing near the scope and scale of the great operations of WW2, in Europe, the Mediterranean or the Pacific.
These were complex operations with classic surface ships shelling positions, submarines posted in the flanks for protection, and permanent air cover, while a large variery of assault crafts, boats, landing ships and assault ships were manufactured. If WW1 Gallipoli was a draft, WW2 operations were the real deal, with amphibious vehicles and scores of specialized ships and crafts, mastery of command and control. The USN Task Force of 1945 was the very basis of operations for NATO during the cold war, a reference. All navies soon adopted specialized assault and landing ships.
New technologies
-ASW rocket launchers: Unknown in WW1, they appeared on WW2 escort ships and quickly became more popular than deep-charge throwers
-Radars: Certainly the most advanced detection system, rendering reconnaissance aviation obsolete and playing a vital role in some battles (like at Cape Matapan)
-Sonars: More advanced electronic passive sonars developed after the WW1 hydrophones
-Huff-Duff: Using radio signals for trigonometry
-Computer (Colossus): Breaking German Enigma encoded messages sent to U-Boats greatly helped winning battle of the Atlantic
-Electronic ballistic computers: Analog computers already existed in WW1 but hybridation reached a new height in 1944
-Central Operation: In 1944 in some battleships like the Iowa there was already an attempt to create a central operation, to centralized detection and destructions of air and sea threats
-Anti-submarine missiles: The German deployed in 1943 bombers armed with the HS.31 missile and sunk several ships with it, like the Battleship Roma.
-Helicopters: The IJN used ASW autogyros in one of their ships (Akitsu maru), while some U-Boats carried small rotary wing contraptions or fully-fledged helicopters for reconnaissance
-Assault ships: Designed with a compartment that can be flooded and used as motherships for landing crafts, and the ‘Ro-Ro’ concept of vehicle carrier.
-Hydropters: Developed by the Germans, mostly experimentally.
KMS Schleswig-Holstein in Dantzig (1st Sept. 1939)
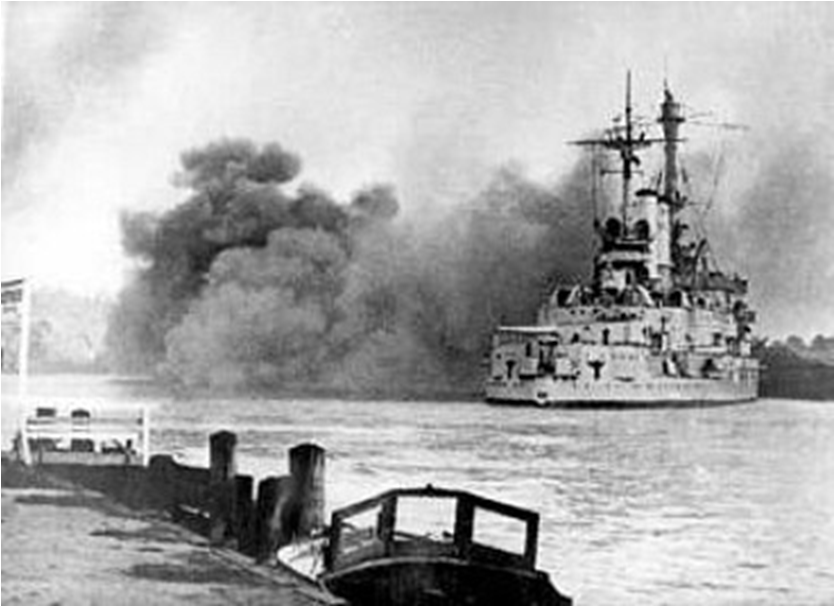
September 1, 1939: Fall Weiss (“white plan”) in preparation for months is launched. Backed by a pact with Stalin, and a secret agreement for a joint dismembering of Poland, compounded by the cowardly wait-and-see attitude of Western democracies, Hitler launches his forces against a country whose political constitution dated back only from 1920.
Against the Polish navy, counting only a few destroyers, and under total air domination by the luftwaffe, the Kriegsmarine has a free hand. And the venerable Schleswig-Holstein is sent, a schoolship of the Reichsmarine, from the series of pre-dreadnought battleships of 1905, spared by the allies because of its age.
By the end of August 1939, the commander of the battleship knew what his objective was: Neutralize the arsenal of the Westerplatte, where artillery and ammunition for the Polish fleet were concentrated. The latter is not present, and for good reason: Under the threat of the Luftwaffe, it was preferred to send it to Britain rather than being cut to pieces in an unequal battle, “Operation Peking”.
Therefore no opposition for the old ship was present which coild sail quietly to be positioned in Polish waters, during the night of August 31 to September 1, opening fire at the first light of dawn on the fortifications defending the arsenal. These were reduced to a few 150 mm guns in casemate, that the 305 mm of the German battleship silenced one after another in three hours of time.
The battleship then approached and shelled the installations and warehouses until early afternoon. She then sets off, her magazines emptied, towards Kiel. The Polish Navy was on the run and no longer has a rear base. Polish defense thereafter relied exclusively on the courage of its troops. The navy would fight, however, with exemplary courage throughout the war under British supervision. In particular, the fleet would receive British destroyers and cruisers, renamed and passed under the Polish flag.
Crews were made up of young recruits, Polish sailors fleeing their occupied country. It is disturbing to see how the General Staff casually considered the Polish fleet, to send her an antiquated schoolship that would have been reformed everywhere else, moreover with a crew comprising mostly student-sailors and young officers. Knowing the insignificant Polish threat, and destroyerd airport which paralized Polish aviation, the ship’s departure to the Westerplatte was considered as a simple “shooting exercise”…
The end of KMS Graf Spee
Graf Spee’s raid (13-19 dec. 1939)
19 December 1939: This was the epilogue of the Graf Spee amazing but short career. The German “pocket battleship”, or overpowered cruiser scuttled herself in the Bay of Rio de la Plata. Her commander, Hans Langsdorff, commited suicide a few hours later. It was the end of an infernal chase on all seas for the German raider/Corsair. This affair started with the departure of Kiel of the ship named Graf Von Spee, the third of the Deutschland class, most often described as a “pocket battleship”, by the intelligence services.
Indeed, the mistake came from the fact that these ships, designed in the context of a corsair war were designed by the Germans as “Schlachschiff” even armored ships (“panzerschiff”) on the registers of the fleet, capable of Fight and outclass heavy cruisers while being fast enough to escape classic battleships.
They will be operational at the beginning of the thirties and constituted a technical tour de force because Germany was at that time condemned to not be able to put into service any building of more than 10 000 tons in standard. On this basis, the engineers grafted to a cruiser hull six pieces of 280 mm, caliber able to outclass that of heavy cruisers of the time, but neither in protection nor in firepower these ships could not compete with battleships.
They had been designed to conduct a privateer’s war on allied traffic, with diesel-electric machines – a first for ships of this tonnage, a room dedicated to the collection of seamen of sunken ships, clean refuellers – that of Graf Spee was the Altmark (see below) – and equipment (sheets, torches and paints) to change their appearance as well as make cargos privateers.
The very name of Graf Spee was that of the Earl and Admiral of the Pacific Fleet who, with his ships, led a merciless war on British traffic in 1914 from the shores of China to the South Atlantic, the hero of the first Battle of the Falklands. where he crushed the squadron of Sir Charles Cradock, he perished with his ships during the second battle of the Falkands.
Graf Spee, along with his twins, Deutschland and Scheer, had taken up positions in strategic areas before the start of hostilities. The Graf Spee was with Deutschland and U-Bootes well placed to threaten the traffic of England with the United States, and it will flow, like its twins a large number of British civilian buildings, sometimes with prime targets as a liner Clement on September 30, which causes great excitement (many civilians drowned) in Britain and recalls the old hatred of the “kraut” of the great war and the case of Lusitania.
A week later, all available ships, including French and New Zealand ships, track the Graf Spee from the Atlantic to the Pacific through the Indian Ocean. In the absence of the predator, who continues to make victims, we also look for his supply ship, also masked by dummy registrations.
The Battle of Rio de la Plata (October 31, 1939)
As of October 31, there are no less than 4 battleships, 14 cruisers and 5 aircraft carriers that track the German privateer. On December 2, he sank the big freighter Doric Star. But the track is precise and the last SOS captured the trap is closed.
Henry Harwood thinks that the privateer is now in the perimeter of the bay of La Plata, where the traffic is dense coming from Montevideo.
On December 13, at dawn (6:14), Commodore Harwood’s squadron spotted the German ship in the South Atlantic, off the Rio de la Plata estuary, 150 miles from Montevideo, Uruguay. The Harwood squadron then includes three cruisers, the Exeter, on which Harwood bears his mark, Ajax and Achilles, the latter of the New Zealand Navy.
A three-on-one part will not be easy so far as the large parts of the Graf Spee have a range well above the 150 mm of the two light cruisers English. Only the Exeter 203 mm seems to be able to face the Graf Spee, with the help of his sailors.
This is the “Battle of Rio de la Plata”: On the one hand Harwood does not have an overwhelming superiority, because it lacks one of its buildings, the heavy cruiser Cumberland, refueling at Falklands so close.
On the other side, Langsdorff, who simultaneously spots British ships, thinks the two light cruisers are actually destroyers that escort the exeter. In confidence, instead of taking the field and pounding the ships at a distance, he is getting closer, not counting on giving the British cruiser a chance, while using his 150 mm side pieces against what he believes to be destroyers.
For his part, Harwood has meticulously developed his tactics: He intends to disperse the shots of the German ship by separating his sailors from his ship Exeter, each one on one side of the Graf Spee. At 6:17 am, just as Langsdorff opened fire at 17,000 meters against the light cruisers and realized his mistake, the Harwood squadron responded vigorously and the Exeter shots framed him and some of them hit home.
The Graf Spee wipes impacts without much gravity but disturbing for the future. Understanding the danger, Langsdorff changes course and heads to the estuary of Rio de la Plata, while protecting himself by a release of smoke. Harwood, far from breaking the fight, follows him with every force of machinery.
Langsdorff then began a reversal manoeuver, and deliberately approached the Exeter, concentrating his shot on him and retaliating to the light cruisers with his 150 mm. Very quickly, the Exeter is hit hard by impacts of 280 mm, with a turret out of service and its rudder destroyed. Another impact plows its open footbridge and is a carnage of officers.
The bar answers only through the relay of sailors from the new improvised command post in the engine room. The situation becomes critical, as the Graf Spee gets closer and more fatally adjusts his shots. From the Ajax and Achilles bridges, the Exeter agony is powerless. The responses of the Exeter become very sporadic and are hindered by the smoke.
Even worse, the rangefinders are out of order. Deciding to play his all-out Harwood deliberately approaches for a torpedo, without effect, the projectiles missing their target. He then turns to face his other side and attempt another torpedoing, without further results. For his part, the Gaf Spee accumulates the shots on goal and the Exeter, riddled and almost blind, gives the band. For other commanders, the building is lost.
At 7:40, She moved south and lost contact, but Ajax and Achilles follow her at a distance. Langsdorff decides to continue on his way to Montevideo to repair his damage quickly. But on the spot, it is opposed an obligation to leave the place under 72 hours, according to a law in force governing the parking ships of the belligerents in the neutral ports.
Langsdorff entrusts his wounded to a German freighter who is in the port and his sailors start makeshift reparations, with the small means of the port. Undertakes a diplomatic stand-off to decide to extend (or put an immediate end to) the corsair’s parking in Uruguayan waters. The Uruguayan government does not bend, and Langsdorff is forced to envisage an exit of his ship in the South Atlantic, exit that he fears because his position being known, all the friendly allied squadrons will converge towards the estuary and not leave him no chance.
In fact, at the limit of the territorial waters, stand Ajax, Achilles and Cumberland, which rallied them to any force of machines. Other buildings are expected. The theater of operation (Currently, seen on google earth) On the ground, the Ambassador receives false dispatches announcing the imminent arrival of the Renown and the aircraft carrier Ark Royal.
The case takes an unexpected turn of the media, and a soap opera commented by all news agencies hastened to follow from the port, where thousands of curious people gathered, following the events.
At 18:15, on 17 December, the time had expired, and Langsdorff had his ship sailed. Nobody knows what his building will do. We expect a naval battle on the horizon and many people start to settle on the beach to watch the “show” at night. What we do not know is that Langsdorff has no illusions about the sequence of events.
His ship was not put back in full combat conditions, and he knew his total inferiority. He does not go to the execution but secretly, arrived a mile from the port of Montevideo, has most of his crew transferred to the German freighter that also leaves the port.
He urged Berlin permission to scuttle his ship, but was told no. He therefore prefers not to sacrifice his men and still puts his plan to execution, mobilizing a small team to do. Machines stopped, the warship stopped at 20:50 in the middle of the bay, and a small star leaves him to couple German cargo, anchored not far from there.
And suddenly, a series of explosions tear the tropical wetness of the twilight. The spectators, delighted, attend the fireworks tons of ammunition remaining in the bunkers of the giant. Ravaged by the flames, unrecognizable, the ship ends up sinking slowly.
The freighter brought the crew of Graf Spee to other assignments, but his commander, who had disobeyed the salvation of his men, knew what he was waiting for when he returned to the Reich. For, as he wrote, “to prevent discredit from tarnishing the salvation of Germany,” he committed suicide in his hotel room in Buenos Aires, the first stopover of the cargo ship.
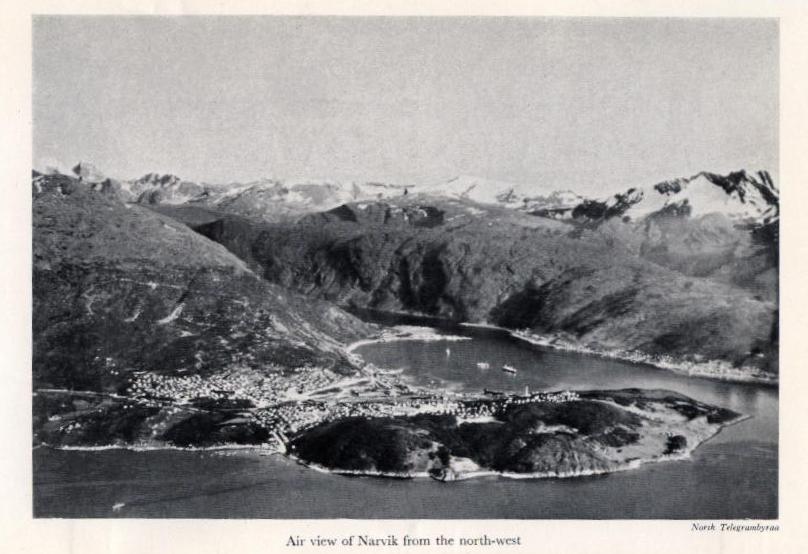
Norwegian campaign (April 1940)
KMS Hipper landing troops on small boats to invade Norway. This was the most important campaign of the kriegsmarine for the numbers of ships deployed (and lost).
At the moment when the Finnish campaign was coming to an end, and the preparations for the great offensive to the west were being made, the German Staff looked upon Norway with interest. This large coastal and mountainous country, poor and poorly defended, was a key position on the North Atlantic, facing Great Britain, as well as an appreciable reservoir of minerals, oil, as well as the famous heavy water needed for research. atomic.
These concerns were recent for the Germans, but already old for allies who sought to weaken the economy of the Reich. For the first time since the “funny war”, allies and Germans would face each other directly. A first warning shot took place on February 16 when the tanker of Graf Spee, the Altmark, was approached and boarded as in the time of the wooden navy by the crew and commandos of the destroyer Cossack in the Jossing fjord where he was in principle quiet, Norway being neutral. The Norwegian government in Oslo protested to the British authorities, whom Churchill called in return “myopic”. This case almost turned to a British-Norwegian confrontation, because the Altmark who had come to find the protection of the Norwegian neutrality saw itself between him and his pursuers the torpedo-maker Kjell.
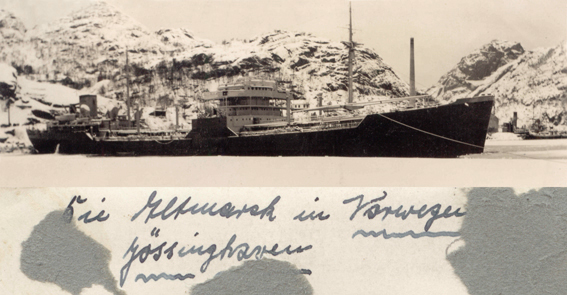
The “Altmark” incident in 1940 was a misunderstanding between Great Britain and the Norwegian Government because of the neutral waters, and the threat posed by the belligerent German tanker proved to be for British intelligence the supply ship of the corsair cruiser Graf Spee.
It was also the last “old-fashioned” boarding for the Royal Navy, by commandos of the destroyer HMS Cossack. (credits wikipedia) The operation received the green light from Churchill himself, not hesitating to wipe the reaction of the Norwegians. 300 prisoners, civilian sailors captured by the Graf Spee and transferred to the tanker were released at the same time, and the Altmark dynamited. Hitler considered that the waters of Norway were no longer safe and opened a possibility of invasion. On 19 February, the Weserübung plan was outlined. He understood the invasion of Norway and also of Denmark to close the access to the Baltic. Finland was neutralized and Quisling, Norway’s new strongman, showed a complacent neutrality towards the Reich.
HMS Eskimo after loosing her bow to a torpedo in one of the battles of Narvik
As early as December 1939, with the Russo-Finnish war that began, the allies planned to make Narvik a base of supply for the Finns. But there is a good fear of the Oslo reaction. This does not prevent General Gamelin from forming in January 1940 an Alpine brigade trained to operate in Scandinavia. On March 13, the Allied troops are ready to leave at the insistence of the Finns, who since the 1st have asked for their help. But on this day, the resistance of the Finnish David has found its limits and the peace is signed, the allied operation cancelled.
On March 28, the Allies decide to undermine Norwegian waters to prevent the rail traffic to Germany and occupy the main ports from April 5, but the embarkation of troops and the ordering of convoys is delayed Until the 7th, on the other hand, the ships of the Kriegsmarine leave the Baltic and head for the south of Norway. This campaign both land and sea, because of the nature of the terrain, saw four warring fleets engaged (Royal Navy, French Navy, Kriegsmarine, Norwegian Navy), with feats of arms and major losses on both sides. other.
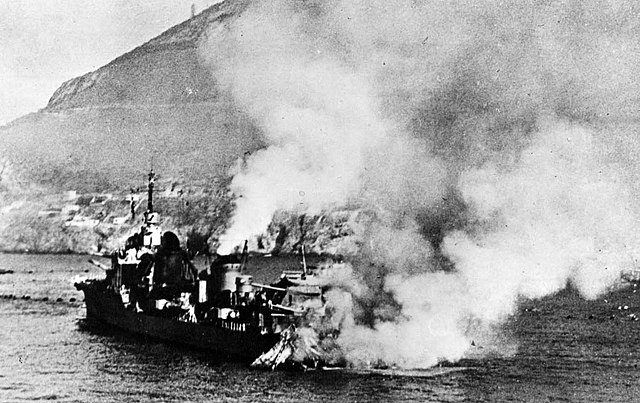
When the Kriegsmarine arrived in order to engage in the narrow passes of fjords to land troops there, they ran into the weak Norwegian defensive capabilities, but it was not the navy that was the danger to the Germans, but coastal batteries. That same April 8, the allies informed Oslo that their destroyers had undermined its territorial waters (in this case the Vestfjord, south of Narvik) to prevent the arrival of the Germans. One of the most famous pictures of the war: The port of Narvik in flames, testimony of the aftermath of the fighting. The memory is painful for the British troops who lived there a “dunkirk” before the hour.
Narvik in 1940
On the night of April 7, a fleet was leaving Scapa Flow to intercept the convoys of the Kriegsmarine. Landings on Norwegian soil begin on the 9th, together with the rapidly consumed invasion of Denmark. The ground forces represent only 7 divisions of infantry and 2 of mountain, with some armored, aviation 970 devices, but for the time all the Kriegsmarine of Raeder is engaged. The deployed forces have 17 warships, but split into two squadrons. That of Trondheim manages to fiddle company with the English squadron by frequently heading course, but is spotted by an English plane which communicates to the fleet this position. Now it was a bait force, which attracts the British fleet and leaves a boulevard to the squadron squadron narvik and Oslo. the operations are as follows: The group that claims to be moving towards Oslo must first pass the fjord defended by old but well placed batteries.
The wing includes the Lützow (ex-Deutschland), 2 cruisers, 5 destroyers and 9 minesweepers, which preceded the convoy. At 11 p.m., a Norwegian torpedo boat defending the fjord was sent to the bottom, but gave the alert, and coastal batteries soon began to thunder. In the middle of the night, they manage to frame the Blücher and manage to sink her. German sailors jumped and swam quickly to shore, fortunately there were few victims. Nevertheless, the precious KMS Lützow is in turn affected and the squadron renounces to continue further. They disembark their troops which then advance along the banks of the Fjord in order to neutralize the batteries. A parachute raid completes the conquest of Oslo itself.
However the Norwegians of the military installations fight like lions and resist until April 13. The Kristiansand Resistance will be just as strong and the city and the port do not fall until the evening of the 9th. A simultaneous airborne operation allows the Germans to take control of Stavanger. The local aerodrome soon received major squadrons of the Luftwaffe. Bergen is also defended by coastal batteries, but the German ship manage to silence them quickly and to continue their progression until the port. There, they disembark and take the place without difficulty. However, British ships in turn entered the Bergen Pass, only countered by the Luftwaffe.
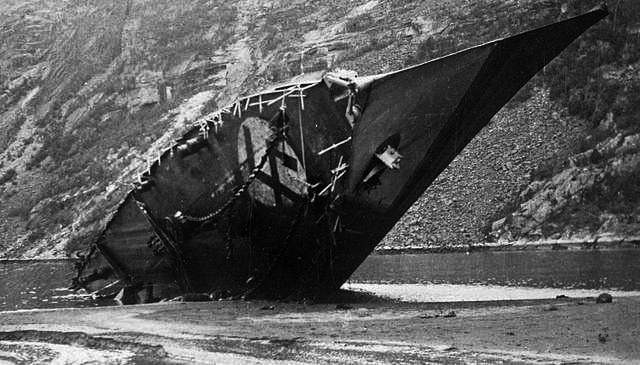
The beached, destroyed German destroyer Bernd Von Arnim, one of the victims of HMS Warspite
At Trondheim, the German squadron passes in front of the batteries without damage thanks to thick coats of smoke; The forces land at the port they take without firing a shot, but the mountain group (Gebirgsjager) will take three days to master the batteries behind. 2000 more of these elite men of the mountain are embarked by 8 brand new destroyers who engage in the Ofotenfjord, where the bulk of what remains of “navy” to Norway and powerful batteries protect the access in Narvik, strategic port if any. On April 9 at 4 am, German elite troops seize the batteries on the back, the rest of the troops chasing the 6th Norwegian Division of the city. The destroyers were quickly right of the few Norwegian units present. On the 9th of April, the axis made itself master of the Norwegian coast; now the Franco-British would try to take them back.
The first action will come from Admiral Forbes, heading a destroyer flotilla on bergen. But the nearby Luftwaffe attacked and sank HMS Gurkha while damaging other ships, forcing Forbes to give up his plan, for the lack of air cover. Despite of this, the Allied Military Council decided to send three more invading flotillas to take over Bergen, Trondheim and Narvik, the main ports of the country. Walburton Lee is sent into the Ofotenfjord at the head of a fleet of 5 destroyers and attacks by surprise the ships present: Two German destroyers are sunk, two damaged, but the other 4 effectively replicate and force it to fall back: Two destroyers are sunk during the latter, including that of the brave captain, killed on his bridge.
With this further failure, the Admiralty decides to use the great means: It sets up a real task force centered around Battleship Warspite and PA Furious, and 9 destroyers. Called “Force B”, this fleet enters this same Ofotenfjord and destroys 5 destroyers, the last three scuttling to avoid capture. Although they do not disembark troops, the British isolate General Dietl’s troops in the harbor itself, who can no longer receive supplies. The reconnaissance reveals, however, that it is impossible to take back Bergen, whose two airfields of the Luftwaffe control the sector. In the face of the Luftwaffe and despite success against the kriegsmarine, the Norwegian campaign was lost to the allies.
Then operation “hammer” against Trondheim started. A naval force was set up, and its direct action was assisted by two diversions at Namsos and Andalnes. The fighting went on inland, Norwegian troops defending valiantly Oslo. On April 13, a bridgehead in Andalnes was established while a brigade landed on the 18th joined the Norwegian forces commanded by General Ruge, but quickly collide in its advance to Lillehammer, to the superior forces supported by the Luftwaffe.
On the 22nd this force leaves the city and retreats to the village of Dombas, an important strategic crossroads. It will maintain delay operations until the 30th, withdrawing from Dombas to Andalnes and being recovered on May 2nd. Until May 30, the last British and French forces, under the guise of naval guns and blocking detachments, and pounded by the Luftwaffe, retreated. The iron road remained open to the axis. This failure prefigured what would follow further south on the continent.
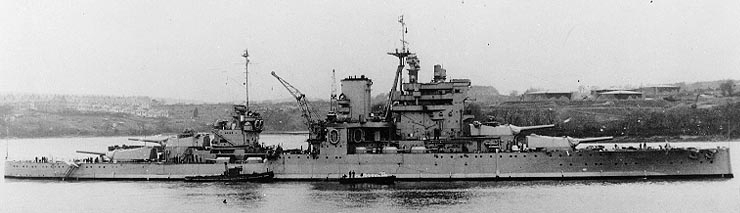
Mers el-Kébir (6 July 1940)
Strasbourg at Mers-El-Kebir
The flash defeat of France was going to plunge press offices around the world into consternation: No one expected anything but a “repetition” of the great war, France to “buffer” Germany, particularly with respect to Great Britain. When the latter fell and the armistice was demanded by Marshal Petain and a certain number of members of the Fourth Republic, England was left to face the axis as well in the Atlantic, North Sea as in the Indian Ocean and in the Mediterranean.
In this last sector, its forces grouped mainly in Gibraltar were inferior to the Marina regia, because the French navy was formerly considered locally sufficient to face it. But since the armistice was requested, despite the opposition of officers including de Gaulle, President Paul Raynaud, and other members of the Fourth Republic, despite the ephemeral project to continue the fight within the “reduced Breton”, then in the heart of the empire, or the national alliance Franco-British, France delivered material and prisoners to Germany.
After these two months of campaign which had cost the French forces dear, the navy was absolutely intact, formidable instrument in the hands of the future government of Vichy. Relations between the signatories, including Petain and Churchill, were strained early on, and they were going to find a definitive breakthrough that would tilt France into a collaborationist neutrality, having passed very close to openly joining the axis with what follows.
For various reasons, Churchill saw the new French government with a wary eye, and still more with Hitler’s future respect for the conditions of armistice. The clauses referred to the disarmament of the German and Italian controlled fleet. His nightmare was to fear the stranglehold of the axis on the fleet.
Position of the ships
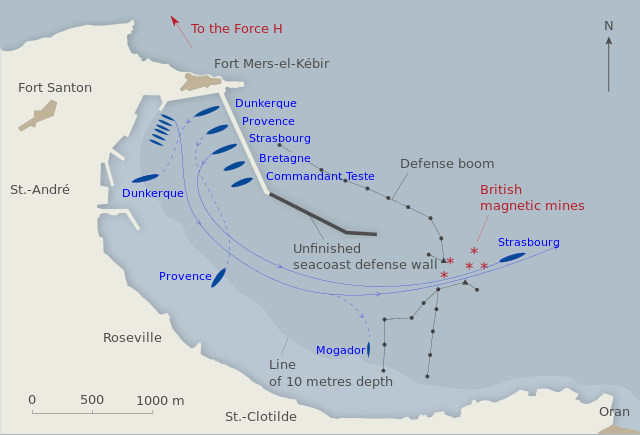
This would have had dramatic consequences for the balance of power in a theater of vital operation for England: The Mediterranean. The bulk of the fleet was there indeed, besides buildings stationed in Alexandria, the others were anchored in the bases of Dakar, overlooking the Atlantic, Toulon, and Mers-el-Kebir in Algeria, near Oran.
Of the three weapons available to France in 1939, the navy was by far the most beautiful: The drastic rationalization imposed on the French tonnage to the Washington Treaty, forced it to design buildings directly inspired by the rival naval powers, with solutions clean and innovative. In the end, it was a revived navy, homogeneous, with quality buildings and well trained crews.
A formidable instrument which, unfortunately because of the vicissitudes of the French situation, undergoes an infamous fate. Only a few buildings escaped destruction, either as a result of Allied attacks (US and British) or by scuttling. No gun was exchanged with the real enemy of that time.
The Richelieu (opposite) was the symbol of this fleet, modern and innovative, as the use of semi-automatic quadruple turrets and his “mast-chimney” which was repeated many years later, or the drawing of his bow . The British could not give hope to the ax to seize it, and tried everything, even alienating their former allies.
HMS Ark Royal planes preparing to depart for the harbor
The French ships stationed at Brest had urgently set sail for Great Britain or the French Caribbean Islands (Martinique), others were present at the Saigon base in Indochina. If in one way or another, such as the scenario that almost came to fruition in November 1943, the axis got its hands on the fleet of Toulon and those stationed allier, the imbalance in his favor in the Mediterranean would have no doubt driven the Royal Navy of this sector, with the probable consequence of taking Egypt (not to mention Malta and Gibraltar).
Preventing any reinforcement and closing the route of the Indian and Eastern colonies to Britain, as well as valuable resources of fuel and raw materials. In the face of this disaster scenario, and having exhausted its land forces in France and preparing to fight a desperate battle against the Luftwaffe with a weakened RAF, all hopes rested on the Royal Navy.
The latter was largely mobilized against an exit of the German fleet in the North Sea, in fact, the squadron of the Mediterranean had to fend for itself. After having asked France to deliver her fleet to the British Admiralty, here it is before a dilemma of importance. From June 25, he faces an internal political danger: A fringe of the population experiencing sympathies for the Nazi regime, including some lords, a large fringe pacifist, as in France, give him the obligation to mobilize the population by a strong act, the testimony of a relentless resolution to continue the war whatever the price.
Churchill later wrote in his memoirs that in the dark outlook he faced he remembered the words of the French revolutionaries: “The allied kings of Europe are threatening us, let us challenge them to a king’s head…”. He prepared the operation “catapult” in these outlines at this time. He will still have to face the opposition of many members of the cabinet of war, to whom he barely snatched the approval, and also aroused a living reluctance within the British admiralty: A few months before indeed the French Fleet and British were neck and neck in Dunkirk, Norway, in the South Atlantic to chase the Graf Spee.
On June 13, Churchill and Dudley Pound send a last message to the French government, always to ask the passage of the British side of the French fleet, guaranteeing its independence of action. Churchill is indeed dubious with regard to Article 8 of the peace convention, which states that French ships must be disarmed under the control of Germany and Italy: The term “control” in English a flavor much more authoritarian, equivalent to taking possession. His mistrust of Darlan will only get worse as a result of his participation in the Pétain government.
On June 23 there was de facto a near-breakup of diplomatic relations, the only surviving naval mission of Rear-Admiral Olden’hal, and again the latter was not fully informed by the Government of Bordeaux. Darlan’s refusal to accept and Hitler’s mistrust of speech led Churchill to speed up Operation Catapult.
On June 27, the final plan is approved and begins to run: Admiral Godfroy whose ships are in Alexandria (the Suez Canal is also vital for France because of his possession of the Far East) receives from the admiralty order to rally Beirut. He informed his British counterpart A. Cunningham, who in turn informed him that he had been instructed not to let him leave the port.
On the 29th, France is officially authorized to begin the disarmament of its ships, and the preparations begin sluggishly: The new government wishes to keep the potential of the fleet intact, while on the other hand, the Admiral Darlan made the promise to scuttle its buildings in case of threat of capture by the axis.
On 1 July, Admiral Sommerville, commanding the Gibraltar fleet, was ordered to sail in the direction of Mers-El-Kebir, where the French navy’s largest force was outside Toulon: four battleships indeed are wet. Sommerville sent back a confirmation message as he was reluctant to carry out the mission he had been assigned. On July 3, shortly before dawn, British troops stormed the French sailors barracks and ships in Portsmouth, Plymouth, Sheerness and Falmouth.
There will be one dead and a few wounded on each side. On the side of Alexandria, French and British ships stationed nearby: The British guns were pointed at the French ships (The battleship Lorraine, three cruisers, three torpedo boats and a submarine) whereas the British commander was received on board Lorraine for his birtday, and these ships had their torpedo tubes ready to fire. Fortunately, able negotiations and good sense would prevail in this situation, and confrontation was avoided.
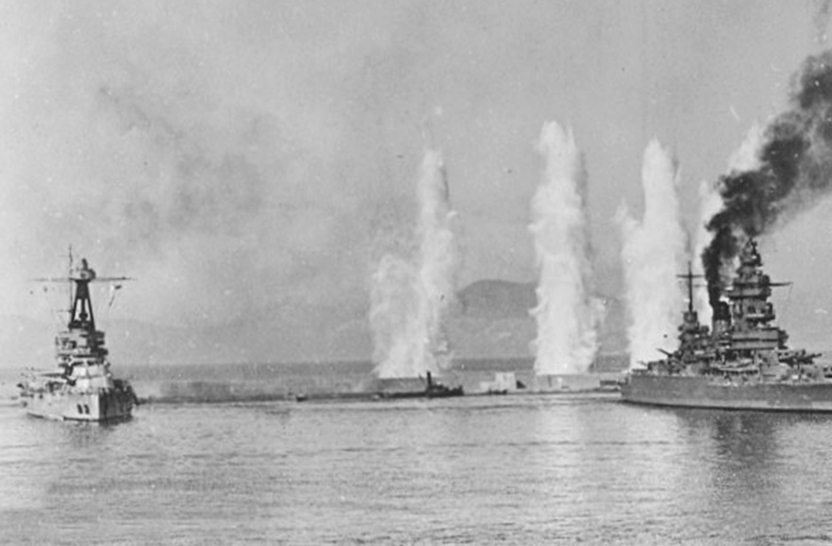
First heavy caliber water plumes, early in the battle
At 8 am Cunningham must send Godfroy the ultimatum to surrender the French ships to the Royal Navy, by a crew pass or to have it disarmed under British control. Negotiations will continue all day. We seek to temporize on both sides. On the other hand, at 6 o’clock, the squadron of Gibraltar, the “H force” of Somerville arrives within range of gun of the harbor of Mers-el-Kebir. It is first Foxhound destroyer, scout, quickly followed by the rest of the fleet.
The latter includes the battle cruiser Hood, the battleships Resolution and Valiant, the carrier Ark Royal, 2 cruisers and 12 destroyers. The French forces present include the Dunkirk and Strasbourg battleships, recent and fast buildings, the older Provence and Brittany battleships, the Cdt Teste airlift, the Kersaint, Tiger, Terrible, Lynx, Mogador and Volta destroyers, all powerful units, plus 15 torpedo boats and 4 submersibles, not to mention the air force.
These forced are under the command of Vice Admiral Gensoul, an Anglophile, who had the privilege of having under his command the Hood during a joint hunt of German raiders in 1939. The British, for their part, had on board HMS Foxhound’s Captain Holland, a Francophile who was a naval attaché in Paris and a liaison officer with the French Admiralty in 1939. Everything seemed to come together in advance to reach an agreement.
At 8 am, after warning the French of a very important communication, a message in Morse Hood says “We hope that our proposals will be acceptable and that we will find you with us”. Then at 8:30, Gensoul receives the British notice, a text written as an ultimatum: It leaves three possibilities to the French admiral: Join the British fleet, sail to Britain for British-controlled disarmament, or drive to the Caribbean or the USA whose neutrality allowed not to violate the armistice agreement.
Bretagne is hit
But the spirit of the missive seemed to oppose it. The first two solutions involve violating the armistice convention, Gensoul is forced to refuse. Moreover, the lookouts of Mers-el-Kebir are perfectly aware of the preparations for Force H and the cannons aimed at the harbor. An airplane even took off to observe it and prepare the artillery adjustments. Gensoul gave the order to re-arm the coastal batteries as quickly as possible and to prepare the buildings for a wobble.
He sends a message to the Admiralty, withdrawn to Nerac, in these terms: ‘English force including 3 battleships, 1 aircraft carriers, cruisers and torpedo boats in front of Oran. Ultimtum sent: Sink your ships within 6 hours or we will force you into it. “The admiralty’s response is unambiguous: French ships will respond to force by force” gives Gensoul had in one hand the assurances given by Admiral Darlan concerning a scuttling of the fleet in case of attempted seizure of the axis and had to remained intact, but on the other hand French vessels would defend themselves in case of attack by any opponent, pointing out that the English communication was considered an ultimatum. He refused to receive Holland in person, and his aide-de-camp expresses concerns to him in the event of disarmament under control of the axis: A scuttling could still be possible.
Moreover, through Gensoul’s aide-de-camp on HMS Foxhound, he suggested that disarmament on the spot with the presence of Royal Navy was still possible. But these arguments did not seemed to bend Gensoul, and nothing seemed to be able to prevent the confrontation of arms. Around noon, Sworfish planes of the Ark Royal moored magnetic mines in front of the harbor entrance, seemlingly contradicting possibilities of the fleet to be able to sail to the Caribeans or the USA. At around 12:30, however, Admiral Somerville still reluctant to fire, offered a final conciliation and pushed the ultimatum on his own back at 14:30.
The aides-de-camp on both sides succeeded in persuading Gensoul to meet with Captain Holland. Gensoul believed that disarmament on the spot could constitute a basis of agreement. He however wanted to save time apparently to speed up preparations for combat and equipment, and the British could see them. At 2:30 pm, Gensoul sent a message indicating he agreed to meet Holland in person. This forced Sommerville to extend the ultimatum again.
At 3.15 pm the meeting took place aboard the Dunkirk: It is encouraging: Gensoul gave Holland a text from Darlan, instructions specifying the scuttling of the fleet in case of any threat of capture, and also agreed to start disarmament in situ, but without the immediate threat of the Royal navy, preparations for an immediate departure for the Antilles or the USA were also planned.
However, even as Holland, hopeful of these new developments, was about to report to Somerville, the latter just received from London the message: “Settle the matter quickly, otherwise you will be dealing with reinforcements.” Indeed, Admiral Le Luc, in Nerac, reading Darlan’s message the British intercepted, sailed with his Toulon and Algiers’s cruisers while giving instructions to prepare the ships for a fight. He then informed Darlan of this.
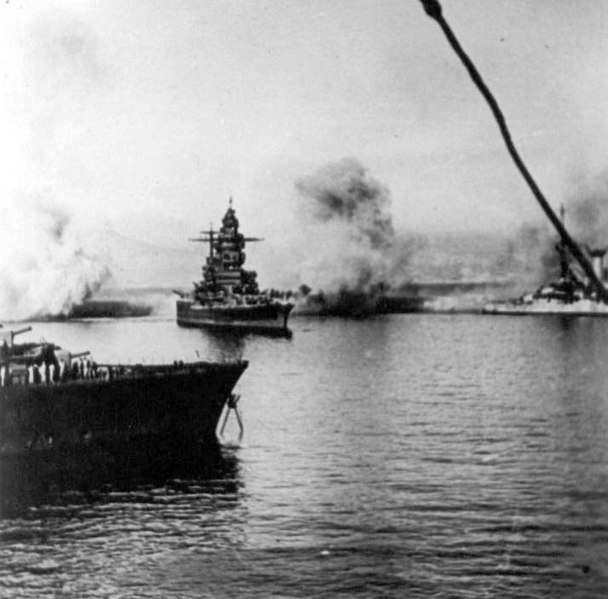
A new communication by Morse is then given from the Hood to Admiral Gensoul, indicating the postponement at 16:30 of the ultimatum, and last deadline. As the British delegation left the Dunkirk at 4:25 pm, 5 min. before expiration, a boat carrying a counterproposal by Gensoul was en route for the Hood. But this was too late. Before it arrived, the admiral opened fire at 16:53.
This was not by any stretch of imagination a “battle” as later claimed in the press, which further scandalized the whole of the French, including De Gaulle, and more a summary execution: The French ships were moored perpendicularly to the harbor, turned inward, so they can’t really defend themselves.
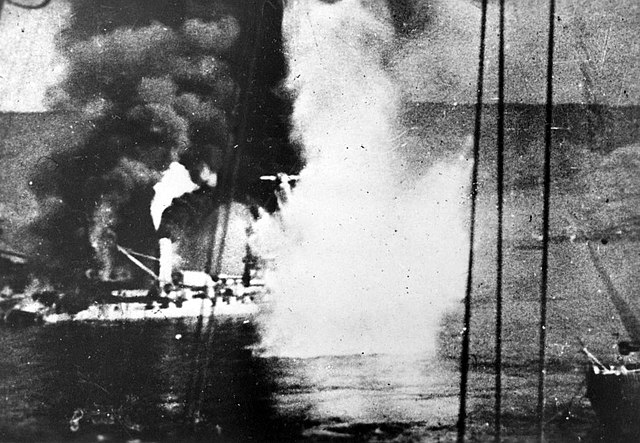
Bretagne is burning
In fact, the two battle cruisers Dunkirk and Strasbourg had all their forward artillery pointing to the shore. In the same way, batteries were mostly turned inwards, to face a possible Italian assault. However they soon turned to the sea and framed the HMS Foxhound, which was obligated to leave fast. The Hood, Valiant and Resolution rained down each eight 16-in rounds every minute, a total of 24 rounds per salvo.
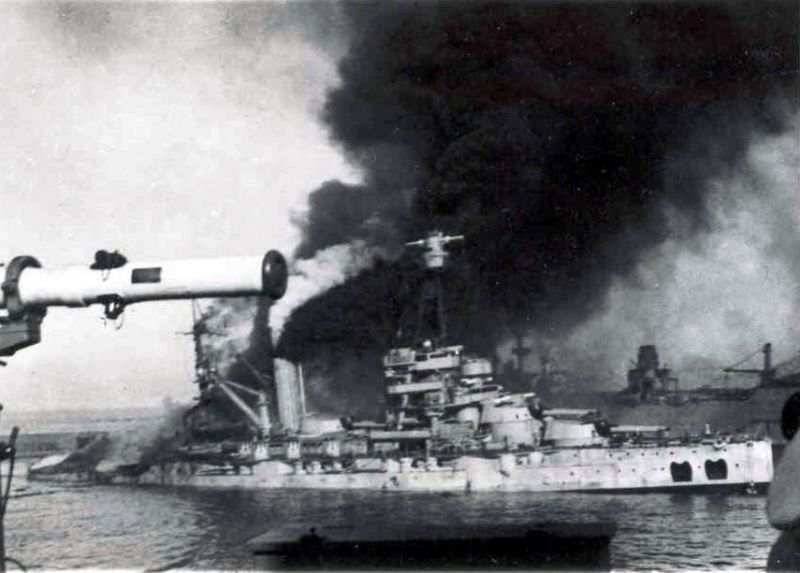
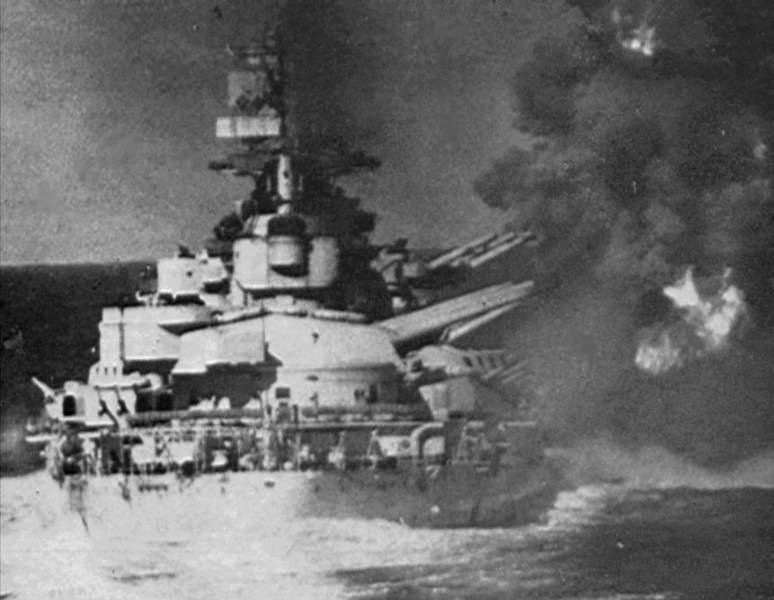
Each salvo raised immense sprays of water, nearly a hundred yards high, falling back with a growl. It was soon apocalypse: Dunkirk was hit on her forward deck, a turret was blown away while the main electric generator and hydraulic system were damaged. The hull was pierced and she took water from all sides. Her commander, to prevent her from sinking decided to make her go straight ahead at full power to beach her. In four minutes the great warship was a steaming wreck with her stern drowned beneath meters of water and her stern raised above the beach.
But the worst was yet to come: The battleship Bretagne, hit the first at 13,000 meters suddenly rose as if by the hand of a titan: Her ammo storages had been reached by a shell. A huge column of flames and mushroom soon replaced her central section. The hull was broken in two, and what was left of the ship capsized and sank quickly, taking 1000 men with her. Provence, which had enough steam, could steam away and clear the harbor, and opening fire on the British squadron as she left.
Her salvo near-missed the Hood which responded with a hit on her 340 mm turret, burning her ammunition store below that was immediately drawn to avoid an explosion. The hull was pierced and the engine compartment was getting water from all sides. She went beaching on the other side of the harbor. The destroyer Mogador saw her stern shredded by a hit when she was trying to get out of the harbor. The whole stern section blew up and she was towed to the bottom of the harbor. Other ships, mainly light torpedo boats, were also struck to death. Only Strasbourg, whose trimmers had done the impossible, was able to escape at sea unharmed.
Mogador’s stern is blasted
Strasbourg’s commander cleverly maneuvered behind the Bretagne burning, hidden from British spotters. Miraculously, she passed between the wrecks on fire, swung at the exit between mines at full speed. This was a sailor’s maneuver that even forced the admiration of the British. He managed, with some destroyers, to reach Toulon and Somerville, who was criticized in this respect, gave up following him and finishing him off.
When the cannons went silent, the harbor of seas-el-Kebir gave the awful sight of a field of wrecks burning in huge black smoke. In the midst of the debris, there were tiny white bodies, the dead and the living, swimming back to the beach. What was the spearhead of the French Atlantic fleet was no longer. Still remained the Richelieu in Dakar and Jean Bart, uncompleted in Casablanca. As De Gaulle, who planned a time of his exile in Canada, said, “it was in our hopes, a formidable axe blow”.
Operation Catapult in color
The consequences of the intransigence of the “old lion”, a lack of communication and perhaps arrogance (or another motivation?) on the part of French officers, falling mostly on Gensoul, led to this considerable drama. While the first consequence was to break the remnants of diplomatic relations – already very tenuous – between France and the United Kingdom, this led a large part of the French to be defiant towards the ally of the day before, as traduced by the sytringer resistance of Vichy territories (like at Dakar) to invasion.
Propaganda of the axis received a gift which Goebbels would exploit to the full, almost obtaining the Vichy government from open collaboration to a frank alliance of fact. Subsequently, on many occasions as said before, the French remaining loyal to Vichy showed fierce resistance. The only immediate follow-up of the British attack was an half-hearted raid of French bombers on Gibraltar, without consequences. However in Dakar, the fierce resistance to the R and Free French was fed by “souvenez-vous de Mers-el-Kebir” (Remember…) and this pushed to a near-civil war between Free France and Vichy France, which the most extremist faction grew in power over time, leading to the dreadful Milice and active hunting of resistance movements by the French themselves.
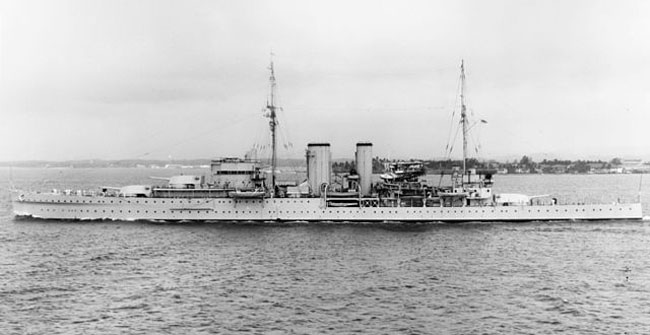
Battle of Calabria/Punta Stilo (9 july 1940)
While the Battle of Britain was raging, the eyes of the world turned to the Mediterranean where Le Duce began a series of campaigns designed both to prove the capabilities of the Italian army against the brilliant success of the Wehrmacht, to annex the Albania and Greece, and was preparing in North Africa, from Libya and Eritrea to start an offensive to eventually seize Egypt and the Suez Canal, depriving Great Britain of this access. vital to his colonial empire to the east. It was in order to guarantee the supply of its armies in Libya to prepare these offensives that the Italian Navy began its operations.
The French Navy is now out of the game due to the armistice and neutralization attacks by the British navy at Mers-el-Kebir, therefore the Royal Navy and the Regia marina were found face to face. In this long duel which was to be concluded in November 1943, the first meeting took place on July 9, 1940, off Punta Stilo, also known as the Battle of Calabria, conducted off the southernmost cape of the Italian “boot”.
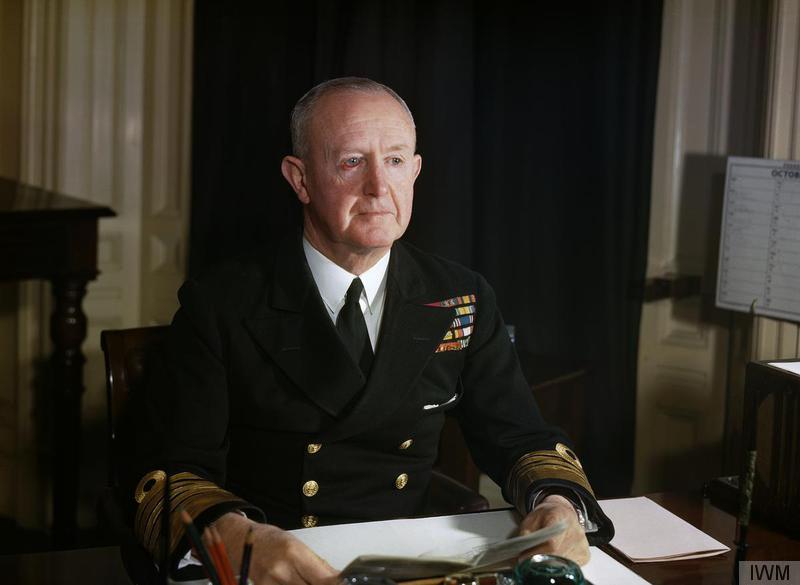
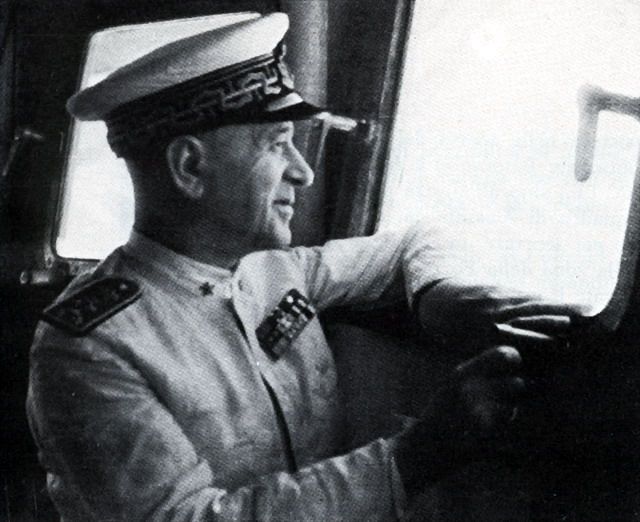
Admiral Andrew Cunningham
At that time, the Royal Navy had in the Mediterranean her main fleet based in Gibraltar, locking the passage to the Atlantic, and a squadron in Alexandria, protecting the Suez canal, unique way to the Indian Ocean via the Red Sea. A third lock was placed in southern Italy, at Malta, with the naval base at Valletta.
The Italians, however, had the numerical and technical advantage, the British had indeed relegated for the fleet of the Mediterranean their battleships veterans Queen Elisabeth class (QE, Valiant, Barham), Malaya and Warspite being assigned to the home fleet as well as the most modern of its ships, the two Nelson, the battle cruisers, King George V, and the bulk of the battleships of the Resolution class. Only master card in the hands of Admiral Cunningham, its aircraft carriers, which lacked Italy. The latter had a lot of bases around Italy but no coordination between the navy and the air force.
At the beginning of this first encounter, HMS Warspite, after her exploits in Norway, had just been sent to reinforce the Mediterranean Squadron, as well as Malaya and Royal Sovereign. Cunningham could count on six battleships to counter the two Littorio and four Guilio Cesare and Duilio. He also had HMS Illustrious, HMS Formidable, HMS Eagle, HMS Furious in backup. The prologue of this battle will take place in Naples on July 6, because of a convoy to Benghazi made of four cargos escorted by 8 destroyers and 4 TBs. Tripoli was fabricated as a fake destination. The British admiral sent a convoy intended to revive Malta, from Alexandria.
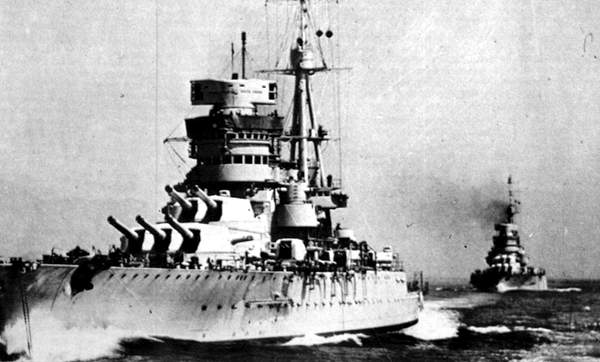
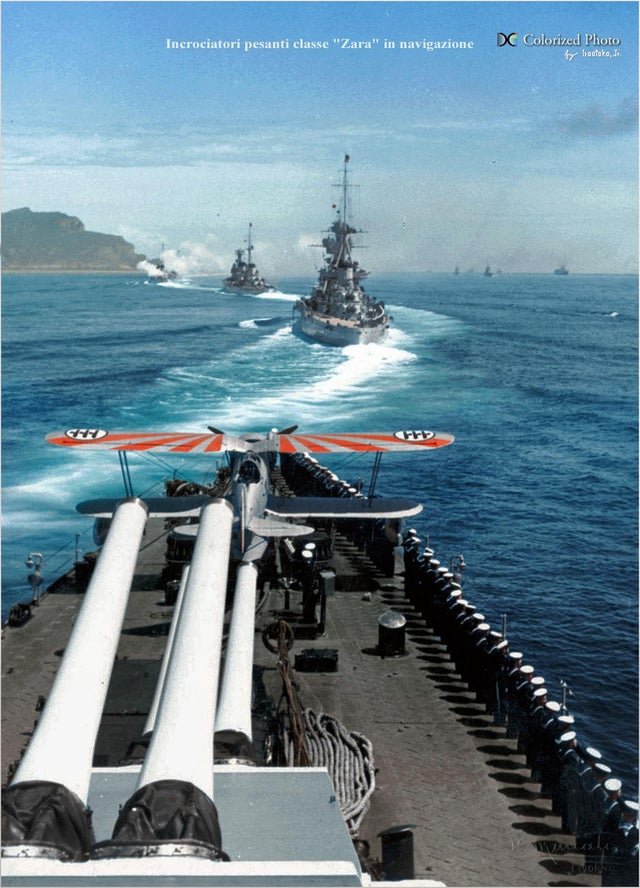
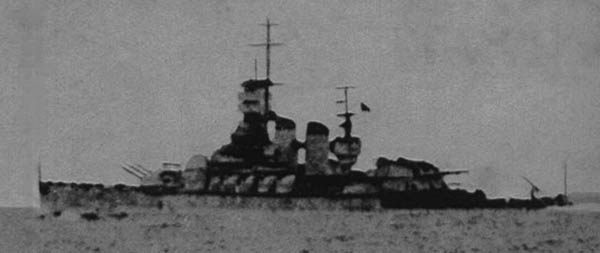
The Italians deployed the bulk of the Italian fleet, a force comprising 6 heavy cruisers, the four Zara and the Trento et Bolzano, 12 destroyers, sent from Tarente and preceding 35 km off the convoy. Behund it followed the Guilio Cesare and Conte di Cavour, 8 light cruisers such as the Duca d’Aosta, Eugenio di Savoia, Attendolo, Montecuccoli, Barbiano, Giussano, Duca degli Abruzzi, Garibaldi, and 13 destroyers. The two squadrons were at the orders of vice-admiral Inigo Campioni joined and converged towards the convoy.
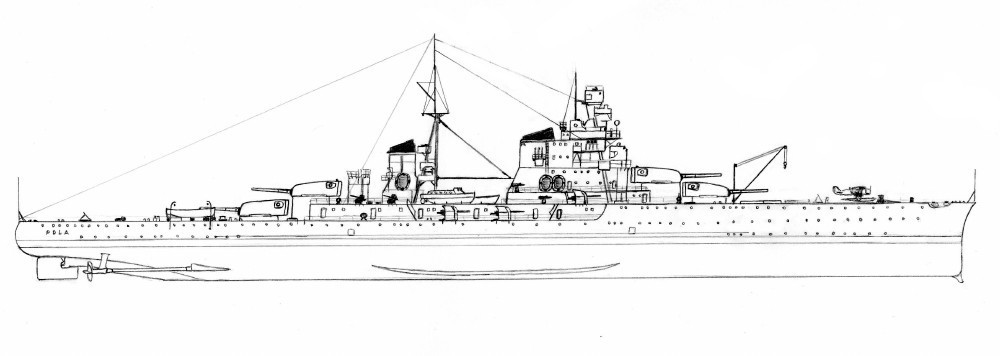
The Cruiser pola
In addition, the first convoy will be separated into two groups of differing speeds (9 & 13 knots) accompanied by three ships, five light cruisers, one destroyer, the HMS Warspite and 5 destroyers on the other. Alexandria fleet with the Malaya and Royal Sovereign armored carriers, bringing you Eagle planes, and 10 destroyers. Dans nuit du 8 au 9, from Italiens destroyers intercepting a message from the RN I planned to intercept the large fleet of Calabria.
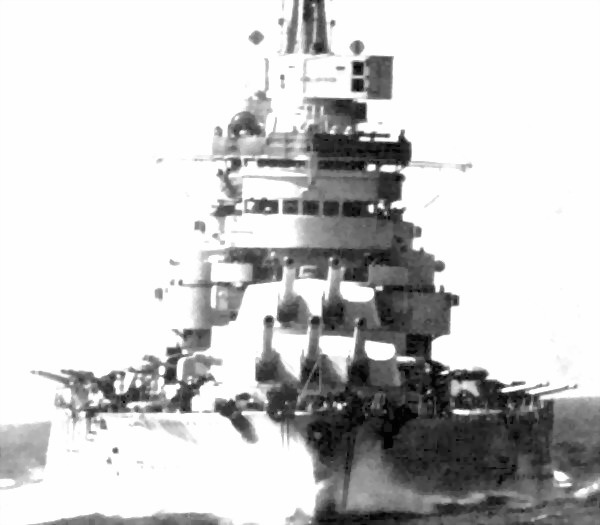
Battleship Conte di Cavour
Three destroyers and cruisers removed from the formation went to supply and solve engine issue, the squadron receiving extra destroyers from Tarente instead. The first British convoy was attacked by a gruppo of Sparviero bombers and cruiser HMS Gloucester was badly hit, deprived of any targeting capacity. At this stage, Italian cruisers had the advantage.
On the morning of 9 July, at about 9 o’clock, Cunningham’s leading squadron, including the Warspite and destroyers, was now only 90 miles from the Italian fleet. He decided to slow his pace to wait for the second convoy to be better defended. At 1 pm, Fairey Swordfish of HMS Eagle were in range, and launched an attack against the Italian cruisers, but missed. At 15:15, the two fleets were in visual contact and arrived within firing range.
Admiral Inigo Campioni
The Warspite had been joined by the cruisers that formed a forward screen. The three battleships were far apart but the cruisers were much close close, and an artillery duel began at 21,500 meters, which seemed to turn quickly to the advantage of the Italians whose rangefinders were more accurate. But the better experience of British gunners made the difference and quickly, they could increase their rate of fire.
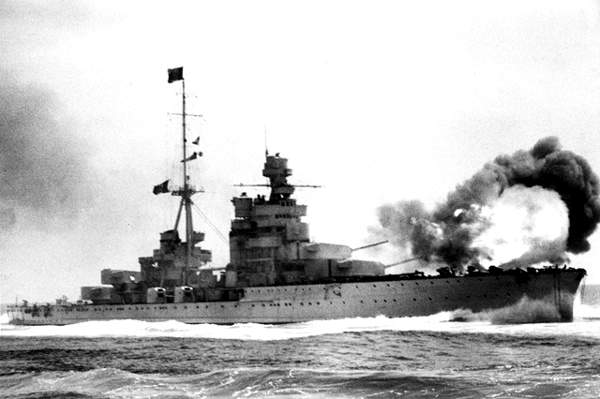
The battleship Warspite, at the thickest of the action during the battle (here in the Indian Ocean by 1942)
Italian fire managed to close very fast on the cruisers of Admiral John Tovey, who decided in agreement with Cunningham on HMS Warspite, to break off from the fight, right after Garibaldi hit HMS Neptune. At 15:30, cruisers had cleared, giving the hand to the battleships.
Warspite started with the Barbiano and Giussano, but failed to score a hit, as they were too short. Cuningham stopped the Warspite completely in order to give him time to be joined by HMS Malaya, whereas HMS Royal Sovereign was still lagging far behind. Admiral Campioni withdrew his cruisers and advanced his battleships to start an artillery duel at 26,500 meters.
But only Giulio Cesare opened fire at first, Cavour being used as an observer according to artillery adjustment principle drawn from the lessons of the Battle of Jutland, when several ships framed the same target, one needed to determine to which belong the watery plumes. It was finally directed against the Cavour while Cesare concentrated on Warspite. HMS Hereward, a destroyer escorting the Warspite, was severely “shaken” by a long impact of the Cesare. The four heavy Zara-class Italian cruisers then began to fire on Warspite, but Campioni ordered them to retreat with the return of Tovey’s cruisers.

The battlehip Guilio Cesare is firing, photo taken from the Cavour, the observer battleship
The fight turned into a tight duel between Warspite and Cesare. The latter almost managed to hit the warspite, her last salvo flooding her bridges and shaking her hull. But the latter responded with a direct impact at 24,000 meter range, hittin the 37 mm ammo storage. The fire drove the smoke back into the port boiler compartment, forcing it to evacuate. These closed boilers cut down the power available to the ship, which speed fell to 18 knots.
Now an easier target, with HMS Malaya and Sovereign dangerously closing in, Cavour’s captain asked nearby destroyers for help. They launched a barrage of smoke to allow the battleship to slip away while Warspite was still waiting for Malaya to catch up. The latter was now very well placed to seriously hit the Cesare, so his new stop seemed providential to the Italians.

The Guilio Cesare during the battle
When forces regrouped, the Italian fleet deployed its cruisers against those of the British. At 15:58, Italian cruiser line opened fire, Trento targeting HMS Liverpool, but at 16:07, Bolzano was hit thrice with medium caliber (6-in), one damaging the rudder. The destroyer Alfieri was also near-missed and badly shaken. Nearby, Guilio Cesare’s chief mechanics announced at that time that they have repaired the two damaged boilers, allowing the ship to reach 22 knots again.
However, Campioni considering that fighting a battle against three battleships and an aircraft carrier with the unique Conte di Cavour was a too much risk to contemplate, and her decided to retreat the fleet towards Messina, ordering a final torpedo barrage from destroyers to cover it. The British did the same, but no impact was noted due to the distance. At around 16:40, a raid of 126 aircraft failed to score any hit. The battle ended at 16:55, but the next morning, a Swordfish raid from the Eagle sank the destroyer Leone.
Zara firing during the battle
Thus ended the first naval battle between the Royal British Navy and the Royal Italian Navy. Despite considerable resources (almost all the Allied and Italian forces present in the Mediteranean participated), the only loss on the aftermath of the battle was an Italian destroyer. A very thin result for the Royal Navy, but a good test for the regia marina, although other events (fatal for Italy) would occur. There were other approaches and isolated battles before the big battle of Matapan in March 1941.
Heavy damage on the Cesare after the battle
Taranto raid (11-12 nov. 1940)
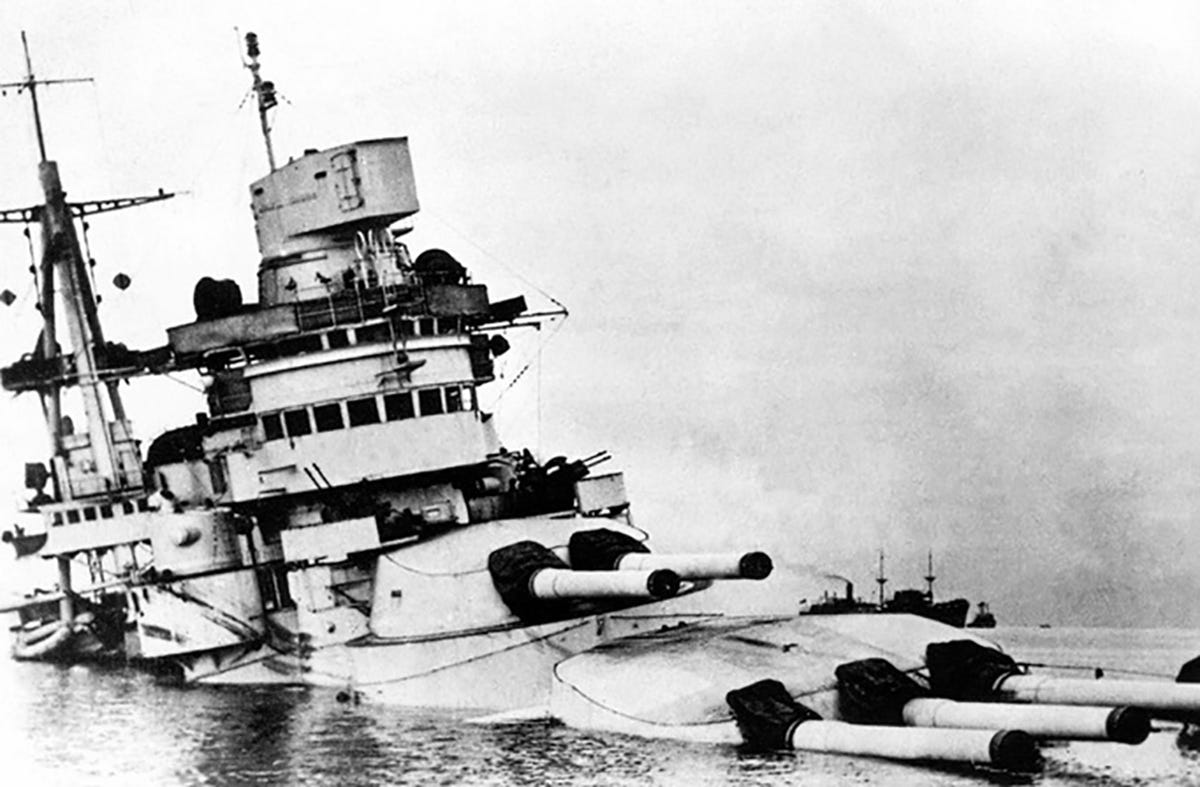
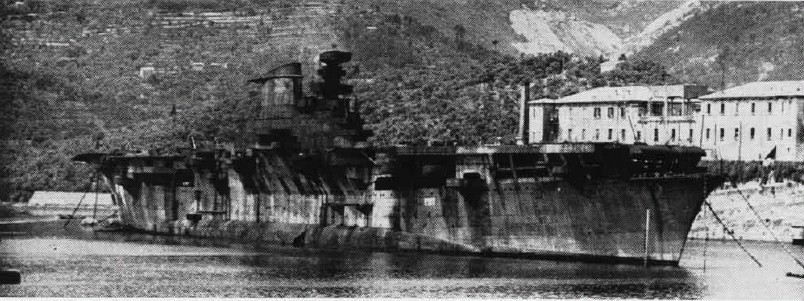
Taranto after the storm: The Conte di Cavour semi submerged. The harbor shallows prevented her to sink completely but she was inactive until the Italian Capitulation.
If the Second World War is fundamentally different from the first, in terms of its geographical scope as well as its dynamics and its industrial massiveness, tactically and strategically it saw the aircraft become a key element: Air attacks were thus conducted with formidable consequences on the various theaters of operation. So it goes from Pearl Harbor December 7, 1941. But this attack was inspired in reality by another, much more modest, conducted with all the audacity required by a Royal Navy ready to do anything to ensure the domination of the Meditannean.
Perhaps the most amazing fact was the disproportionate forces tht effectively hit compared to the result: 6 battleships, 16 cruisers, and 13 destroyers against only 4 cruisers and 5 destroyers on the British side, as well as the old aircraft carrier HMS Glorious and also old torpedo-boats. This is the nature of the tactics used with all the necessary nerve, which would make all the difference and revolutionize the naval war…
Winston Churchill’s resolution along the admiralty were known after Mers-el-Kebir. The naval base of Taranto was a thorn in the British side, menacing communication lines between Gibraltar and Alexandria, and Malta in particular. Maintenaing safe convoys supplying Egypt, just when north african campaign started, was crucial. In November 1940, if Italy suffered setbacks in Greece, it still seemed in a strong position in Libya, and Mussilini’s forces just started a campaign with great optimism. Taranto was in 1940 the main Italian naval base. There, were based all the main warships of the Regia Marina, starting with battleships and the majority of cruisers. Naples and Genoa were mainly arsenals that were bombed by British ships, La Spezia being the second largest naval base and the main Italian shipyard.

The harbor of Taranto was the Pearl Harbour of the Italian Navy, with a roomy, ideally suited area, large fuel tanks, and protected by AA. This was therefore a target of choice, with a formidable strike force composed at that time of 6 battleships, 7 heavy, 2 light cruisers, and 8 destroyers. The British admiralty drew up plans for a first surprise attack called Operation Judgment. It was supposed to be carried out by the HMS Eagle and HMS Illustrious aircraft. The latter was brand new originally for the trafalgar day, October 21, but in the meantime the Eagle was damaged, and it was decided to assign his surviving devices to the Illustrious who would lead the attack alone. The latter deployed four squadrons of swordfish biplanes and was escorted by 2 heavy cruisers, 2 light cruisers and 4 destroyers, under the command of Andrew Cunningham. It was preceded by twin-engine Martin Maryland reconnaissance flights from Malta, and a Short Sunderland flight the night before the attack.
The plane was spotted by the Italians, but they did not followed suit. That evening, the naval squadron had assembled a few cables from the Greek island of Cephalonia, 170 miles from the Italian base. At 21:00, a first raid of 12 Swordfish arrived on site, followed at 22:00 of 9 others planes. The first, half equipped with torpedoes and the other by bombs, plunged above the harbor at 22:58. These two waves had separated targets, the first attacking the great outer port, and the other half the smaller inner port. The first aircraft marked their targets with flares (which helped the gunners of the Italian AA artillery to down two Swordfish). The attack was carried out with an admirable precision – torpedo planes really arrived at the water’s edge in order to be sure that their gear, modified for the occasion, did not “bounced” or exploded by hitting the bottom which was only 12 meters, which also prevented the Italian ships from sinking completely.
“Dangerous Missions”, You Tube – The Taranto raid
The Littorio, spearhead of the fleet, received three torpedoes, the Caio Duilio and the Conte de Cavour one each. Guilio Cesare was still in repair, withdrawn after the battle of Calabria. The second raid put several bombs on the target, particularly damaging a heavy Italian cruiser. In the end, the balance of the raid was relatively satisfactory: True, the Italian fleet had been deprived for several months of half of its battleships (Littorio (fout months), Duilio (six months), while the cavour was never fully repaired and remained inactive until the armistice of 1943. The fact that this attack was carried out with the torpedoes helped in part to save human lives: Indeed, the Italians had to deplore only 59 dead, mostly prisoners of submerged compartments, and 600 wounded. The British had only 4 losses, 2 airmen killed and two captured. The raid of Pearl Harbor carried out a little later mixed also bombers dive, altitude and torpedo-bombers: the human toll was much heavier.
Regia Marina was then forced to exile to the port of La Spezia further north, and therefore no longer directly threatened the British convoys to the east. The ships needed to mch time to heat up and speed up on the area, the convoys most often were away. Moreover, for each subsequent raid, the fleet was obliged to pass in front of Malta, within the reach of British aviation, always aware of her actions. It can not be denied what was Cunningham’s belief that the Fleet Arm’s “Hour of Fame”, the poor relative of the British Air Force. The coup allowed a frank reinforcement of this corp by many pilots afterwards. On the verge, it was indeed necessary to launch at night such a raid, and it was daring enough to have been made by obsolete planes flying at two hundred kilometers-hours. The Taranto Raid did not meant the end of activities for the Italian fleet, which was going to suffer its most serious setback at Matapan.

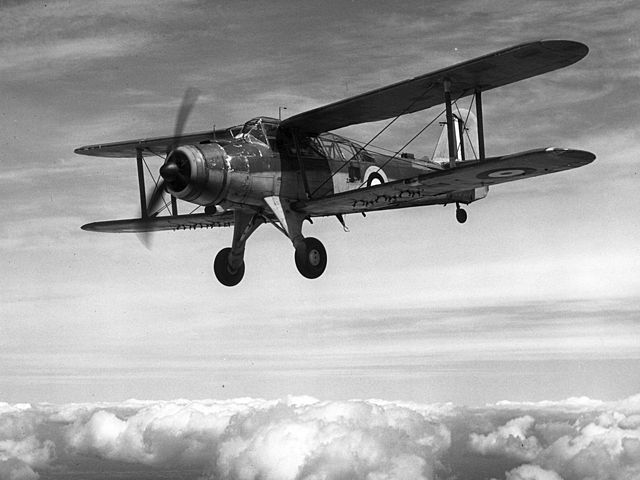
Fairey Swordfish
The hero of the Taranto raid, Fairey Swordfish (Image Wikipedia). The Japanese Admiralty, then influenced by Admiral Yamamoto, indefatigable promoter of naval aviation, was going to draw all the lessons of this attack that he would literally plagiarize, with a magnitude increased ten years later…
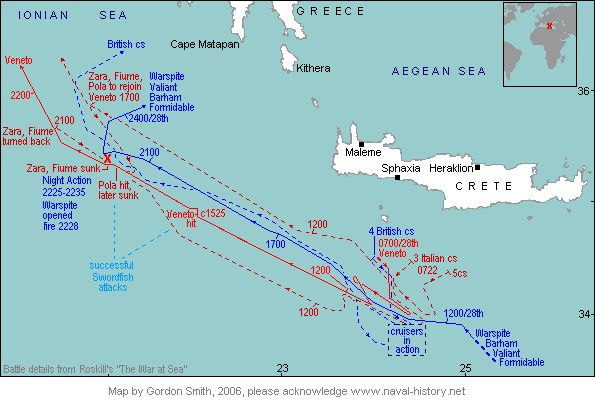
Cape Matapan (27-28 mars 1941)
Context
Undoubtedly the most resounding British victory in the Mediterranean, the battle of Cape Matapan (actually fought off the south of the Peloponnese ridge), was another very hard blow dealt to Regia marina after the attack of Taranto.
Following this attack, the Italian Fleet one had lost the use of three battleships for some time, especially, had to withdraw the bulk of its forces from this forward base further north and dispersing them between different ports. The present battle takes place just at the end of the Balkan campaign. The British armies just re-embarked and has been not disturbed by the Italian fleet.
The Italian fleet in manoeuvers, circa 1939 (colorized by Irootoko JR)
The next move was initially the attempt developed by the Comando Supremo, in consultation with German forces, to attack troopsships between Egypt and Greece. After a long development, the plan was finalized and launched on March 15 under the command of Admiral Angelo Iachino.
Preparations
 A long preparation presided over it and the operation was to be a double offensive carried out both north and south of Crete, starting from four ports (Messina, Naples, Taranto and Brindisi.). It included the battleship Vittorio Veneto, three heavy cruisers of the Zara class, and also the heavy cruisers Bolzano, Trento and Trieste, plus the two light cruisers of the Duca degli Abruzzi class, and nine destroyers distributed in four squadrons commanded by admiral Angelo Iachino, Commodore Legnani, and the admirals Sansonetti and Cattaneo respectively. Quite an amazing deployment of forces.
The difficulty came from the fact that the British forces established air bases in Crete, and air support urged by Iachino was theoretical. In reality there was no coordination between the fleet and the air cover, smething tat will plague operations of the Italians in the whole Mediterranean campaign.
Meanwhile, the Luftwaffe’s 10th Corps will bombard Malta while the Regia Aeronautica (Italian air force) as planned would take care of Crete. In addition, submarines have been placed under observation and used for reconnaissance sweeps, following one another at regular intervals over a wide front. They were deployed more particularly towards Suda Bay, the only real gathering place in southern Crete.
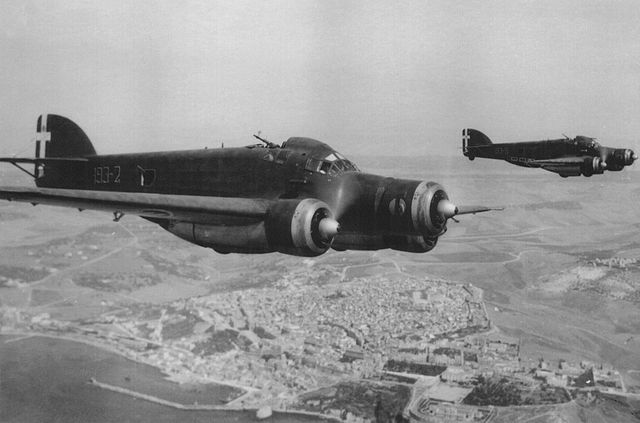
Savoia Marchetti SM.79 over Sciacca. The absence of coordination navy/air force proved disastrous for the Italians and later motivated the conversion of two recent liners into aircraft carriers.
The Italian forces set sail on March 27. Weather conditions were bad: The sea was heavy, visibility reduced, but the different groups headed east. In Alexandria, at the Royal Navy HQ, Admiral Cunningham closely followed these moves thanks to his spies and intelligence services, which interpreted the reconnaissance missions of the axis and deciphered coded messages.
The battle
Around noon, a Short Sunderland saw the Italian fleet approaching southern Greece, and immediately Cunningham gave the order to Force B under the command of Admiral Pridham-Wippell, to set sail from Piraeus and stand behind the island of Gavdos (southwest of crete) and be ready in March 28.
For his part Cunningham fooled the naval attaché of Japan, who spied the British in Alexandria on behalf of the axis, that he was to leave to rest, taking his golf clubs with him when in fact would later later embark during the night and set sail with the bulk of the British naval forces in the east.
The next day around 2 p.m., Iachino was aware of the detection of his fleet after having intercepting a message from the Sunderland after spotting them. As he feared to see himself outnumbered, he ordered his forces to cancel the operation the north of Crete, and to regroup in the south. At dawn, Vittorio Veneto’s reconnaissance planes spotted Force B (Pridham-Wippell) east of Gavdos. As this one included only four cruisers (Ajax, Gloucester, Orion, Perth) and four destroyers, he knew himself in a position of strength and lashed towards the latter. As expected, Pridham-Whipell, after a brief duel from 7.45 am until 8.30 am, withdrew towards the main body of Cunningham’s forces. The classic manoeuver.
Cunningham from his part was at the head of three battleships, the Warspite, Valiant and Barham, followed by the aircraft carrier HMS Formidable and 9 destroyers. Although having a large numerical superiority, the Italians of Admiral Sansonetti’s squadron (the three cruisers Bolzano, Trento and Trieste) failed spot British convoy as Visibility was so poor.
Sansonetti decided to abandon the chase and turned around to return to Vittorio Veneto (Iachino). Pridham-Wippell also turned around and kept in touch with the Italians. This was the time. Sansonetti’s cruisers joined Veneto at 10 a.m. and together opened fire again on British cruisers, who started a second manieuver which almost turned into a rout: The large calibers of the Veneto closely framed them, and those of the heavy cruisers too. The light 6-in guns of the cruisers could not compete and they only survived by deployming an intense smoke curtain and by skillful maneuvers.
It was now around 11:30 am, and the Italians gave up on it and headed north-west. Suddendly, rushing from the sky, a group of Fairey Albacore torpedo bombers from HMS Formidable attacked ihis ships, but without scoring a single torpedo hit.
Iachino felt his forces were now vulnerable especially the vitorrio, now the last operational battleship, and the absence of advanced air cover, decided to withdrew. Shortly after, Force B joined the Cunningham fleet and informed them of the composition of the Italian squadron. His old battleships being too slow to catch up, he had the Fleet air arm ordered to slow down the Italians and renew attacks.
At 2:00 p.m. bombers from Crete bombed the Italians at high altitude, but without results. The latter headed to Taranto, hoping for a rapid intervention by the Regia Aeronautica meanwhile. A new attack on HMS Formidale occurred at 3:20 p.m., practically at the same time as high-altitude planes just captured the attention of the AA crew. Attacking from just abive waves, they rushed almost without being spotted and socred a hit on the Vittorio Veneto, at the port propeller.
This caused a very serious damage: The bar was now blocked, and 4,000 tons of sea water rushed into the engine rooms whose compartments were evacuated. Her engines were stopped, and the Veneto was now dead in the water. Iachino’s worst nightmares were not realized. Mechanic teams reushed into action and will then do the impossible to allow the ship to leave before Cunningham arrival: Their struggled would take half an hour. This ws the Italian heroics of the day, showing that well trained maintenance and emergency tems can save the day, like at Midway.
Vittorio Veneto started painfully to reach 16 and then 20 knots, a miracle which was enough to outrun the dangerousely close British battleships. To save his flagship, Iachino had her framed and protected by a AAA curtain with all his heavy cruisers. These, opening fire and blinding British pilots of the third wave with their projectors at full power, almost routed them, shooting down one in the process. This was the only loss of the battle, showing that Italian AA was certainly not the best at that time. Nevertheless, one of these planes of the third wave scored a hit on the Pola. This was the hinge of the battle, the moment of truth. It was then that the chief admiral made an unfortunate decision.
Ignoring that the bulk of Cunningham’s forces are approaching (the Italians had no radar, unlike the Rpyal Navy – this will weigh heavily in the balance of the battle), Iachino ordered Zara and Fiume to protect and tow the Pola to safety back to Taranto while he plan to strengthens its forces and return. At dusk, the Pola is effectively joined by the Zara, at the head of the line, followed by the Fiume and the destroyers, at low speed.
At 10:25 p.m., Cunningham, closely monitoring the Italian moves by radar, approaches by night, all lights off. The Italians ignore everything about the proximity of the British battleships until they are only at 3,500 meters. By then, order is given to turn the searchlights at full power on the Italians. Time stops for a second; And the batte line then open a deadly fire: In a few minutes, the three heavy cruisers are no more than floating torches, badly hammered by 15-in HE shells. This is a harrowing sight.
The Fiume is wrecked by explosions, list heavily, and sinks in a few minutes, carrying with her, almost the entire crew. Zara is widly blazing but refuses to sink, and the Pola, also burning from stern to stem, is undoubtedly the least “battered” of the three. On board there total panic. Completely bewildering by what just happen, the crew did no longer obeys their officers. Some jumps to the water, others (as reported later the the British boarding party) is drinking alcohol and behave like the end of the world was near. The destroyer Jervis, aking advantage of this situation indeed approach the Pola without being worried and land a company of infantry to take the officers prisoners and possession of the ship in a few minutes.
The crew of Pola, Ionian Sea, 1940.
Epilogue
The battle of Cape Matapan is perhaps one of the best remembered naval battle of the Mediterranean. It is showing grave deficiencies in the Regia Marina, both the lack of radar, and absence of coordinated air cover, which mussolini himself had to admit. The results of this last act of the battle are quite serious for the Italians who lose three heavy cruisers, considered the best in the whole fleet, along with two destroyers, the Oriani and the Carducci. The last operational Italian battleship after the disaster at Taranto, the Vittorio Veneto, is also immobilized for long repairs.
The Zara went on to burn, listing on her the port side up to the next day. She will be torpedoed by the destroyers of the 14th division (Captain Mack) while Pola was towed to Alexandria as a war prize, something quite unique in WW2, and a supreme humiliation for Mussolini. The British press went wild about this success and Churchill had at least something to positive to present to the house of commons.
But Cunningham was criticized to quit the area back to Alexandria, perhaps too soon, because of the still latent threat of Axis aviation. The Pola was torpedoed and the survivors picked up by the hospital ship Gradisca. The battle discouraged the Italians from other large-scale actions for long unless they can make better use of naval aviation or developing or adopting a radar (via Germany). The lesson was digested enough by Mussolini that he returned on his previous opposition to built an aircraft carrier, boasting Italy was itself the best, unsinkable carrier around. Order was given to start the reconversion of two liners, the Aquila and Sparviero, into aircraft carriers, while a commission was charged to bring from Germany engineers and equipment in order to equip the fleet with radars.
Battle of Kerkenna (16 april 1941)
This apparently less important naval commitment was nevertheless a perfect illustration of the purpose of naval battles in the Mediterranean between 1940 and 1943: To allow the supply of the troops of the two camps engaged in Africa. Kerkenna is a series of islands surrounded by shoals on the Tunisian coast. A squadron of British destroyers, without any other more important building, is urgently sent to intercept an Italian convoy of 5 freighters escorted by 3 Italian destroyers, bound for the Italo-German forces which besiege Tobruk.
The convoy includes the German freighters Aegina, Iserlohn, Adana, Arta, and the Italian freighter Sabaudia, escorted by the Tarigo, the Lampo and the Baleno, all under the command of Lieutenant Da Cristofaro. Commander Mack’s 14th British squadron from Malta included the Janus, Jervis, Mohawk and Nubian. These last two were of the “tribal” type, very powerful. This very simple interception action, also called the battle of Sfax, was broken down into two stages.

Italian destroyer Lampo
At first, the British destroyers spotted by radar around 1:00 am the escorts of the convoys and opened fire from a good distance (The Nubian and the Mohawk in particular had 8 long-range 140 mm guns, completely outclassing the Italian artillery). The artillery duel turns very quickly to the disadvantage of the Italians, who take several impacts, but the Luca Tarigo will have time to get close to its attackers enough to release a line of torpedoes, before being permanently disabled.
Regia Marina (Cdv. Mack LdV Da Cristofaro)
 3 Destroyers
Royal navy (Andrew Cunningham)
 4 Destroyers
 5 Cargos
The British destroyers maneuvered to avoid them, but the Mohawk was struck and badly hit by two torpedoes. Helisted quickly, but without sinking, he was no longer able to make his way to Malta. Second, the British destroyers meticulously torpedoed the Axis freighters, sending them all to the bottom. After the battle, the destroyers saved the crews, but the Mohawk, which had lost 41 men in the double impact, was scuttled before sinking. In the end the action was successful on the British side. The convoy was a precious help for Rommel’s troops, 3,500 tons of material, 300 vehicles and 1,800 men (out of 3000) lost, fuel, food, reinforcements which were sorely lacking.
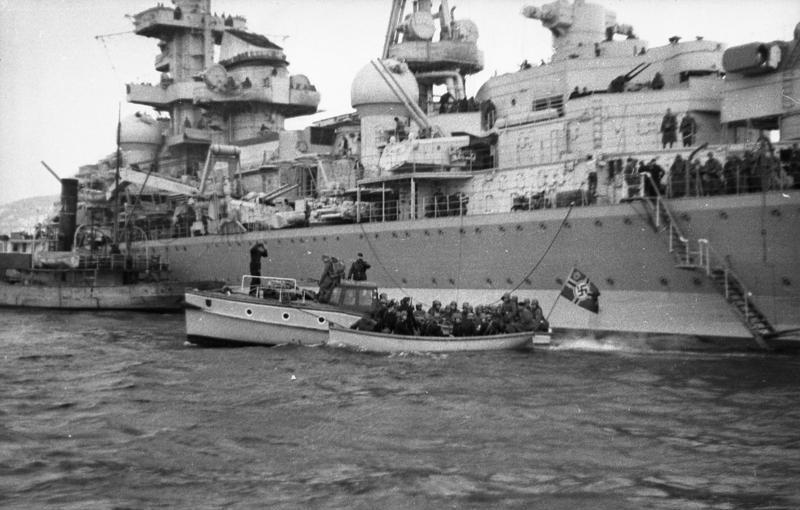
Bismarck raid (18-27 may 1941)
The Bismarck Affair (May 18-27, 1941): The most famous photo of the most famous battleship: The titanic Bismarck opening fire on the unfortunate Hood.
“Sink the Bismarck”. By this peremptory order of Winston Churchill, which gave rise to a film with the identical title, half of the Royal Navy was dispatched with all business ceasing – including convoys from the Atlantic – from Scotland, from the Firth of Forth, but also from the east coast of England, or even Gibraltar. All these forces against one ship: The German battleship Bismarck. This means that the threat he represented for the “old lion”, well informed by his naval attachés.
It all began with the project, within the Kriegsmarine staff under the patronage of Admiral Raeder, to provide Germany with a real battleship, since the blank check granted by Great Britain in 1936 , which at the time sought to appease the master of the Second Reich by allowing him to build a fleet with a tonnage representing 25% of the Royal Navy. Sweeping aside the Treaty of Versailles, in particular the ban on building ships over 10,000 tonnes, which a priori banned battleships, Hitler and Raeder set up a very ambitious program aimed at returning to the Germany the naval force it had in 1914, then the second largest in the world. But to get there, a long road was to be expected, and the plan was not to be fulfilled until the 1940s.
The first milestone in this plan, after the drafts represented by the Scharnhorst-class battle cruisers, were the four Bismarck-class battleships, of which only the first two were completed. They were put on hold in 1937 and, from the drawing board, a tonnage much higher than the 35,000 tonnes allowed by the Treaty of Washington, still in force, was envisaged. By artillery as by general architecture, the Bismarck and its twin the Tirpitz were only very improved and modernized copies of the Bayerns of 1917. By their speed, the range of their pieces, the precision of their telemetry devices coupled with their Ultra modern radars, all well served by an almost invulnerable protection, the two battleships were a new milestone in the matter.
When the Bismarck, which was launched in 1938, became known to the British, they inquired about the means to fight against such a ship. The Bismarck indeed proceeded from a new philosophy, developed in response to the poor manpower of the German navy. As much as the three Graf Spee-class pocket cruisers were designed to outclass any cruiser, the Bismarck was a ship of naval superiority, made to outclass any adversary, including the last fast battleships. Its aim was not in principle to be integrated into a line of combat with a view to a classic engagement, in line and in numbers against the English fleet, but to be able to operate as a privateer against enemy convoys, with the difference that ‘he could silence his escort without being worried. Against this building, in fact, the Royal Navy did not have battleships fast enough or equipped with an artillery with sufficient range to catch and destroy it. Only an attack by numbers, a real hunt with hounds, slowing it down by repeated air attacks – according to the classic tactics already successfully implemented in the Mediterranean – could overcome it.
However, on May 18, 1941, the battleship had successfully completed tests and shooting exercises, so far well protected in the Baltic. But now Hitler was counting on him to undermine the Atlantic convoys and define Operation Rheinübung. The Bismarck therefore sailed from Gdynia, bearing the mark of Admiral Lütjens, along with the heavy cruiser Prinz Eugen. As soon as it left Gdynia, the British were on the alert. On the news that the ship had been seen passing the Strait of Skaggerak, in the east of Denmark, closing the Baltic Sea, the RAF, the Coastal Command and the Fleet air Arm were put on high alert: It was primarily a question of maintain permanent contact with the German combat group. On May 20, in poor visibility, the two ships crossed the strait and headed for the port of Bergen, in the south-west of Norway.
Order of Battle:
Royal Navy (Admiral John Tovey, Vice-Admiral Holland)
 5 Battleships
 2 CVs
2 CVs
 6 cruisers
 8 destroyers
Kriegsmarine: (Admiral günther Lütjens)
 1 Battleship (Bismarck)
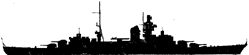 1 cruiser (Prinz Eugen)
The raiding party is spotted:
On May 21, the Bismarck and its escort were spotted in Bergen by the RAF. An Operation HQ is set up from London, and the order is given to the Scapa Flow fleet to deploy. The Home fleet is on the verge of war. To reach the Atlantic, four routes are possible considering the islands in the north of Scotland. John Tovey must be able to have the means to bar the passage to the German group with all the forces available. Immediately, we mobilize the battleships in full escort, and coming from Scapa flow are sent the Hood and the Prince of Wales, escorted by 6 destroyers, as well as the King Georges V, the aircraft carrier Victorious, the battle cruiser Repulse, the heavy cruisers Norfolk and Suffolk and 6 other destroyers, the latter patrolling the coast of Iceland. The first ships to leave are in the middle of the night at 12:52 am, the Prince of Wales, the Hood and 6 destroyers under the command of Vice-Admiral Holland.
The “Mighty Hood” was a hugely famous “old boy” around the world, who had never seen anything other than squadron drills since launch, while the Prince of Wales was the second fast battleship in the class. King Georges V, so new that its secondary turrets were not yet fully operational and its painting unfinished: It set off in disaster to the point that the civilian construction workers who were on board did not have time to disembark. All day on the 22nd, the reconnaissance follows one another. Finally, in the evening, at 8:00 p.m., a plane informed Tovey that the two German ships were no longer in Bergen. On the morning of May 23, Tovey’s squadron was complete with the King Georges V, the Repusle, and the Victorious.
Meanwhile, Bismarck and Prinz Eugen were on full power north-westward with a view to crossing north Iceland. At 12 o’clock, they had bypassed the island in the plain sea because of the English minefields on the coasts and descended towards the south and the convoy route. The weather was crystal clear, and the two buildings were followed by radar by Suffolk, which at 19:22 communicated its position. At 8:22 p.m., exactly one hour later, Norfolk in turn made contact. The Bismarck will then tack and open fire against Suffolk and the latter quickly evades, not being of size. He will continue his radar contact. Lütjens who suspects that his position is known and that the Royal Navy is mobilized against him wonders if it is better not to turn back, but being too committed, decides to continue his route south. On May 24, the shortest but most impressive battle of the war was to be fought off Iceland, the so-called “Danish Straits” battle.
Very early this morning, the fog had lifted. the sea was still rough, the ceiling low, but the visibility was much better. At 5:25 am, the Prinz Eugen’s hydrphones picked up the sound approaching two important buildings on the port side. At 5:37 am, at 35,000 a building first analyzed as a cruiser was seen. At 5:43 am, a second building, still taken for a heavy cruiser, was seen by the Prinz Eugen and the chief gunner consequently decided to charge his pieces with highly explosive shells. It was actually the group formed by the Hood and the Prince Of Wales, arriving at 28 knots. Vice-Admiral Holland knew the weaknesses of his flagship, poorly protected and equipped with parts of less range than those of Bismarck. As a result, he made the choice to approach the two German ships very quickly. However the British who saw the Prinz Eugen in front, the Bismarck being a mile behind, they believed it to be the German battleship.
The mistake was expected: The two ships had a very similar silhouette. When the mistake was cleared, the gunners were ordered to change targets, but only the Prince of Wales engaged the Bismarck. With 10 pieces of 343 mm he had the advantage of number but neither of range nor of caliber. At 5:52 am, the two English ships opened fire at 23,000 with their forward pieces only, due to their inadequate approach angle. However, from the first salvo, the POW (Prince of Wales) suffered from a mechanical problem on the N ° 1 quadruple turret and had to temporarily put it out of service. His ill-adjusted shots by inexperienced shooting officers fell too far from the Bismarck. For its part, the first two salvos of Hood fell too short aiming at Prinz Eugen. Meanwhile, the Bismarck gunnery officer repeatedly asked the bridge for permission to open fire, without a response.
The Prinz Eugen was still insufficient in range to respond. At 5:54 am, Vice-Admiral Holland had his ships orientated in parallel with those of the Germans to benefit from all their artillery. This enabled Bismarck telemetrists to identify Hood and Prince Of Wales and act accordingly. At 5:55 am, the Bismarck, followed by Prinz Eugen opened fire in their turn at 20,000 meters. At 5:56 a.m., the fifth salvo from the POW fell too long, but a direct impact was recorded on the next, aft of the Bismarck at the stern, leaving behind a trail of fuel oil while the Prinz Eugen recorded with its 203 mm hit the Hood at the rear masts, starting a big fire. The two German ships had hitherto focused their fire on the Hood but Lütjens quickly ordered Prinz Eugen to open fire on the POW, while Bismarck’s secondary artillery did the same, its main artillery still engaging the Hood. By 6 am, the distance had fallen to just 16,000 meters. The Prinz Eugen even fired three torpedoes abeam, to no avail.
It was then that the key event of the battle occurred: While the two English ships this time presented themselves almost perfectly in profile in order to engage their rear artillery, one or more 380 mm shells from the Bismarck penetrated the magazine at Hood’s rear ammunition. There followed a cataclysmic explosion from an incredible height (nearly 600 meters), a column of fire, smoke and debris which echoed in the distance and whose explosion made – according to their description – the German sailors waver. on the deck of the two ships. The tallest building in the world for almost 20 years, the pride of the Royal Navy, had split in two and was quickly sinking. Three survivors of the Hood were rescued three quarters of an hour later by the destroyer Electra and landed in Reykjavik.
On board the POW it was the consternation. Vice-Admiral Holland had perished with his ship, and the English battleship was deprived of the use of its front main turret. So when the guns of Bismarck turned against him, the affair seemed very badly started. The civilians embarked in spite of themselves on board the vessel were livid, terrified. The POW had tacked to pass behind the burning hull of the sinking Hood, carefully moving away from the German ships while responding with its 6 operational 343 mm guns. At 6:02 a.m., a shell from the Bismarck entered the POW bridge, killing all the deck officers except Commander Leach, who was miraculously saved. The German ships had approached the POW at only 14,000 meters and all their parts, 8 of 380, 8 of 203 and 6 of 152 mm and even 24 of 105 mm AA were spitting fire. Leach, came to his senses and immediately ordered a smokescreen to be sent and a retreat.
The brand new English battleship had then taken 4 impacts from the Bismarck and three from the Prinz Eugen and was in a very unfortunate position. Even the POW’s rear telemetry station was out of order, so the British battleship’s rear turret fire officer was firing without recording any results. His speed had fallen and Leach was already seeing himself caught up and destroyed when at 6:09 am the incredible happened: Lütjens decided to break off the fight and stop the pursuit. This unexpected respite allowed Leach to walk away with his building safe and sound. The latter will be off for long repairs and will experience a disastrous fate in the Far East in December. Lütjens continued on his way south-west. He informed the staff that he was going to join Saint-Nazaire to carry out repairs there, while Prince Eugen, who had not suffered any blow to the goal, would continue the mission and attack the convoys.
At 9:50 am, Captain Brinkmann of the Prinz Eugen received the order to pass on the back of the Bismarck to assess its fuel oil leak. However, the German squadron was still active on the watch, with Suffolk on starboard and Norfolk and POW on port. At 12:40, the German squadron bent its course due south in order to reach the central Atlantic and then turn due east towards the French coast. On May 24, it was outrage in London: All the headlines featured the destruction of national pride, the Hood. The blow was severe and in front of Churchill, the House of Commons was unleashed. The admiralty, lectured by Churchill, since the terrible message of the POW on the morning of the 23rd, was forced to stop all ships of the line from their escort missions planned to join the meeting of Bismarck. At this moment of the famous “sink the Bismarck!” ordered by a furious Churchill, the Rodney which escorted the Britannic was the first to leave, at 10:36 am from the east coast of Ireland with 4 destroyers. Commander Dalrymple-Hamilton was formally ordered to split up if the troop transport was needed, leaving him only an escort destroyer.
The older battleship Ramillies, which escorted convoy HX127, was also diverted to proceed southwest. Finally at 3:00 p.m., the ready-to-alert Revenge also set sail in Halifax. On May 24, at 2:20 p.m., the decision was made and the Bismarck sent the Prinz Eugen in Morse code at 6:40 p.m. the order to break up the formation, while the Birmarck was heading south-southeast. The diversion would allow the Bismarck, launched at full speed, to reach France for the 26th. To the north, many ships of the line were hunting. Lütjens hoped that the Bismarck would attract the bulk of its pursuers on a trap: 6 U-Bootes positioned off the Bay of Biscay. En route south-southeast, the Bismarck quickly approached Suffolk. The latter soon saw himself surrounded by shots from the Bismarck.
From 6.30 p.m., the exchange with the English cruiser, which soon retired under a smokescreen, took place with the POW, which remained wisely at a distance, on the port side of the Bismarck, and ended at 6:56 p.m. Suffolk passed over the rear of Bismarck and joined Norfolk and the English battleship. At 8:56 p.m., the fuel situation on board the Bismarck was becoming worrying: Still at full power, the latter no longer had the possibility of joining its refuellers and was obliged to continue heading south and not towards France, to avoid putting a “T” in relation to his pursuers. The U-boats are ordered to cover the Bismarck on its new route. A threat was approaching, however: Rear Admiral Alban’s squadron aboard the aircraft carrier Victorious accompanied by four light cruisers.
At 10:10 pm, the Bismarck was heading at 25 knots. The 9 sworfish of the Victorious took off in an attempt to sink it, followed at 11:00 p.m. and midnight by Fulmar. The lead Sworfish commanded by Esmonde was equipped with a radar which recorded the expected target. The British squadron then prepared for the torpedoing when the sun had disappeared, but instead of the Bismarck it was the coast guard USS Modoc which was very close and was almost targeted. At this point the German battleship saw the planes and opened fire with its long-range AA artillery, while increasing speed to 27 knots.
By midnight the Sworfish had taken up an attack position. They received from Bismarck a real hellfire, because not only all its antiaircraft artillery opened fire, from the 105 to the 20 mm, but also the 152 and even the big 380 mm. Braving the steel wall, the British aviators released their torpedoes, all of which the Bismarck avoided by maneuvering with skill, except the last, which exploded near the starboard belt. The Bismarck therefore recorded no waterway, but the explosion killed a sailor and wounded six others.
At 2:30 am, the Sworfish all returned to the Victorious to land: None had been lowered. The speed of the Bismarck was however reduced to 16 knots to allow some repairs, and at 1:30 in the morning, the Prince of Wales opened fire at 16,000 meters. The Bismarck replied, without the two protagonists registering a shot on goal. At this time, morale was at its highest on board the German ship and the crew were celebrating the birthday of the admiral who was this May 25, 52 years old. The latter also felt in total confidence and tried to take advantage of the darkness to sow his pursuers in a daring maneuver: At 3:06, he made his ship turn due west, then begin a 180 ° in order to pass behind the English ships.
At 4:01 am, the maneuver had succeeded, thanks in particular to the absence of Suffolk to starboard, and Vice-Admiral Wake-Walker had to announce the famous “contact lost” to the admiralty by TSF. By now the Bismarck had left her pursuers and had become invisible, but even more so, was heading directly for Saint-Nazaire, to the south-east, again at 27 knots. Ironically, Lütjens believed that the British were still following him and announced it by radio. He was informed, but too late by the Kriegsmarine HQ Western Operation, that this was no longer the case. Too late, because the first message from Bismarck at 9:00 had been picked up and thus allowed the British to calculate by trigonometry its new approximate position. After that, the Bismarck kept radio silence. This did not prevent around 11:00 a.m. Lütjens from making a speech by intercom to his men to signal them their glorious feat of arms against the Hood, but also that by bending its course towards a French port they would probably be intercepted by the Royal Navy and should fight.
He ended his speech with a vibrant “victory or death!” Soon after, at around 4:25 p.m., he received another happy birthday from Hitler himself and congratulations on his achievement against the Royal Navy. In addition, the crew was ordered to build a second dummy chimney behind the first to deceive the enemy, as well as to paint the tops of the turrets yellow. At 3:00 am on the 26th, a Coastal Command catalina took off from Ireland and located the battleship at 10:10 am when it was time to turn around. Assaulted by the giant’s DCA, he took a schrapnell and had to maneuver to escape the shots, after having released his deep-charges. At that time, Admiral Tovey could only count on King Georges V and Rodney, far too far north, and who could not make their way at full speed in order to save their already well-depleted fuel oil reserves.
There was now only one hope left for the Admiralty to intercept the Bismarck before its arrival in France: The H force of Vice-Admiral James Sommerville, coming at full speed heading north of Gibraltar. Indeed at this time, the Renown accompanying the Ark Royal was in a good position to intercept the Bismarck, but after the loss of the Hood the admiralty did not want to risk a second battle cruiser against the German battleship. Also, Force H found itself chasing east-south-east of Bismarck, with the cruiser Sheffield behind it a short distance away. On May 26 at 8:35 am, the aircraft carrier Ark Royal launched its Swordfish. At around 11:14 am, one of them saw the battleship, soon followed by a second aircraft. Two others came to pick them up in order to maintain contact. The H Force was then closely followed by the submersible U-556, but the latter returning from the Atlantic with more torpedoes could not attempt anything.
At 2:50 p.m., not less than 15 Swordfish took off from the Ark Royal loaded with torpedoes and found their target at 3:50 p.m. thanks to the radar spot recorded by the lead aircraft. visibility was very poor, but the silhouette of the ship stood out in the haze when the old biplanes attacked: with deficient magnetic fire exploded by touching the water or dropping or crossing the turbulence of the cruiser wake. The second wave did not go on the attack after the first Swordfish recognized the English ship.
At 5:00 p.m., the planes returned to the aircraft carrier for refueling. These long operations left only a short time before dusk for a new attack. Another night attack was promised to fail, so the last of the evening was crucial: The next day the battleship would enter an area covered by both the Luftwaffe and U-Bootes. Also, at 7:15 p.m., the squadron of 15 Swordfish took off again with torpedoes equipped this time with contact triggers.

The famous HMS hood, which the British and their allies regarded with immense respect … One hit on goal was enough to make it disappear: Many had forgotten that it was only an evil “battle cruiser” protected.
At 8:47 p.m., the squadron went on the attack in better visibility. The giant’s DCA was unleashed once again. And this time again, its captain maneuvered it masterfully, avoiding the 15 torpedoes except two: One hit the vessel at the port belt, without damage, but the other exploded on the rudder guide which was then pointed. at 12 ° in a tight maneuver. The consequences of this single impact were considerable: The bar room being submerged and the adjacent compartments inaccessible due to the bent sheet metal, the divers could not even hope to repair it in time. (It was even considered to put the rudder in position by triggering an explosion on the other side, but this could damage the propeller shafts, this idea was given up, as well as that of compensating for the gap by using starboard propulsion. Now deprived of the ability to use a helm stuck in the same position, the battleship saw itself enter a long circle which would cause it to turn its back involuntarily to the French coast, but worse, to find himself now at the mercy of his pursuers.
During engine trim tests, the Bismarck set off on an erratic course and came up against Sheffield. The latter, closely framed, found salvation in the flight and a cloud of smoke. At 10:38 pm, the 4th destroyer flotilla commanded by Philip Vian, future admiral, detected the battleship thanks to the Piorun, the most advanced Polish destroyer. The weather was then bad, and the Piorun was almost destroyed by fire from the Bismarck. All night long, the 5 destroyers attacked with torpedoes, sending illuminating shells, one of which ignited the start of a fire on the deck of the Bismarck. In heavy weather and rain, no impact was recorded as the destroyers maneuvered skillfully to avoid destruction in front of the vessel’s heavy fire. One of them, the Cossack, already famous for its attack on the Altmark in Norway, lost radar contact due to a very close impact, its antenna being crushed by tons of seawater.

The Battleship King Georges V, sister-ship of the Princes of Wales, at the time of the events. He carried 10 pieces of 356 mm.
At 7:00 am, the destroyers gave up their actions, having already launched 16 torplles without results. Despite this success for Lütjens, the respite was short-lived: It was only a matter of hours before the big British units arrived. The Bismarck sank forward, making a “ploughshare” in enormous waves: We were at a sea of force 8. The wounded battleship was dragging itself at 7 knots against the wind. Finally at 8.43 am, at 23,000 meters, the King georges V and the Rodney bent their course to place themselves in the battle line. Now the whole crew was tense. Two to one, with low speed and an inability to govern properly, the Bismarck was nothing more than a steel fortress awaiting hallali. His artillery and rangefinders were intact, so his firepower was fully operational and everyone’s resolve was absolute.
At 8.47 am, the Rodney opened fire at 20,000 meters, followed by the KGV. Then, as the distance dropped, cruiser Norfolk did the same with its 203mm guns. When the secondary artillery of the English battleships barked in turn around 9:00 am, the Bismarck replied with its 4 rear 380 mm guns and its 4 152 mm lateral guns. The British totaled 10 pieces of 356, 9 of 381 mm, and 8 of 203 mm. At 9:02 am, the first serious impact deprived the Bismarck of its main telemetry station on the bridge tower. Two minutes later, the cruiser Dorsetshire added its 8 pieces to the concert of steel. The shot of the Bismarck, hampered by the swell, remained effective because of the transfer of the central shot from a rear post. It was then at 9.13 am, when the last salvo from the Bismarck had closely surrounded the KV and was preparing to strike, a 356 mm shell struck the firing center.
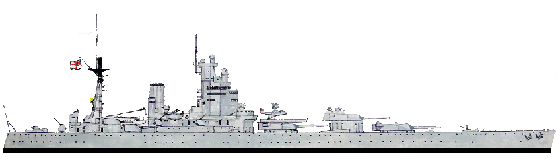
HMS Nelson, at the time of the events. This 1925 capital ship, slower than the Bismarck, carried twelve 16-in guns.
Now only the two rear turrets of the Bismarck continued to fire with their own range finders, ineffectively. Soon a shot from Rodney silenced “Dora” turret, and shortly after, it was the turn of “Caesar” turret. Bismarck continued to fire with her 6-in (152 mm). But these turrets were soon also silenced. The rain of hard steel and explosives continued even as the distraught German giant was no more than an unarmed target. Captain Lindemann decided at 9:34 am to evacuate and scuttle her (as shown by Cameron’s expedition in 2002). But as the English battleships approached 3,000 meters, the rolling fire continued. To this, torpedoes were added, hitting the ship at its belt. But the leviathan was still afloat, on fire, heeling, and immobilized.
At 10:00 am, the remaining crew still alive jumped into the sea. The war flag, which was still fluttering in the wind, could hardly be brought down. At 10:16 a.m., Tovey’s battleships ceased firing, short of fuel and ammunition. Bismarck was still floating. As the end drew near, a squadron of Swordfish torpeo planes arrived at 10:15 am but stayed away to avoid being mown down by British fire. They were mistaken for Luftwaffe planes and HMS KGV opened fire anyway with its 133 mm, fortunately to no avail. Now only the British cruisers remained, torpedoing the dying giant from 2,500 meters. But none of the hits still caused the ship to sink although her list increased further.
Short of torpedoes, the British cruisers wanted to finish her off with their 8-in guns, but at 10:39 am finally, they saw the giant slowly capsizing and sinking. Her own crew had opened all accessible valves to accelerate the process. After three quarters of an hour of fierce hammering, the Third Reich proud flagship, which had suffered perhaps 600 hits, over 2876 shells fired, sank to the bottom of the Bay of Biscay. 800 sailors were able to evacuate the battleship before she plunged straight into the depths, dragging with her all those who had remained on board and those who had been slow to swim away, by suction. Under the threat of U-Boats, HMS Dorsetshire and Maori rounded up a hundred men before departing, then the Spanish cruiser Canarias arrived on the spot from El Ferrol, a little late for survivors dying in the meantime of fatigue and hypothermia in a water at 13°. 115 men survived however. Hitler from that day on, began to doubt the theories of commerce warfare developed by Raeder as plan Z was cancelled, and started to pay an attentive ear to his rival Dönitz, the champion of submarine warfare. The twin of Bismarck, KMS Tirpitz, never attempted such daring raids and remained wisely anchored in a Norwegian fjord for the duration of the war. Thus ended one of the most famous episodes of the Second World War.
Battle of Crete (may 1941)
Called Unternehmen Merkur (Operation Mercury) this was a bold airborne assault of the island of Crete where the remnants of the British expeditionary force and Greek elements fled in April 1941. The operation’s goal was to mopup rapidly the remnants of these forces to avoid, either a repatriation in North Africa, or the island’s fortification, south of Greece, which would have been a torn in the foot of the German forces present in the area. Despite smaller forces the German paratroopers ultimately prevailed, but it was a Pyrrhic victory. The Luftwaffe however inflicted serious losses to the Royal Navy, in the hands of the Junkers Stuka.
Forces in presence:
Allies: 42,547, including 18,047 British troops, 10,258 to 11,451 Greeks, 7,702 Kiwis and 6,540 Australians. In addition, the Cretan population was not particularly friendly with the Germans and did its part. There was a “harder” local component, consisting of the the Cretan Gendarmerie (2.500 men) and the Heraklion Garrison Battalion. In the air, this was not glorious: The RAF was nearly absent from the sector, with the last fighters of 33, 80 and 112 Squadrons and a squadron of the Fleet Air Arm). The Royal Navy however could oppose notheworthy forces to the Regia Marina (see later).
Axis: 22,000 paratroopers and mountain troops, and 2,700 Italians.
The air component of the axis rested on the Luftwaffe, which could carry troops using 500 transports planes (nearly all Ju-52 and 80 troop gliders of the DFS 230 type, and a few larger Gotha Go 242. The air bridge was protected by 180 fighters which also had the responsibility of covering 280 bombers (Do-17, He-111) and 150 Ju-87 Stuka dive bombers.
We are not going to dwelve of operations in Crete itself, the subject had been well treated already. Let just say the naval side of Crete was important, both in the number of units involved, and of ships destroyed or damaged: This battle affected more than half of the Royal Navy present in the whole of the Mediterranean.
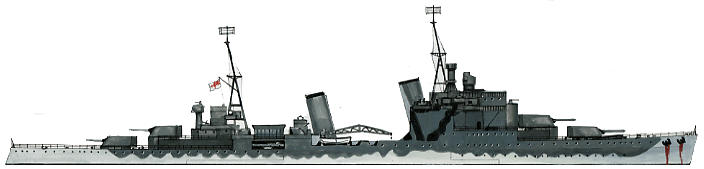
The Town class cruiser HMS Sputhampton, another victim of the Stukas
The Naval fight in Crete:
The naval side started when ships evacuated British and Greek troops from Greece in late April to early May, requisitioned steamers of all sizes and tonnage, and a few Royal Navy ships. The memories of Dunkirk were present and Cunningham had no intention to risk his precious large units, including the destroyers, with a dangerously closing Luftwaffe. The period of June, when the battle turned to the advantage of the Germans, made it necessary for the Royal Navy to risk these precious ships to repatriate British troops, far from bases on North Africa. The air support was limited to few surviving planes after unrelentless attacks on all aerodromes and airfields in the island, and the Royal Navy’s aircraft carrier HMS Formidable own air group.

HMS York in Suda bay, April 1941.
Losses:
During these evacuations operations, carried mostly by night, the Luftwaffe sank the cruisers HMS Gloucester, HMS Fiji, HMS Calcutta the destroyers Kelly, Greyhound and Kashmir, or HMS Hereward starting on 22 May and until the 1st of June. Italian bombers did their part too. Those from 41° Gruppo sank the destroyer HMS Juno on 21 May, and badly damaged HMS Imperial on the 28 (she became a total constructive loss). Most of the time, these were taken car of by German Junkers Ju 87 “Stuka” dive-bombers. There were also a few Ju-88 twin-engine bombers that performed dives in some occasions, those of II./LG 1.
The aircraft carrier HMS Formidable was damaged, as well as the battleships HMS Warspite and Barham, the cruisers HMS Ajax, Dido, Orion and the HMAS Perth, even a submarine, HMS Rover, as well as the destroyers HMS Kelvin and HMS Nubian, in repairs for months. The Regia Marina also inicted tremendous damage, sinking the heavy cruiser HMS York in Souda Bay (northern Crete), blasted by Italian explosive motor boats (MTM). Beached on 26 March she was later abandoned and scuttled by using demolition charges during the may evacuation. On 1st June, the Royal Navy had been reduced to two operational battleships and three cruisers for the Alexandrian Eastern squadron. The Italians, despite their losses at Tarento, had still four battleships and eleven cruisers. But fr this price, the allies shot down and estimated twenty enemy aircraft, and in the end about 22 destroyed, 11 probable, 21 damaged. In the end, it appeared the Battle of Crete was the costliest naval engagement of the entire war for the Royal Navy, although it is mostly remembered for its costly paratrooper action.
Battle of the Atlantic (1939-45)
Great Syrta battle (22-23 march 1942)
Pantelleria (15 june 1942)
Operation “Pedestal” (11-12 aug. 1942)
Italian specs ops and Flotilla X-Mas (1940-43)
Operation Husky (July 1943)
Anzio (Jan. 1944)
D-Day (June 1944)
Anvil-Dragoon (August 1944)
Naval Battles of the Pacific
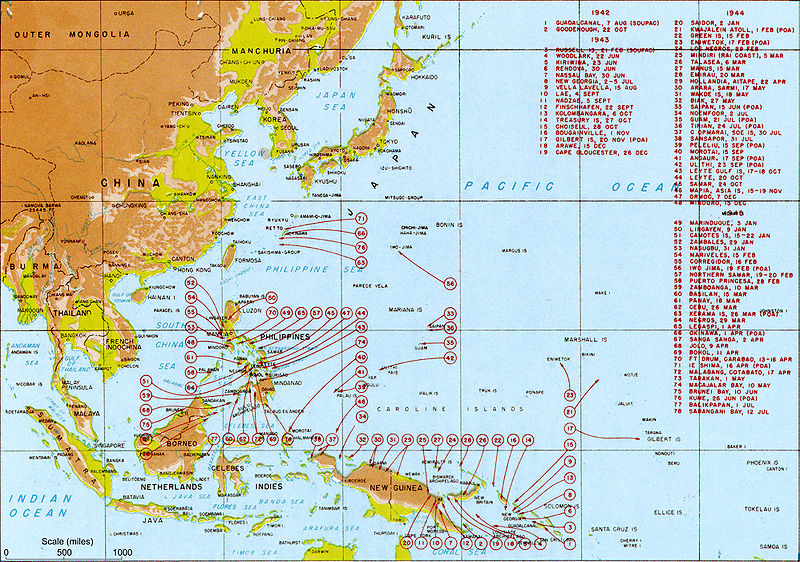
When the Japanese attacked Pearl Harbor, the war was already more than two years old and, and the axis so far (to be fair, the Germans) had accumulated a set of successes and assured domination of Western Europe, North Africa, while USSR was still expected to fall. Japan entering the fray was of dire consequences for the allies colonial possessions as they hardly could stretch their forces: The Dutch, British, and French (by the occupation of Indochna) would take the brunt of the attack and be hard pressed everywhere. Pearl Harbour succeeded in eliminating the mighty US Navy battlefleet of the Pacific, ensuring that only a few carriers were left to stop the Japanese all-out conquest. Seven month later, in June however, the best asset of the Japanese, the Kido Butai, the core of large fleet carriers with veteran air crews, superbly trained, was eliminated. Until mid-1943 it is fair to say that the USN was hanging by the nails in the pacific, making the best of inferior forces to contain the Japanese from Australia.
Midway was truly the turning point celebrated by historians, Guadalcanal was its Verdun, and Leyte the last gamble of the Japanese Navy. A plan that could have worked if a serie of assumptions and blunders on both sides, determination plus the crucial use of radar on US side, turned the tables and finished off what remained of the IJN. The Pacific ocean by its nature, imposed a maritime conflict, a counterpoint to the land war in USSR. In this conflict, classic naval engagement were many, most far larger in scale than in Europe. But most importantly for the first time, air-naval battles became the norm, with fleets fighting each others from beyond the horizon and the proxy of their air fleets. The air component therefore became vital, as in addition to numerous carriers on both sides (with a clear advantage for the USN) thanks to numerous islands also used as air bases, and this naval air component will be seen in detail. Last factor, amphibious warfare, was also in scale and scope quite dramatic compared to the western front due to also the nature of operations: A conquest phase in 1942 by the Japanese, a grinding match in 1943 and the “island hopping” slow reconquest by the USN and the allies at large in 1945.
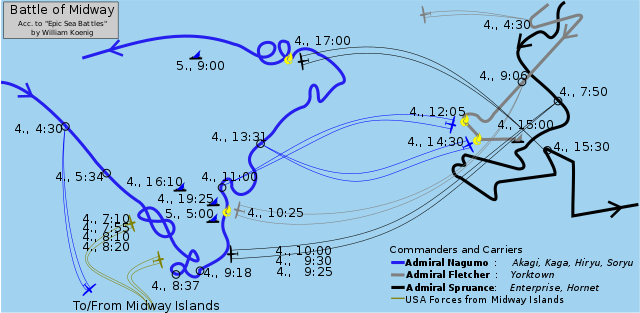

The “internal” instrument to disrupt japanese supply lines during the pacific campaign*, never called “the battle of the pacific”: USN Submarines did much more than just signalling the IJN moves or sinking freighters and oilers but also major IJN vessels, from carriers to battleships. At Leyte, they had sunk to the bottom 75% of IJN oilers, seriously disrupting the capability to continue fighting.
*The “external” instrument was the island hopping campaign waged on the islands chains defensive perimeter.
Indeed, helping in the background all along was the silent service: The submarine warfare waged by the USN to disrupt traffic and oil supplies, worked wonders due to the incapacity for the IJN staff to consider ASW warfare. When it did from 1944 it was already too little too late.
It was indeed mostly an industrial conflict. The Japanese were not all favourable (including yamamoto) to an attack on the US, knowing full well the industrial inequality between the continent and Japan, its seemingly inextingsuishable resources in men and material. In an attrition war, Japan was likely a looser, but the embargo decreted by Pdt. Rooselevelt on Japan after its occupation of French Indochina harmed its capabilities to pursue its war in China and the overall dream of an Asiatic Empire. The 1942 conquest was mostly a way to create a buffer zone to protect its newly gained supplies sources. But in the end, underestimating the American resolve would lead to devastating losses that could not be recovered and as foreseen by Yamamoto and others, Japan was in effect doomed by the scale of the “new fleet” built over two years, unprecedented in history.
Operation Downfall, or “Olympic”, the landing on Japanese home islands, was never carried out. It would have been the most colossal amphibious operation in history.
Pearl Harbor (7 dec. 1941)

Arizona in flames, Hawaii has gone to war.
There are some key events of the Second World War whose names are among the legends as they were pivotal in history. With D-Day, Pearl Harbor is undoubtedly the most important element of the war: Factually, it is a massive Japanese naval air attack on the American base in the Pacific, on the island of Oahu, part of the archipelago. of Hawaii. But it is also the entry of a continent into the war, and the beginning of the end for the axis: With the entry into the war of the USA, Great Britain had a weighty ally in Europe. Their decisive weight added to that of the Russians was the tipping point of the war, after a period of dramatic uncertainty which together will crush the axis in Europe and in the Pacific.
Everything has been said, written, and filmed about this event. I would therefore limit myself to dealing with the facts: The attack on Pearl Harbor stems from Japan’s desire to do battle with the USA. This was born out of the progressive isolation of Japan by the League of Nations and of the economic sanctions applied to it since its invasion of Manchuria in 1931, then of the rest of China in 1937. However, if Japan was rich in recesses of ores (excellent local steel was produced), it was not the same with petroleum and rubber, two capital materials in any industry, and by extension war industry. The blockade on various important materials was decided by the USA in 1940, but not oil. It did not cut off oil supplies until September 1940, after the Japanese coup in Tonkin, possession of France from Vichy. The staff and the government knew then that the oil reserves were only for a few months.
Faced with the will to continue their expansionist movement, inevitable and the importance of these precious raw materials, a confrontation with Holland and Great Britain, whose colonial possessions were full of these vital riches, was inevitable and seemed easy given the superiority of the Japanese naval, air and land forces were patent. But a conflict with these countries would have raised a new international protest and most certainly an entry into the war of the USA alongside their allies. War with this powerful neighbor was therefore inevitable. It therefore remained to secure victory by decisive “preventive” action. Admiral Yamamoto Isoroku, a strong supporter of naval aviation whose birth and tactics he had contributed, had the ear of the Japanese admiralty and the support of Nagumo, but also of the military government chaired by General Tojo.

Yamamoto was inspired by the naval air attack on Taranto in November 1940, which had proven that with a handful of torpedo bombers from a single aircraft carrier, half of the Italian fleet could be put out of action. in one night. Thus was defined the attack on Pearl Harbor, the naval base of the Pacific fleet, within direct reach of the Japanese fleet. This powerful naval force was slightly lower in tonnage than the Japanese fleet, with fewer aircraft carriers. Battleships, in a classic naval warfare perspective, were the backbone of this fleet. Also a force attack and the destruction of the American battleships in the Pacific (8 in number, the bulk of the American line fleet) would have neutralized the means of the United States to oppose the Japanese expansion policy, with the impact demoralizing expected. We also expected to quickly build up a defensive glacis on the war weariness of the versatile American people, “softened by a materialist culture”.

From then on the plan adopted in broad outline, the captain of the naval air force Minoru Genda was charged with the technical installation of the attack. While Japanese spies photographed the base from all angles, including by private plane, at Kure the focus was on modifying the torpedo steering to allow them to be launched from shallows. The aircraft carriers, dispersed by squadrons, were assembled into a fleet of a total of 8 ships (Kaga, Akagi, Hiryu, Soryu, Sokaku, Zuikaku), the line ships Hiei and Kirishima, the cruisers Tone and Chikuma, Abukuma, 9 destroyers, 3 submersibles cruisers and 28 other carriers of pocket submersibles. The latter were to force the harbor and complete the torpedoing of the ships (- it was in fact a complete failure).
The plan was implemented on November 26: The fleet left Kure and the various rallying ports to regroup at Hitokkapu in the Kurils. It will then tack towards Hawaii by following the northern route, known to be difficult (storms and ice). This little-traveled road serves as a cover: We don’t expect him there. The American intelligence services know that the Japanese fleet is somewhere at sea, but the planes of Hawaii, Wake and Guam which patrol find nothing, the Pacific is vast. On December 2, we ordered the branlebas with the coded order welcomed in general jubilation “Climb the mount niitaka”. On Saturday 6 December, the fleet is only a few cables away from the base. The latest information from agents on site indicates the entire fleet at anchor and the crews preparing for a peacetime weekend. However, the three aircraft carriers in the fleet are not there. It is a relative disappointment for Yamamoto who orders to continue the preparations.

In Pearl Harbor, there are fears of the action of a “fifth column” and spies and saboteurs among the many Japanese residents in Hawaii. Planes are parked outside in a row for more efficient guarding. Despite calls for vigilance from the intelligence services, negotiations with the Japanese government through proconsul Kurusu continue. On the evening of the 6th, in front of the deterioration of diplomatic relations, Admiral Kimmel confirms that the fleet has been put on alert, effective since the announcement of the departure of Japanese forces at sea. A radar was freshly installed on the coast and we’re testing another on the battleship California. On the 7th at dawn, the operators of this radar, without experience, identified a swarm of points. The alert is given to the local manager who consults his files and deduces the arrival of a group of B-17s expected on Hickham Field. In reality it is the 183 aircraft of the first wave, the “Val” bombers, the “Kate” torpedo boats and the “Zero” fighters also loaded with bombs which have taken off since 6 hours and are now in sight of Hawaii and the United States. ‘Oahu.
famous pearl harbor pictures.
 At 7:48 a.m., Fuchida’s words echo through the headphones: “Tora, Tora, Tora “(“tiger”). This is the signal to attack. Clouds of gray and white planes badged by the hinomaru tumbled in a hellish noise above the harbor, on both sides of Ford Island where 14 ships were moored including the eight famous of the “battleship row”. 27 other large-tonnage vessels were anchored in quays, 96 total. Surprise is total. Sailors are still sleeping to recover from often agitated nights on leave, a few watch officers are on deck, still incredulous. At 7.55 am, the seaplane base is bombed and becomes hell: All the aircraft lined up as in parade exploded one after the other. Hangars are shattered. The staff are still too petrified to react, but soon small arms are taken whenever possible. Then it was the turn of the capital ships in the harbor: The destroyer USS Monaghan is hit and explodes, the cruisers USS Raleigh and Helena are seriously damaged, and then the minelayer Oglala, the battleships Arizona, Nevada, Oklahoma, West Virginia, California in order were torpedoed and bombed by specialist planes, and their decks strafed by covering fighters. USS Arizona receives a bomb in her ammunition bay and breaks up inside, capsize and sinks rapidly, carrying almost all of her crew. Admiral Kinkaid tumbles into the mess parking lot with his officers, then rejoins the CP and throws a surrealist announcement over the microphone: “Air attack on Pearl Harbor. This is not an exercise!”
Everywhere, distraught sailors, personnel, Marines, pilots are getting organized as best they can. Some shoot with rifles, MGs or even pistols at low-flying planes. Pilots rush towards the remaining planes, just to discover there are no left in flight condition. Bases of Hickham, Wheeler and Ewa are totally devastated. Pearl Harbor is defended by a generous AAA, but servants are absent this sunday, and men trying to fire from ships can’t access ammunitions, often under lock and keys with officers abenset, and are strafed constantly. At 8:40 am, the entire base is a buzzing beehive from which emerges smoke from dante’s inferno’s fires, while the second wave arrives over Ford Island. 134 bombers covered by 36 fighters. This time, it is greeted by a much stronger fire as every able body is armed when possible and ready. The Battleship USS Pennsylvania and destroyers Cassin and Downes however are targeted and gutted, the destroyer USS Shaw sets off in a column of flame. Some fuel and ammunition depots explodes. Hangars collapses and even the military hospital is targeted.
At 9.45 am, planes from the second wave returned and landed. But Nagumo, despite urgent appeals from Commander Fuchida, refuses to launch a third wave, believing that the element of surprise is stale, or to launch a search to find the aircraft carriers at sea and sink them. He is more concerned about finding his supply ships in the North. Not knowing whether enemy aircraft carriers were still nearby or not, and considering himself fully satisfied by the success of the attack, he gave the order to retire and head northwards. The squadron will drop anchor on December 23 at Hashirajima. He recorded only the loss of 29 downed aircraft, and 5 pocket submersibles. The announcement from the American side did not hit the air until 2:26 p.m. The bill was heavy: USS Nevada and Oklahoma, Oglala, the old Utah target boat, are definitely lost, destroyed and sunk beyond any recovery. USS Nevada’s hull lied pitifully upturned, propellers in the air, and men fiercely attempted to help trapped sailors out into what became a vast tub, inexorably filling. In total, there were 2,300 dead and missing, more than 3,000 injured, many seriously burned. 188 planes were destroyed, the immense majority on the ground and almost all ships present, notably all battleships, were put out of action for at least two years. It was not until the end of 1943 that some of these battleships, refloated, repaired, rebuilt and modernized, resumed the fight, to the surprise of the Japanese at Leyte (admiral Oldendorf).
A funeral service will last a week. Later this day in a press conference, Roosevelt made his famous speech of war declaration assorted with the “day of infamy”. The attack seemed to be in contradiction with the Hague Convention of 1907 concerning the late declaration of war, but representatives waited to give it only when the attack was launched, in order to preserve surprise, but because of broken communication, it was given well after the attack started. The attack had a particular historical significance as it strenghtened the resolve of the United States, whose official isolationism stopped that day. The fight would be tough, but soon the entire continent was mobilized for total war, unleashing its war industry to wage war on two fronts, as the same day, war was also declared on Germany and Italy. A total, global war now backed by an industrial juggernaut, to the great relief of the British, but also in all occupied countries.
Force Z end (10 dec. 1941)
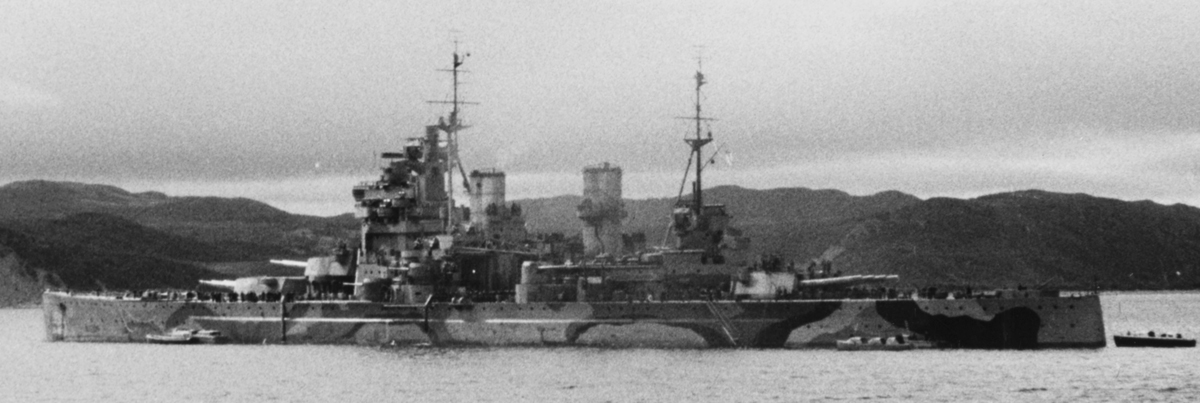
HMS Prince of Wales: With her resided the hope of the British presence in Malaysia. (LDD)
Although numerically insignificant compared to Pearl Harbor, the destruction of the British Far Eastern squadron sounded the death knell for the British presence in Malaysia, India’s last bulwark against the Japanese. The loss of the squadron heralded the capture of Singapore by the Imperial Japanese forces, freed from the only force capable of opposing its landings. This squadron consisted of only meager troops, hastily sent by the government to reinforce the naval means almost inexistent since the front of North Africa monopolized the attention. On a broader historical level, it is the best illustration of the vulnerability of large commercial ships to aviation.
The entry into the war of Japan against the allies was indeed a hypothesis long accepted by the British as the Dutch as the economic blockade of Japan risked provoking the new militarist government of Tojo. Ambitious, with an army well-trained in fighting in China since 1931 and the third fleet in the world, as well as the most trained naval air force and the most manageable and fastest fighters in Asia, Japan had since their victory against the Russians in 1905 developed a superiority complex that nothing seemed to hinder, except the lucidity of a few senior officers and politicians as to the entry into the war of the United States alongside the allies.
The reasoning was simple: To defeat the weak British and Dutch forces present and to finish off the Chinese by cutting off their last lines of communication, the project of a massive offensive on several objectives had been conceived. The first was the elimination of the United States Pacific Fleet. The second, to have a free hand in this sector, was the elimination of the squadron of Admiral Tom Philips, who arrived in Singapore on December 5. It bore its mark on the Prince Of Wales, a recent fast battleship which had seen fire against the most powerful warship in Europe a few months before, the Bismarck. He was accompanied by Battle Chest Repulse, a barely modernized Great War veteran, just like the Hood. The squadron was supplemented by two destroyers, the Electra and the Express, the Encounter and the Jupiter, and should also have included the aircraft carrier Indomitable, unavailable due to repairs after an accident during its tests. Added to this were the destroyers Tenedos and the HMAS Vampire (Australian), but above all the cruisers Durban, Danae, Dragon, Mauritius, already anchored in Singapore. 3 days later, the arrival of the heavy cruiser Exeter, the Dutch cruiser Java, 2 other British destroyers and 4 Americans were expected. The deterrent role of Force Z hoped for by Churchill was a failure: On the 7th, the Japanese fleet attacked Pearl Harbor and another squadron was preparing for the invasion of the Malay Peninsula.
Force Z was operational from the 5th, and very quickly Tom Philips had in mind to hunt down the Japanese fleet and seek a decisive confrontation. But at dawn on the 8th, Singapore resounded with the clash of bombs and DCA: An air raid by land-based naval aircraft attacked the port facilities. The ships present responded with their artillery, but without recording any hits. Likewise, the Japanese attack was only too modest to record a tangible result. The landing of the Japanese forces had, however, taken place in the northeast of the peninsula, and the British troops were severely attacked.

Tom Philips decided to set off to intercept the support convoys. She finally left at 5:10 pm with 4 destroyers. he was taking a risk, knowing that the RAF, already strongly engaged, could not promise its support: its aged aircraft were on land already threatened by the Japanese advance. He thought he was relatively safe from an air attack and his ships could endure it without suffering too much (the only losses known since the start of the war had been cruisers, and the “surprises” of Taranto and from Pearl Harbor had caught the crews unawares.
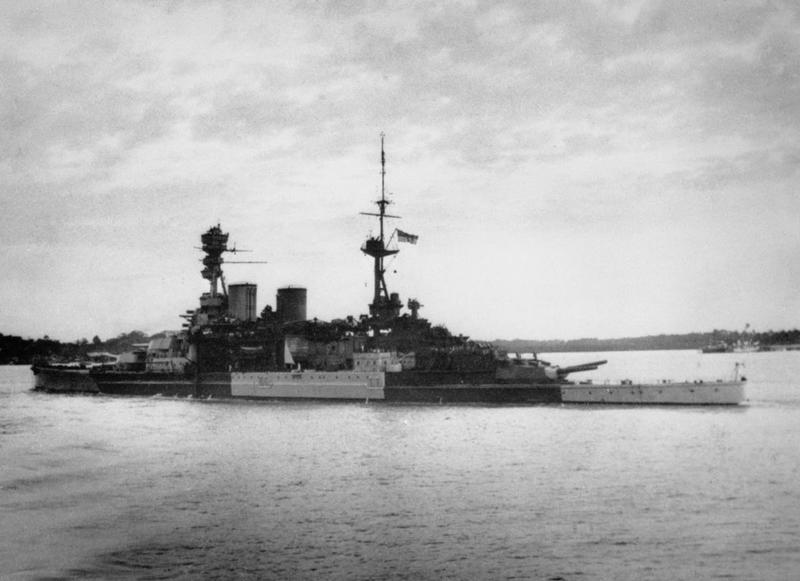
On the 9th, after having traveled all night, Force Z passed the Anamba Islands at around 7.13 am, and bent its course towards the supposed route of Vice-Admiral Ozawa’s convoy. At around 2 p.m., the I-65 submersible reported the presence and position of Force Z in Ozawa. The latter ordered the bulk of the fleet to fall back to Cam Rahn in Indochina. In the evening, three Aichi catapulted by the cruisers confirmed the position of the British squadron. They followed her for an hour. Then the destroyer Tenedos was sent back to Singapore and broke away from the squadron, due to its reduced autonomy. In the middle of the night, these two forces met without seeing each other: The Prince of Wales radar was unfortunately not operational. They were for a short time within 5 nautical miles of each other, which was more than enough for the British squadron to deliver their 6 381 and 10 343 guns at long range. At 8:55 p.m., Philips decided to return to Singapore.
Macassar strait battle (24 jan. 1942)
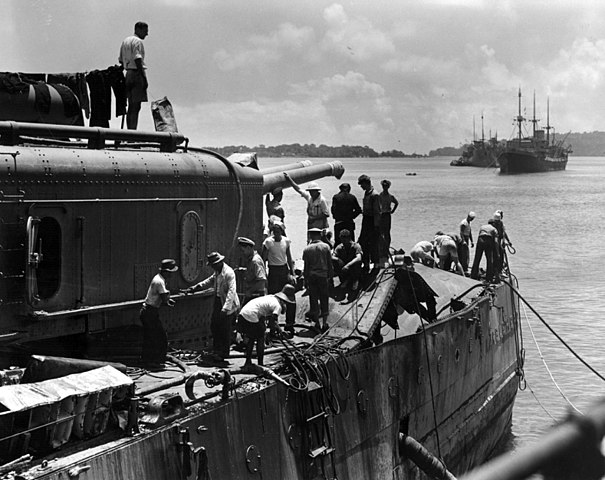
Bomb damage on the USS Marblehead following the Battle of Makassar strait in February 1942
The Battle of the Macassar Strait, which took place on January 24, 1942, was a naval engagement early in the Pacific Theater of World War II. The battle occurred between American and Dutch forces, collectively known as the ABDA (American-British-Dutch-Australian) naval forces, and the Imperial Japanese Navy.
The ABDA naval forces, consisting of cruisers and destroyers, were attempting to disrupt Japanese naval operations in the Dutch East Indies (now Indonesia). They intercepted a Japanese invasion convoy en route to Makassar in the Dutch East Indies. The convoy was heavily guarded by Japanese warships.
In the ensuing battle, the ABDA forces attempted to engage the Japanese convoy. However, they were outnumbered and outgunned by the Japanese ships. Despite their efforts, the ABDA forces suffered heavy losses, including the sinking of several ships. The Japanese were able to successfully protect their convoy and continue their advance into the Dutch East Indies.
The Battle of the Macassar Strait highlighted the superior strength and coordination of the Japanese Navy in the early stages of the Pacific War. It also underscored the challenges faced by the Allied forces in countering the Japanese advance in Southeast Asia.
Java sea battle (27 Feb. 1942)
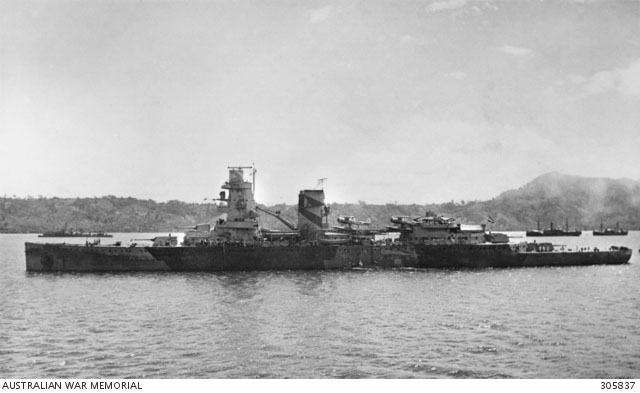
Dutch Cruiser De Ruyter in 1942
The Battle of the Java Sea, fought on February 27, 1942, was one of the significant naval battles of the Pacific Theater during World War II. It took place in the Java Sea, northeast of Java Island in the Dutch East Indies (now Indonesia), between Allied naval forces and the Imperial Japanese Navy.
The Allied fleet, under the command of Dutch Rear-Admiral Karel Doorman, consisted of ships from the United States, Britain, Australia, and the Netherlands. The Japanese fleet, led by Vice-Admiral Takeo Takagi, aimed to eliminate Allied naval power in the region to facilitate the Japanese conquest of the Dutch East Indies.
During the battle, the Allied forces attempted to intercept a Japanese invasion convoy en route to Java. However, due to poor coordination and communication, the Allied fleet was dispersed, making it easier for the Japanese to engage and defeat them piecemeal.
In the ensuing battle, the Japanese utilized their superior firepower and maneuverability to devastating effect. Multiple Allied ships were sunk, including two Dutch cruisers, two British destroyers, and an American destroyer. Despite brave resistance, the Allied fleet suffered heavy losses and was forced to retreat.
The Battle of the Java Sea was a significant defeat for the Allies, as it resulted in the loss of vital naval assets and further weakened their position in the Dutch East Indies. It allowed the Japanese to proceed with their invasion virtually unopposed, ultimately leading to the fall of Java and other key territories in the region.
Doolittle Raid (18 april 1942)
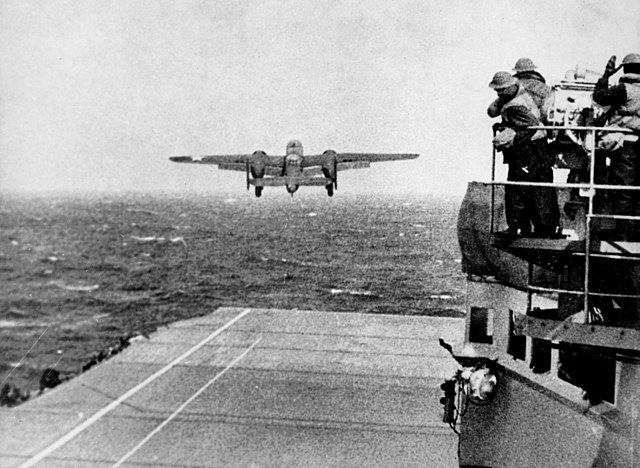
The Doolittle Raid, also known as the Tokyo Raid, was a daring and audacious air raid conducted by the United States against Japan during World War II. It took place on April 18, 1942, and was a response to the Japanese attack on Pearl Harbor and subsequent rapid advances in the Pacific.
Led by Lieutenant Colonel James Doolittle, a group of 16 B-25 Mitchell bombers launched from the aircraft carrier USS Hornet (CV-8). This was the first time in history that land-based bombers had taken off from an aircraft carrier. The raid was intended to strike targets in Japan, primarily Tokyo, and inflict damage on Japanese morale, as well as demonstrate to the Japanese people that their homeland was not invulnerable to American military power.
The raiders flew over 600 miles to reach their targets, which were industrial and military facilities in Tokyo, Yokohama, Yokosuka, Nagoya, and Kobe. Due to the limitations of their aircraft’s range, the raiders could not return to the USS Hornet after the mission. Instead, they were instructed to fly to airfields in China or the Soviet Union.
While the physical damage inflicted by the Doolittle Raid was relatively minimal, it had significant psychological and strategic impacts. It boosted American morale and demonstrated the United States’ ability to strike back against Japan. Additionally, it forced the Japanese military to divert resources to defend their home islands, potentially weakening their overall war effort.
However, the raid also had consequences for the Chinese civilians who assisted the American airmen. Japanese forces carried out brutal reprisals against Chinese civilians, resulting in widespread suffering and loss of life.
Overall, the Doolittle Raid was a daring and symbolic operation that lifted American spirits during a difficult time in the war and contributed to the eventual Allied victory in the Pacific.
Coral sea battle (7-8 may 1942)
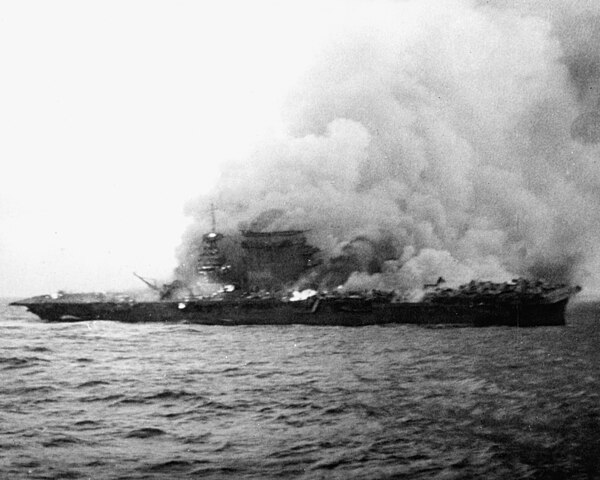
The Battle of the Coral Sea, fought on May 7-8, 1942, was a significant naval engagement between the United States and Australia on one side and the Empire of Japan on the other. It was the first naval battle in history where opposing fleets never came within sight of each other and was also the first battle where aircraft carriers engaged each other.
The battle took place in the Coral Sea, southwest of the Solomon Islands and northeast of Australia, and it was a result of Japanese plans to occupy Port Moresby in Papua New Guinea and Tulagi in the Solomon Islands. These locations were seen as stepping stones towards further expansion into the South Pacific and a potential threat to Australia.
The American and Australian forces, under the overall command of U.S. Admiral Frank Jack Fletcher, comprised two aircraft carriers, USS Yorktown and USS Lexington, along with supporting cruisers and destroyers. They intercepted a Japanese invasion force, which included the carriers Shokaku and Zuikaku, as well as several cruisers and destroyers.
Over the course of the battle, both sides launched airstrikes against each other’s ships. The Americans successfully damaged the Japanese carrier Shoho and several other ships. However, the Japanese also inflicted damage, including sinking the American carrier USS Lexington and heavily damaging the USS Yorktown.
Despite the loss of the Lexington, the Battle of the Coral Sea was considered a strategic victory for the Allies. The Japanese invasion of Port Moresby was thwarted, and the Japanese suffered significant losses in aircraft and experienced aircrew. Additionally, the battle marked a turning point in the Pacific War, as it halted the Japanese advance and demonstrated the effectiveness of carrier-based air power in naval warfare.
Furthermore, the battle indirectly set the stage for the decisive Battle of Midway, which took place just a month later, as it forced the Japanese to alter their plans and exposed vulnerabilities in their carrier fleet and tactics. Overall, the Battle of the Coral Sea was a crucial engagement that helped shift the momentum of the Pacific War in favor of the Allies.
Midway (4-7 june 1942)
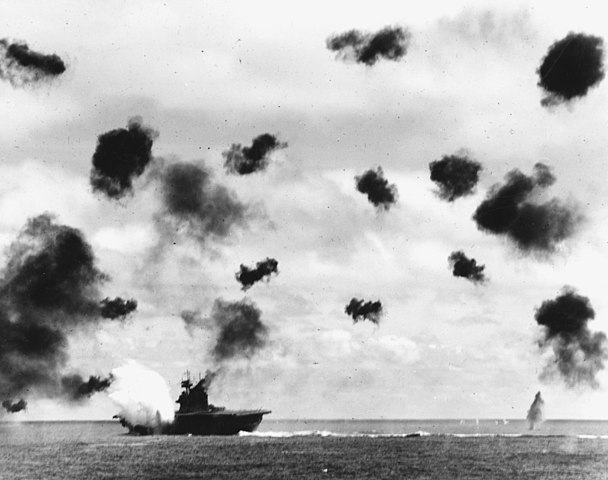
USS Yoktown hit by a torpedo on 4 June 1942
The Battle of Midway, fought from June 4 to June 7, 1942, was one of the most pivotal naval battles of World War II and a turning point in the Pacific Theater. It took place near the Midway Atoll, located northwest of Hawaii, and pitted the United States against the Empire of Japan.
The battle was a result of Japanese plans to lure and destroy American aircraft carriers in the Pacific, thereby securing dominance in the region. However, U.S. intelligence had partially decoded Japanese communications, allowing them to anticipate the Japanese attack.
The American forces, under the command of Admiral Chester W. Nimitz, deployed their carriers, USS Enterprise, USS Hornet, and USS Yorktown, along with supporting ships. The Japanese fleet, led by Admiral Isoroku Yamamoto, included four carriers: Akagi, Kaga, Soryu, and Hiryu.
The battle began with American aircraft launching a surprise attack on the Japanese carriers, catching them off guard. In a series of intense air battles, American dive bombers and torpedo planes inflicted heavy damage on the Japanese carriers. The Japanese, in turn, launched counterattacks, severely damaging the USS Yorktown and sinking the USS Yorktown.
Despite the loss of the USS Yorktown, the American carriers continued to press their advantage. In a decisive moment of the battle, American aircraft located and sank three of the four Japanese carriers, including the Akagi, Kaga, and Soryu. The Hiryu, the remaining Japanese carrier, launched a counterattack and managed to heavily damage the USS Yorktown before being sunk itself by American dive bombers.
The Battle of Midway was a resounding victory for the United States. The loss of four of their aircraft carriers severely weakened the Japanese Navy and halted their advance in the Pacific. It also shifted the balance of naval power in the Pacific in favor of the Allies.
The Battle of Midway is often regarded as the turning point of the Pacific War. It not only boosted American morale but also marked the beginning of the decline of Japanese naval supremacy. The strategic significance of Midway cannot be overstated, as it paved the way for Allied offensives and ultimately contributed to the defeat of Japan in the Pacific.
Guadalcanal (8 aug. 1942)
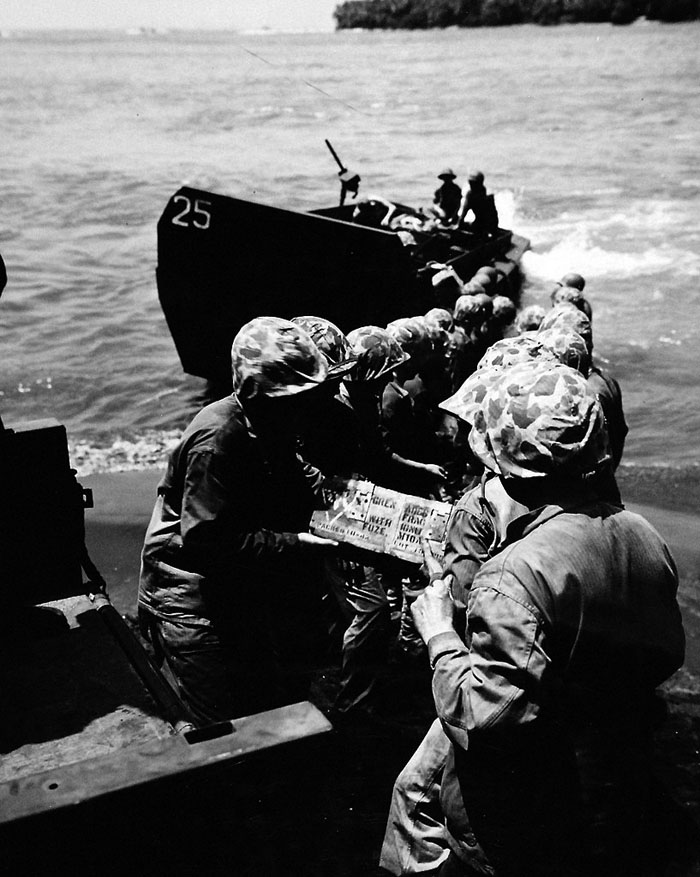
The Battle of Guadalcanal, which began on August 7-8, 1942, was a significant campaign in the Pacific Theater of World War II and one of the longest and most brutal battles of the war. It marked the first major offensive by Allied forces against Japanese-held territory in the Solomon Islands.
The campaign began with a surprise amphibious assault by U.S. Marines on the island of Guadalcanal, part of the Solomon Islands chain in the South Pacific. The objective was to establish an airfield, later known as Henderson Field, to threaten Japanese lines of communication and provide a base for Allied air operations.
The initial landings were successful, with the Marines securing a beachhead on Guadalcanal. However, the following days saw intense fighting as Japanese forces launched counterattacks to retake the airfield and drive the Americans off the island.
The battle for Guadalcanal quickly devolved into a grueling, attritional struggle marked by fierce jungle warfare, naval battles, and relentless air attacks. Both sides suffered heavy casualties and endured harsh conditions, including disease, starvation, and exhaustion.
Naval engagements in the waters around Guadalcanal, including the Battle of Savo Island, saw heavy losses on both sides. The Japanese made several attempts to reinforce their troops on the island, resulting in further naval clashes and significant losses of ships and personnel.
Despite the ferocity of Japanese resistance, the Allied forces, primarily consisting of American Marines and later Army units, managed to hold onto Henderson Field and gradually expand their perimeter on Guadalcanal. The battle continued for several months, with both sides committing additional troops and resources to the campaign.
The Battle of Guadalcanal was ultimately a strategic victory for the Allies. The capture of Henderson Field denied the Japanese a crucial airbase in the South Pacific and shifted the balance of power in the region. It also marked the beginning of a series of Allied offensives that would ultimately lead to the isolation and eventual defeat of Japanese forces in the Solomon Islands and the broader Pacific theater.
Eastern Solomon Islands 24-25 august 1942
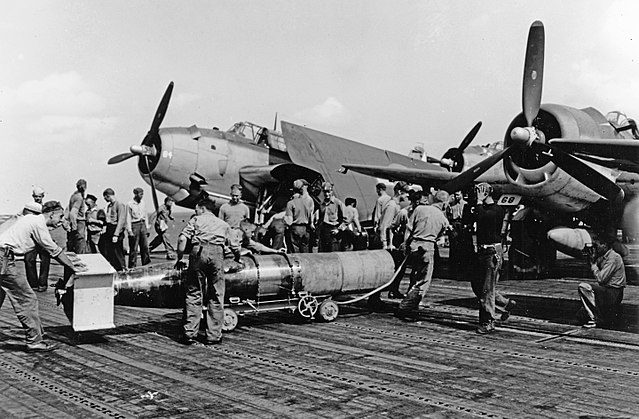
The Battle of the Eastern Solomons, which occurred on August 24-25, 1942, was a naval engagement between the United States and Japan during World War II. It took place near the eastern Solomon Islands in the South Pacific, approximately six months after the Battle of Pearl Harbor.
The battle was part of the larger Guadalcanal campaign, where Allied forces were attempting to seize and secure key positions in the Solomon Islands to protect lines of communication and establish airfields.
The American fleet, under the command of Admiral Fletcher, comprised aircraft carriers USS Enterprise, USS Saratoga, and USS Wasp, along with supporting cruisers and destroyers. The Japanese fleet, led by Admiral Isoroku Yamamoto, included carriers Ryujo and Junyo, as well as a number of battleships, cruisers, and destroyers.
The engagement began with a series of air attacks launched by both sides against each other’s fleets. American aircraft from the carriers targeted Japanese ships, scoring hits on several vessels and damaging the carrier Ryujo. However, the Japanese also inflicted damage on the American fleet, sinking the carrier USS Wasp and damaging the USS Enterprise.
Despite the loss of the USS Wasp, the Battle of the Eastern Solomons was considered a tactical victory for the United States. The American carriers were able to prevent Japanese reinforcements from reaching Guadalcanal and maintain control of the air over the region. Additionally, the damage inflicted on the Japanese fleet forced them to temporarily withdraw from the area.
Strategically, the battle demonstrated the importance of air power and carrier-based aircraft in naval warfare. It also highlighted the fierce competition for control of the Solomon Islands and the broader Pacific theater.
The Battle of the Eastern Solomons was a precursor to further naval engagements in the region, including the decisive Battle of the Santa Cruz Islands in October 1942, as both sides continued to vie for dominance in the Pacific.
Santa Cruz (26 october 1942)
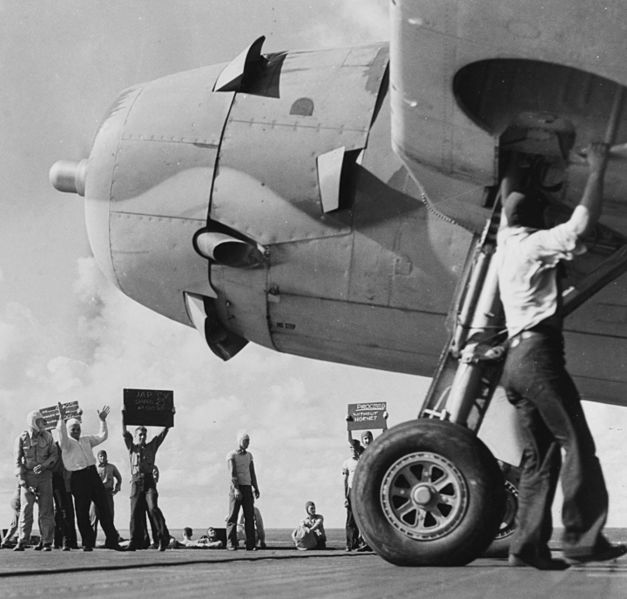
The Battle of Santa Cruz, fought on October 26, 1942, was a pivotal naval engagement between the United States and Japan during World War II. It took place near the Santa Cruz Islands in the South Pacific and was part of the larger Guadalcanal campaign.
The American fleet, under the command of Admiral William “Bull” Halsey, included the aircraft carriers USS Enterprise and USS Hornet, along with supporting cruisers and destroyers. The Japanese fleet, led by Admiral Isoroku Yamamoto, consisted of the carriers Shokaku, Zuikaku, and Zuiho, as well as supporting warships.
The battle began with a series of air strikes launched by both sides against each other’s fleets. American aircraft from the carriers targeted the Japanese carriers, inflicting significant damage on the Shokaku and Zuikaku. However, the Japanese also scored hits on the American carriers, damaging the USS Enterprise and sinking the USS Hornet.
Despite the loss of the USS Hornet, the Battle of Santa Cruz was a strategic victory for the United States. The American carriers were able to disrupt Japanese operations and prevent them from delivering reinforcements to Guadalcanal. Additionally, the damage inflicted on the Japanese carriers forced them to withdraw from the battle and return to their base at Truk for repairs.
However, the battle also highlighted the ferocity of the fighting in the Pacific and the heavy toll it took on both sides. Both the Americans and the Japanese suffered significant losses in aircraft and personnel, underscoring the intensity of the conflict in the Solomon Islands.
The Battle of Santa Cruz was one of the last major carrier battles of the Pacific War and marked a turning point in the Guadalcanal campaign. While the outcome was inconclusive in terms of territory gained or lost, it demonstrated the resilience and determination of both the American and Japanese navies in the struggle for control of the Pacific.
Second battle of Guadalcanal (12-13 nov. 1942)

The Second Battle of Guadalcanal, also known as the Naval Battle of Guadalcanal, took place from November 12 to November 15, 1942. It was a pivotal engagement in the Guadalcanal campaign during World War II and marked another intense phase of fighting between American and Japanese forces in the Solomon Islands.
During this battle, the American forces, under the command of Admiral William Halsey, were primarily focused on reinforcing and resupplying their troops on Guadalcanal. The Japanese, however, launched a major naval offensive with the goal of reinforcing their troops on the island and defeating the American naval presence in the region.
The Japanese sent a powerful naval force, including battleships, cruisers, and destroyers, to engage the American fleet guarding Guadalcanal. The American fleet, centered around the aircraft carriers USS Enterprise and USS November, engaged the Japanese in a fierce and chaotic battle that lasted for two days.
Both sides suffered heavy losses during the Second Battle of Guadalcanal. The Japanese lost several ships, including battleships and cruisers, while the Americans lost the USS Juneau and several other vessels. The battle was characterized by close-range naval combat and intense air attacks launched by both sides.
Despite the heavy losses, the battle ended inconclusively. The Japanese were unable to reinforce their troops on Guadalcanal effectively, and the American naval presence in the region remained intact. However, the battle underscored the ferocity of the fighting in the Solomon Islands and the determination of both sides to control the strategic island of Guadalcanal.
The Second Battle of Guadalcanal marked a significant phase in the Guadalcanal campaign, which would ultimately culminate in an Allied victory and the expulsion of Japanese forces from the island. It also demonstrated the importance of naval power and air superiority in the Pacific theater of World War II.
Tassafaronga (30 nov. 1942)

The Battle of Tassafaronga, which occurred on the night of November 30, 1942, was a naval engagement between the United States and Japan during World War II. It took place near Tassafaronga Point, off the coast of Guadalcanal in the Solomon Islands, and was part of the broader Guadalcanal campaign.
During the battle, a Japanese naval force consisting of several cruisers and destroyers attempted to deliver supplies to Japanese forces on Guadalcanal. The American fleet, under the command of Rear Admiral Carleton H. Wright, intercepted the Japanese convoy.
The American fleet, consisting of cruisers and destroyers, launched torpedoes at the Japanese ships, hoping to disrupt their supply mission. However, the Japanese launched a counterattack, using their superior night-fighting capabilities to surprise the American ships.
In the ensuing battle, the Japanese destroyer force managed to sink or severely damage several American cruisers, including the USS Northampton, USS Minneapolis, USS New Orleans, and USS Pensacola. The American losses were significant, and the Japanese were able to successfully deliver their supplies to Guadalcanal.
Despite the tactical victory for the Japanese, the Battle of Tassafaronga did not alter the overall strategic situation in the Guadalcanal campaign. The Japanese were unable to exploit their success and regain control of the initiative in the Solomon Islands. The battle highlighted the challenges of nighttime naval warfare and the importance of intelligence, tactics, and technology in such engagements.
Overall, the Battle of Tassafaronga was a costly engagement for both sides, but it ultimately did not change the course of the Guadalcanal campaign, which would continue until February 1943, when the Allies finally secured the island and turned the tide of the Pacific War.
Bismarck sea (3-5 mach 1943)

The Battle of the Bismarck Sea, which took place from March 3 to March 5, 1943, was a pivotal engagement between Allied and Japanese forces during World War II. It occurred in the Bismarck Sea, located between the northeastern coast of Papua New Guinea and the islands of New Britain and New Ireland.
The battle was a response to Japanese attempts to reinforce their garrison at Lae and Salamaua in New Guinea, which were critical bases for the Japanese in the South Pacific. The Japanese convoy, consisting of eight destroyers and eight transport ships carrying troops and supplies, was escorted by several cruisers and aircraft.
The Allied forces, primarily composed of American and Australian aircraft, launched a series of coordinated air attacks against the Japanese convoy as it sailed along the northern coast of New Guinea. The Allied aircraft, including bombers, fighters, and torpedo bombers, attacked the Japanese ships with bombs, torpedoes, and strafing runs.
The Japanese convoy suffered heavy losses during the battle, with most of the transport ships and four destroyers sunk. The remaining Japanese ships were scattered and forced to retreat, abandoning their attempt to reinforce the garrison at Lae and Salamaua.
The Battle of the Bismarck Sea was a significant victory for the Allies. It demonstrated the effectiveness of coordinated air power in naval warfare and highlighted the vulnerability of Japanese shipping to air attacks. The victory also prevented the Japanese from strengthening their positions in New Guinea, which ultimately contributed to the Allied advance in the Pacific.
The Battle of the Bismarck Sea is often considered one of the most decisive aerial engagements of the war and a turning point in the campaign in the South Pacific. It helped to secure the Allied foothold in New Guinea and set the stage for further offensives against Japanese-held territories in the region.
Comandorsky (26 march 1943)
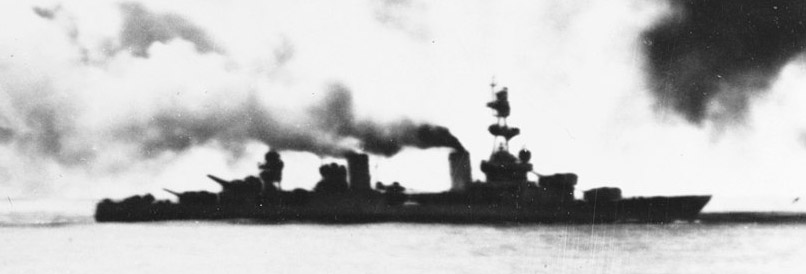
The Battle of the Komandorski Islands, which occurred on March 26, 1943, was a naval engagement between the United States and Japan during World War II. It took place in the North Pacific, near the Komandorski Islands (also known as the Commander Islands), which are located off the eastern coast of Russia’s Kamchatka Peninsula.
 The battle was an unintended confrontation between American and Japanese naval forces. The American fleet, under the command of Rear Admiral Charles H. McMorris, consisted primarily of cruisers and destroyers and was tasked with intercepting Japanese shipping and preventing reinforcement of Japanese forces in the Aleutian Islands.
The Japanese fleet, commanded by Rear Admiral Monzo Akiyama, consisted of two heavy cruisers, two light cruisers, and four destroyers. Their mission was to deliver troops and supplies to the Aleutians and to support Japanese operations in the region.
The engagement began when the American fleet encountered the Japanese convoy near the Komandorski Islands. Despite being outnumbered and outgunned, the American ships engaged the Japanese in a fierce battle that lasted for several hours.
The battle was characterized by long-range gunnery duels and torpedo attacks, as both sides maneuvered to gain the advantage. The American ships, though smaller and less heavily armed than their Japanese counterparts, were able to inflict significant damage on the Japanese fleet, particularly with their longer-ranged guns.
In the end, the Battle of the Komandorski Islands resulted in a tactical victory for the United States. The Japanese convoy was forced to retreat, and the American fleet successfully prevented the reinforcement of Japanese forces in the Aleutians.
The battle demonstrated the effectiveness of American naval tactics and the importance of superior gunnery and maneuverability in naval engagements. It also underscored the challenges faced by the Japanese Navy as the war progressed and resources became increasingly scarce.
The Battle of the Komandorski Islands was one of the last major naval engagements in the Aleutian Islands campaign and marked a significant victory for the United States in the Pacific Theater.
Vella Lavella or “Tokyo night Express” battle (6-7 oct. 1943)
 The Battle of Vella Lavella, which occurred in the Solomon Islands campaign during World War II, was a series of engagements between American and Japanese forces from September 15 to October 6, 1943. Vella Lavella is an island located northwest of Guadalcanal in the Solomon Islands chain.
The battle began when Allied forces, primarily composed of U.S. Marines and U.S. Army soldiers, launched an amphibious assault on Vella Lavella on September 15, 1943. The objective was to seize control of the island and establish air and naval bases to support further Allied operations in the Solomon Islands.
The Japanese, aware of the Allied intentions, deployed naval and air forces to contest the Allied landings. The Japanese Navy sent several destroyers and smaller vessels to intercept Allied supply convoys and disrupt their operations. Additionally, Japanese aircraft conducted air raids against Allied ships and positions on Vella Lavella.
Despite heavy Japanese resistance, the Allied forces were able to secure a foothold on Vella Lavella and establish their bases. However, the battle continued for several weeks as the Japanese launched counterattacks and attempted to retake the island.
One of the most notable aspects of the Battle of Vella Lavella was the use of “Tokyo Express” operations by the Japanese, where they utilized destroyers to transport reinforcements and supplies under the cover of darkness. These operations posed a significant threat to the Allied positions on the island and led to several naval engagements between Japanese and Allied forces.
Ultimately, the Allied forces successfully repelled Japanese counterattacks and maintained control of Vella Lavella. The battle represented another step forward for the Allies in their campaign to push the Japanese out of the Solomon Islands and secure strategic positions in the Pacific. It also demonstrated the effectiveness of Allied amphibious and air power in overcoming Japanese defenses in the region.
Augusta Imperial islands (2 nov. 1943)
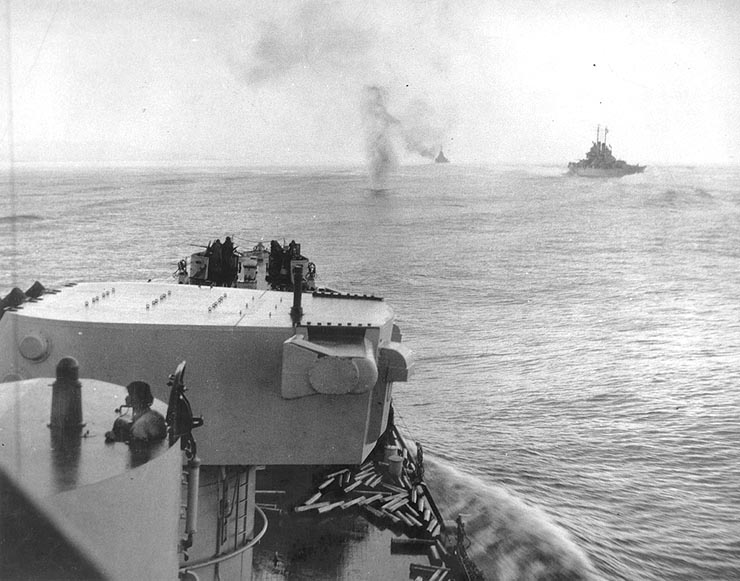
The Battle of Empress Augusta Bay, which occurred from November 1 to November 2, 1943, was a naval engagement between Allied and Japanese forces during World War II. It took place off the coast of Bougainville in the Solomon Islands, specifically in Empress Augusta Bay.
The battle was part of the broader Solomon Islands campaign and aimed to secure a beachhead on Bougainville for Allied forces, primarily composed of U.S. Marines. The objective was to establish air and naval bases to support further Allied advances in the region and isolate Japanese forces on the island.
The Allied fleet, under the command of Admiral Aaron S. Merrill, included several cruisers and destroyers, along with supporting aircraft carriers. The Japanese, aware of the Allied intentions, deployed a force of cruisers, destroyers, and aircraft to contest the Allied landings.
The battle began with an amphibious assault by U.S. Marines on beaches in Empress Augusta Bay on November 1, 1943. The Allied ships provided fire support for the landing forces, bombarding Japanese positions on the shore.
The Japanese responded with air attacks and naval bombardments aimed at disrupting the Allied landings and inflicting damage on their ships. However, the Allied naval and air forces were able to repel the Japanese attacks and provide effective cover for the landing operations.
Despite heavy Japanese resistance, the Allied forces successfully established a beachhead on Bougainville and began to expand their positions inland. The Battle of Empress Augusta Bay was a strategic victory for the Allies, as it allowed them to secure a foothold on Bougainville and further isolate Japanese forces in the Solomon Islands.
The battle demonstrated the effectiveness of Allied amphibious tactics and naval power in overcoming Japanese defenses in the Pacific. It also set the stage for further Allied advances in the Solomon Islands campaign and contributed to the eventual defeat of Japanese forces in the region.
Tarawa (20-23 Nov. 1943)
![]()
The Battle of Tarawa, which took place from November 20 to November 23, 1943, was a pivotal amphibious assault by the United States against Japanese-held Tarawa Atoll in the Gilbert Islands. It was one of the bloodiest and most fiercely contested battles of the Pacific Theater during World War II.
The objective of the Allied forces, primarily composed of U.S. Marines, was to capture Tarawa Atoll in order to establish a base for further operations against Japanese-held territories in the Pacific. The Japanese had heavily fortified the island, constructing extensive defenses, including concrete bunkers, machine gun nests, and coastal artillery positions.
The battle began with a massive naval and aerial bombardment of the island, aimed at softening Japanese defenses and preparing the way for the amphibious assault. However, due to various factors including inaccurate intelligence and the coral reefs surrounding the island, the bombardment was not as effective as hoped.
The amphibious assault began on November 20, with U.S. Marines landing on the beaches of Tarawa Atoll under heavy enemy fire. The landing craft encountered difficulties navigating the shallow waters and coral reefs, exposing the Marines to intense Japanese resistance.
Despite facing fierce opposition and heavy casualties, the Marines fought tenaciously to secure the island. They engaged in brutal close-quarters combat, clearing Japanese bunkers and strongpoints one by one. Over the course of several days of intense fighting, the Marines gradually gained control of the island. However, the battle exacted a heavy toll, with thousands of casualties on both sides.
The Battle of Tarawa was a significant victory for the United States, as it demonstrated the effectiveness of amphibious assault tactics and the determination of American forces in the face of formidable Japanese defenses. However, it also highlighted the high cost of capturing heavily fortified enemy positions in the Pacific.
The Battle of Tarawa served as a grim reminder of the brutality of war in the Pacific and the sacrifices made by those who fought there. It also provided valuable lessons that would inform future amphibious assaults in the Pacific Theater during World War II.
Philippines sea battle (20 june 1944)
The Battle of the Philippine Sea, which occurred on June 19-20, 1944, was a major naval engagement between the United States and Japan during World War II. It took place in the Philippine Sea, also known as the “Marianas Turkey Shoot” due to the large number of Japanese aircraft shot down by Allied forces.
The battle was part of the larger Allied campaign to capture the Mariana Islands, including Saipan, Tinian, and Guam. The Japanese, recognizing the strategic importance of the Marianas, sought to defend the islands and engage the Allied fleet in a decisive naval battle.
The American fleet, under the command of Admiral Raymond Spruance, included numerous aircraft carriers, battleships, cruisers, and destroyers. The Japanese fleet, commanded by Admiral Ozawa Jisaburo, also consisted of carriers and supporting warships.
The battle began with extensive air strikes launched by both sides against each other’s fleets. The American carriers launched waves of aircraft, including fighters, dive bombers, and torpedo bombers, to attack the Japanese ships. The Japanese, meanwhile, launched their own aircraft in an attempt to counter the American assault.
The Battle of the Philippine Sea was characterized by intense aerial combat, as American fighter aircraft engaged Japanese fighters and shot down large numbers of enemy planes. The superior training, tactics, and technology of the American pilots, along with the effectiveness of Allied radar and intelligence, gave the Allies a decisive advantage.
The Japanese suffered heavy losses during the battle, with over 300 aircraft shot down and several carriers damaged or sunk. In contrast, the Americans suffered relatively light casualties, with only a few aircraft lost and minor damage to some ships.
The Battle of the Philippine Sea was a resounding victory for the United States. It effectively destroyed Japanese carrier-based air power and marked the end of the Japanese Navy’s ability to conduct large-scale carrier operations in the Pacific. The battle also paved the way for the Allied capture of the Mariana Islands and provided a significant boost to Allied morale.
Overall, the Battle of the Philippine Sea was a turning point in the Pacific War and demonstrated the growing strength and effectiveness of the Allied forces in the region.
Leyte (24-25 oct. 1944)
-
Phase 1: The Submarine action in Palawan Passage (23 Oct.)
-
Phase 2: Battle of the Sibuyan Sea (24 Oct.)
-
Phase 3: TF34 and halsey’s decision
-
Phase 4: The Night Battle of Surigao strait (24-25 Oct.)
-
Phase 4: The Battle of Samar (25 Oct.)
-
Phase 5: Battle off Cape Engaño (25–26 Oct.)
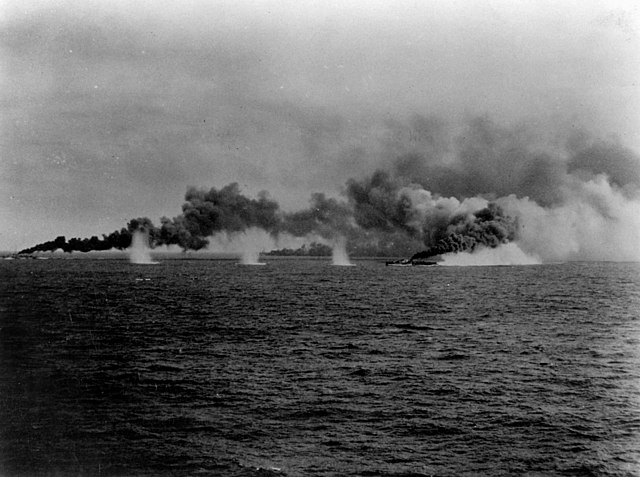
The Battle of Samar in October, 25, 1944 was mainly performed by aviation and American DDs, and Probably one of the most spectacular use of destroyers in this war: It happened when Task Unit 77.4 was attacked by Kurita’s 2nd fleet, which sneaked through the San Bernardino Strait into the perimeter. Earlier the bait fleet (Ozawa) had admiral Halsey, supposed to at least left a battleship force to protect the landing fleet in the north, was entirely away and a message to confirm its presence was received too late to change the events. This leftover USN force under command of Clifton Sprague comprised three carriers groups north to south protecting the landings, and included Taffy 3 which had a screen component, composed of Fletcher class destroyers, the USS Hoel, Heermann and Johnston, and destroyer escorts Dennis, John C. Butler, Raymond, and Samuel B. Roberts. Against overwhelming odds, they repelled Kurita’s fleet, combining skirmishes, smoke clouds and extremely aggressive charges. The recklessness of its commander was paid which heavy losses but the CV force was spared (but for 2 escort carriers sunk). The three destroyers were the best asset of this fleet, and they totally distrupted the already Japanese disorderly attack and put the fleet in total confusion over its real strenght. In total were sunk 3 heavy cruisers, 3 others and a destroyer damaged, while were repelled four battleships and two light cruisers, with, of course, the crusial help of aviation of both Taffy 3 and Taffy 2, launched since the beginning of the attack.
Iwo Jima (Feb-March 1945)
Okinawa (April-June 1945)
Raids over Kure (Summer 1945)
See also:
naval-history.net/
combinedfleet.com
ww2db.com/
rusnavy.com/
List_of_naval_battles
Pictures:
commons.wikimedia.org Naval_battles_of_World_War_II
commons.wikimedia.org/ Naval_battles of the Pacific War 1944
 Latest Facebook Entry -
  X(Tweeter) Naval Encyclopedia's deck archive
 Instagram (@navalencyc)


 French Navy
 Royal Navy
 Russian Navy
 Armada Espanola
 Austrian Navy
 K.u.K. Kriegsmarine
 Dansk Marine
 Nautiko Hellenon
 Koninklije Marine 1870
 Marinha do Brasil
 Osmanlı Donanması
 Marina Do Peru
 Marinha do Portugal
 Regia Marina 1870
 Nihhon Kaigun 1870
 Preußische Marine 1870
 Russkiy Flot 1870
 Svenska marinen
 Søværnet
 Union Navy
 Confederate Navy
 Armada de Argentina
 Imperial Chinese Navy
 Marinha do Portugal
 Mexico
 Kaiserliche Marine
 1898 US Navy
 Sovietskiy Flot
 Royal Canadian Navy
 Royal Australian Navy
 RNZN Fleet
 Chinese Navy 1937
 Kriegsmarine
 Chilean Navy
 Danish Navy
 Finnish Navy
 Hellenic Navy
 Polish Navy
 Romanian Navy
 Turkish Navy
 Royal Yugoslav Navy
 Royal Thai Navy
 Minor Navies
 Albania
 Austria
 Belgium
 Columbia
 Costa Rica
 Cuba
Cuba Czechoslovakia
 Dominican Republic
 Haiti
Haiti Hungary
 Honduras
 Estonia
 Iceland
 Eire
Eire Equador
 Iran
Iran Iraq
Iraq Latvia
 Liberia
 Lithuania
 Mandchukuo
 Morocco
 Nicaragua
 Persia
 San Salvador
 Sarawak
 Uruguay
 Venezuela
 Zanzibar
 Warsaw Pact Navies
 Bulgaria
 Hungary

 Bundesmarine
 Dutch Navy
 Hellenic Navy
 Marina Militare
 Yugoslav Navy
 Chinese Navy
 Indian Navy
 Indonesian Navy
 JMSDF
JMSDF North Korean Navy
 Pakistani Navy
 Philippines Navy
 ROKN
ROKN Rep. of Singapore Navy
 Taiwanese Navy
 IDF Navy
 Saudi Navy
 Royal New Zealand Navy
 Egyptian Navy
 South African Navy


 Ukrainian Navy