
British vs German Navy, 28 August 1914
The first major naval battle of ww1
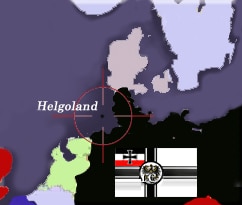 Heligoland in the North Sea is a geological oddity, a block of harsh red cliffs laid in the North Sea. Successively Danish, English, and German, she locked the bay of the same name. Located on the west side of Denmark next to the mouth of the Elbe and 70 km from the coast this spot included two islands, the smallest of which was a simple dune.
Ships anchored in Wilhelmhaven and Bremerhaven crossed its path at any outlet in North Sea. In addition, if the island had so far been mainly a stop for sailors and popular holiday resort thanks to its microclimate, Tirpitz soon contemplated its naval base potential and started to built two large piers and military installations.
From the start of the war, British submersible watched moves and regular patrols of destroyers and light cruisers in the area. Commodore Roger Keyes, who commanded the force of British submersibles, formulated a plan that involved the Harwich Fleet commanded by Admiral Tyrwhitt.
Initial Plans
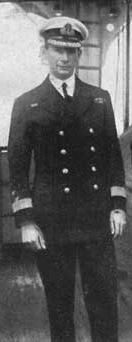 < Commodore Roger Keyes. The plan was to attract the bulk of the enemy light forces off the coast of Heligoland by a submersible curtain split into two groups, one of which was to play the role of decoy, and attract the enemy ships onto Harwich Fleet and the other to prevent reinforcements. It was planned a another force composed of heavier vessels (battle cruisers and armoured cruisers) within reach in case of massive reinforcements from Bremerhaven or even the Grand Fleet.
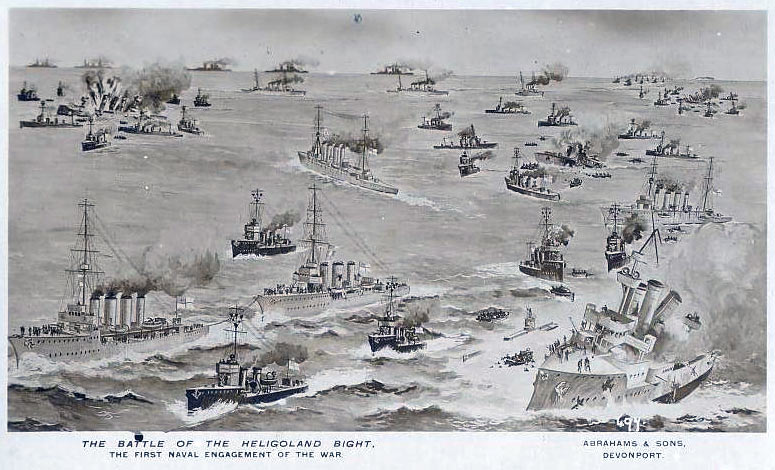
Heligoland battle and ships involved (Postcard)
But the staff at that time had other things in mind and provisionally dismissed the Keyes plan. The latter resurfaced when W.Churchill became First Lord of the Admiralty and explained his views. Cheerful, boiling Churchill then requested a meeting and confered with Tyrwhitt, the Prince of Battenberg (1st Lord of the Sea), Sturdee (Chief of Staff of the Admiralty) and Hamilton (2nd Lord of the Sea). Sturdee opposed any mobilization of the Grand Fleet in support, but agreed to provide coverage of the operation with five cruisers, battleships of the force C and the two battle cruisers of the Force K.
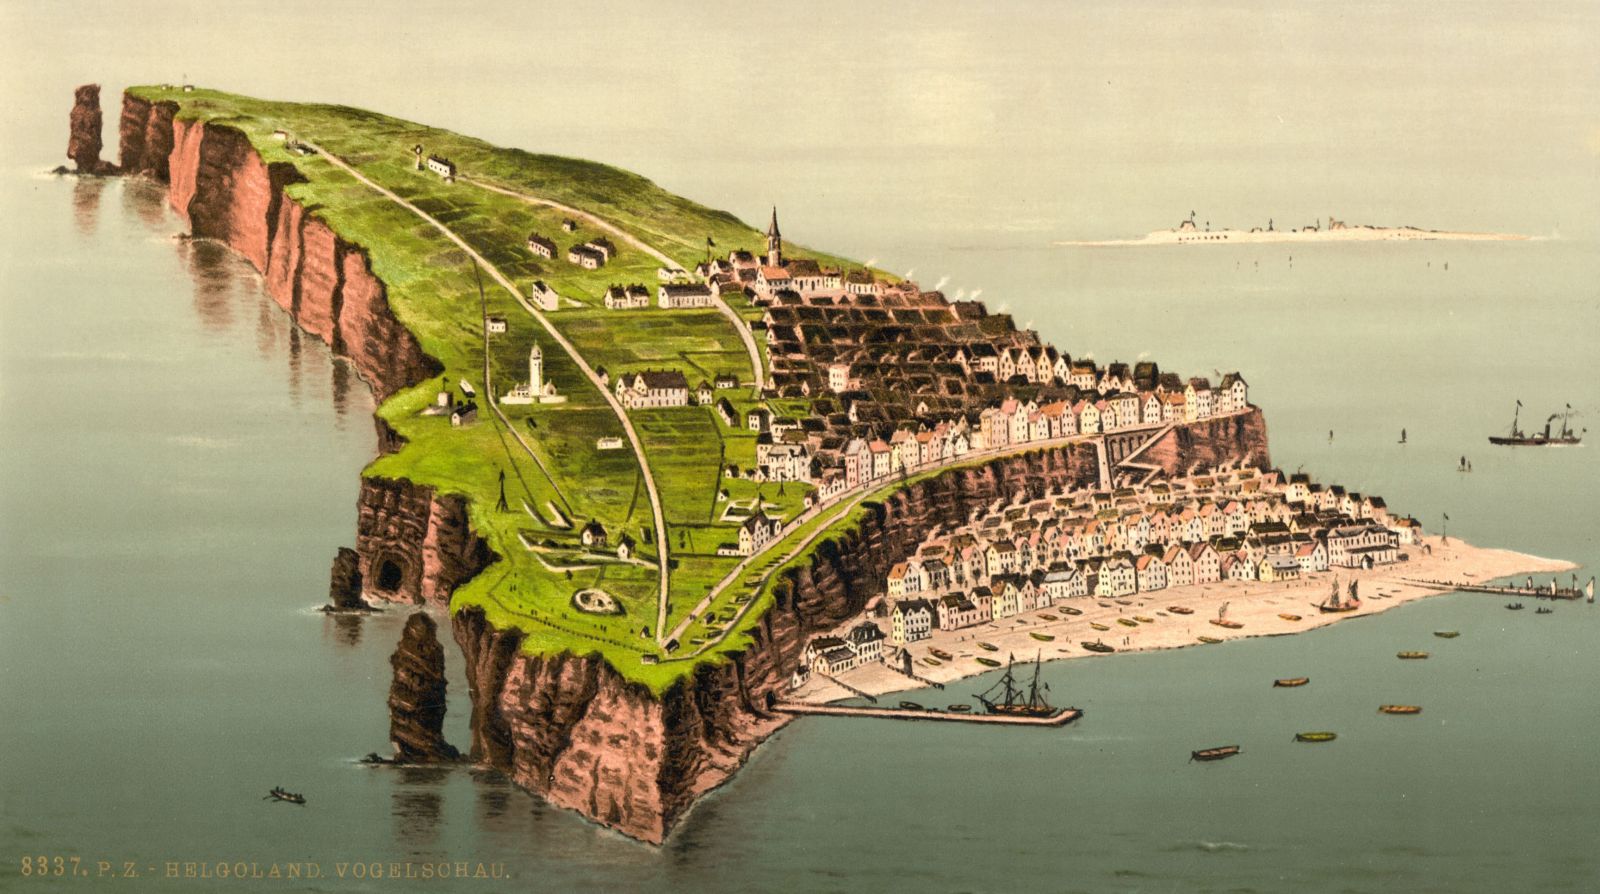
The Island of Helgoland circa 1890-1900
Keyes’ submarines are deployed
Both Keyes’s submersible groups were composed of E4, E5, E9 placed north and south of Heligoland to prevent the Germans reach to coast, while another line consisting of E6, E7 and E8 was sent 74 km from there to attract Germans to the west force. Finally the D2 and D8 were placed at the mouth of the Ems to intercept any reinforcements. The day was to be scheduled for 28 August. However John Jellicoe, the commander of the Grand Fleet was only informed of this in very vague terms, on the 26, just when Keyes was sailing his submarine force.
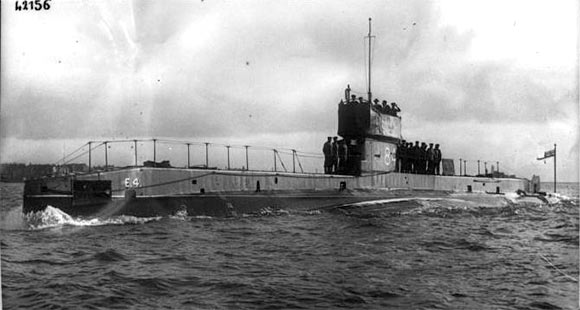
Submarine HMS E4
Cruisers are committed
The latter finally offered the assistance of the Grand Fleet, worrying an exit so close to German coasts. Sturdee objected again, but nonetheless allowed to detach some battle cruisers, which could be quickly in the area. A force comprising the first squadron of battle cruisers under David Beatty and a squadron of light cruisers under Commodore Goodenough was established. But Keyes and Tyrwhitt had at that time almost reached their positions and were then could not be contacted. So they ignored this support force. Thus the unexpected meeting just before dawn on the Force of Harwich and Goodenough nearly turned to confrontation before the watchmen confirmed that they were friendly vessels !
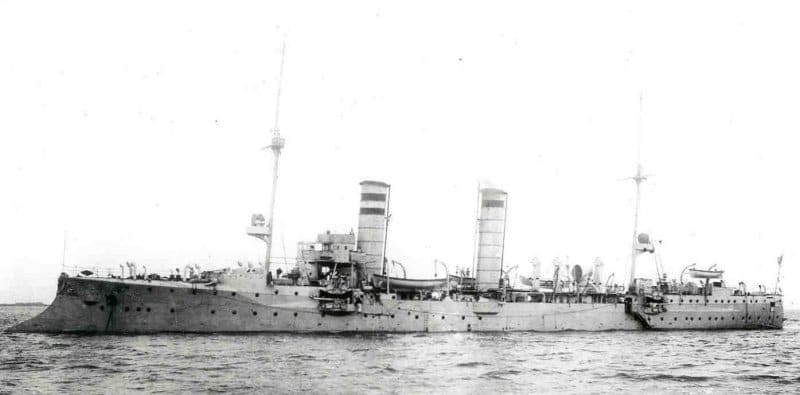
SMS Frauenlob, Gazelle class
German order of battle
From their side, the Germans had sent a force of nine modern destroyers from the first flotilla of torpedo boats, 46 km west of the island. 22 km of the island was also posted the Third Division of minesweepers. In support, were the light cruisers SMS Hela, Ariadne, Frauenlob and Stettin, while the Mainz was still in the mouth of the Ems, and 7 other light cruisers were anchored at Wilhelmshaven and Brunsbuttel. No heavier ship was available. The Harwich force commanded by Tyrwhitt included no less than 31 destroyers led by light cruisers Arethusa and Fearless. In support, C Force counted five armoured cruisers, and Force K had six light cruisers and battle cruisers HMS Invincible and New Zealand.
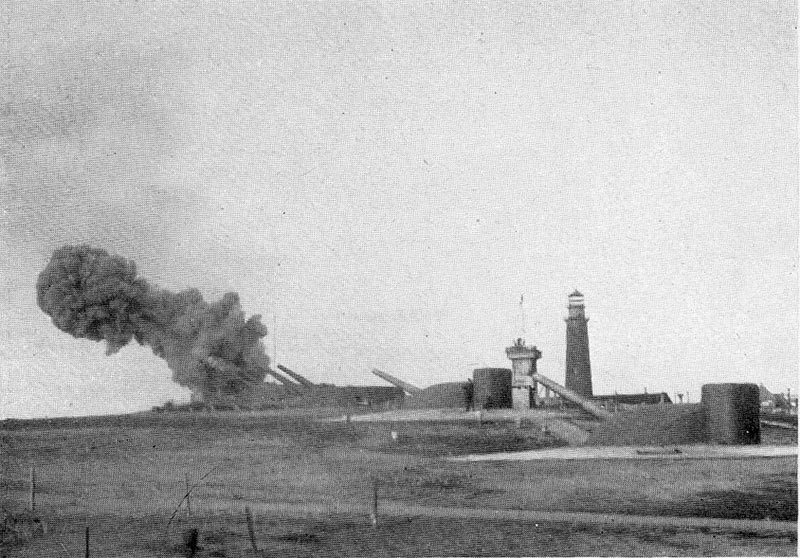
Heligoland Fortifications
 < German Rear Admiral Maass At the first light of dawn, the German destroyer E9 spotted the G194, and at 5:26, torpedoed, but missed the latter while is was proceeding at full steam for ramming. The German ship immediately signaled her position, and other destroyers of the flotilla aimed at full speed for this sector.
Tyrwhitt’s destroyers at the vanguard
Then Tyrwhitt Forces arrived with vanguard, Laurel and 3 other class “L” destroyers. The latter spotted the G194 at 6:50, and was pitted against Admiral Leberecht Maas, who hoisted his mark on the Cöln, the first to see the enemy. He echoed the new commander in chief of the defense of the bay of Heligoland, Rear-Admiral Franz Hipper. The latter, thinking it was just an isolated squadron of four destroyers, only authorized the departure as Stettin and Frauenlob in immediate reinforcement.
HMS Loyal, 1913
Tyrwhitt on his side feared for his too advanced destroyers, and unable to recall them, was obliged to sail at full speed to assist them. This is when the first flotilla of destroyers arrived. These spotted the cruisers and destroyers which did not joined the battle, preferring to retreat to the shelter battery of Heligoland. Detached, the first flotilla led by Fearless made its way north. The Third flotilla led by Arethusa, having mauled the S13 and V1, reached the second German line, composed of frail minesweepers.
But at 7:57, the British watchers signaled the presence of two enemy cruisers: These were the SMS Frauenlob and Stettin. The 3rd fleet veered towards these ships, while the first in gunnery reach engaged combat. Soon the Fearless hit the Stettin, which came to support the destroyers veering towards the island. However, the Fearless was ordered to continue north of the island. Arethusa, meanwhile, heavily engaged the Frauenlob.
HMS destroyer Laurel
The ordeal of HMS Arethusa
However because of the concentration of German Fire, the Arethusa was also hit several times, with its machinery damaged, flooded, its engine and transmission out of order, but especially its two main guns knocked off, the others quickly following. The Frauenlob on her side and conceded 10 impacts. But the British cruiser situation worsened with the arrival of the SMS Stettin, recently “released” from its duel with the Fearless, pulling northeast. At 8:30, the Arethusa, too badly damaged, broke off the fight and headed due west, with the Frauenlob on its tail.
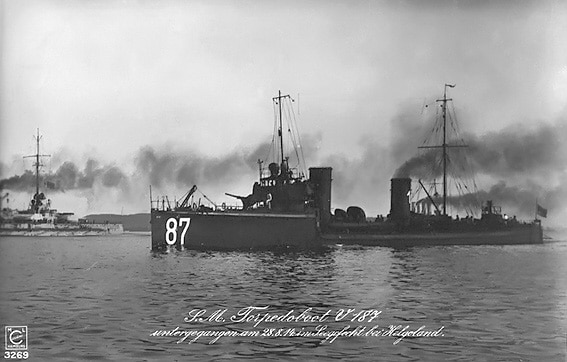
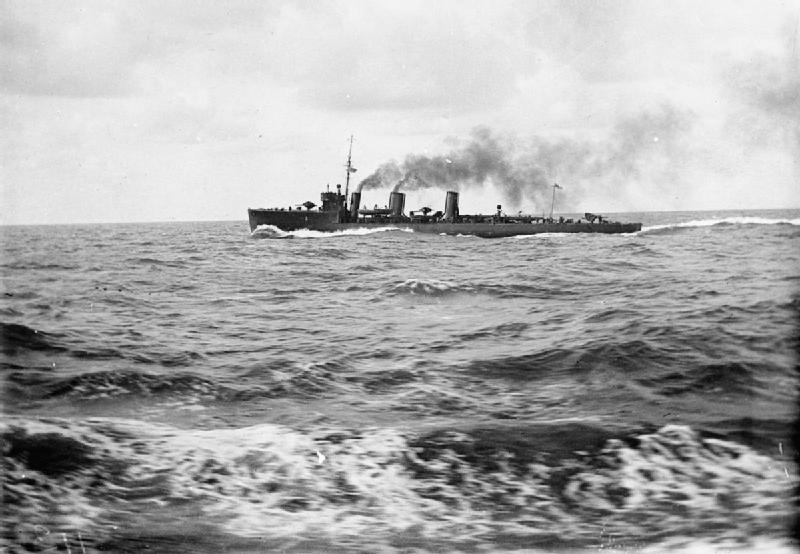
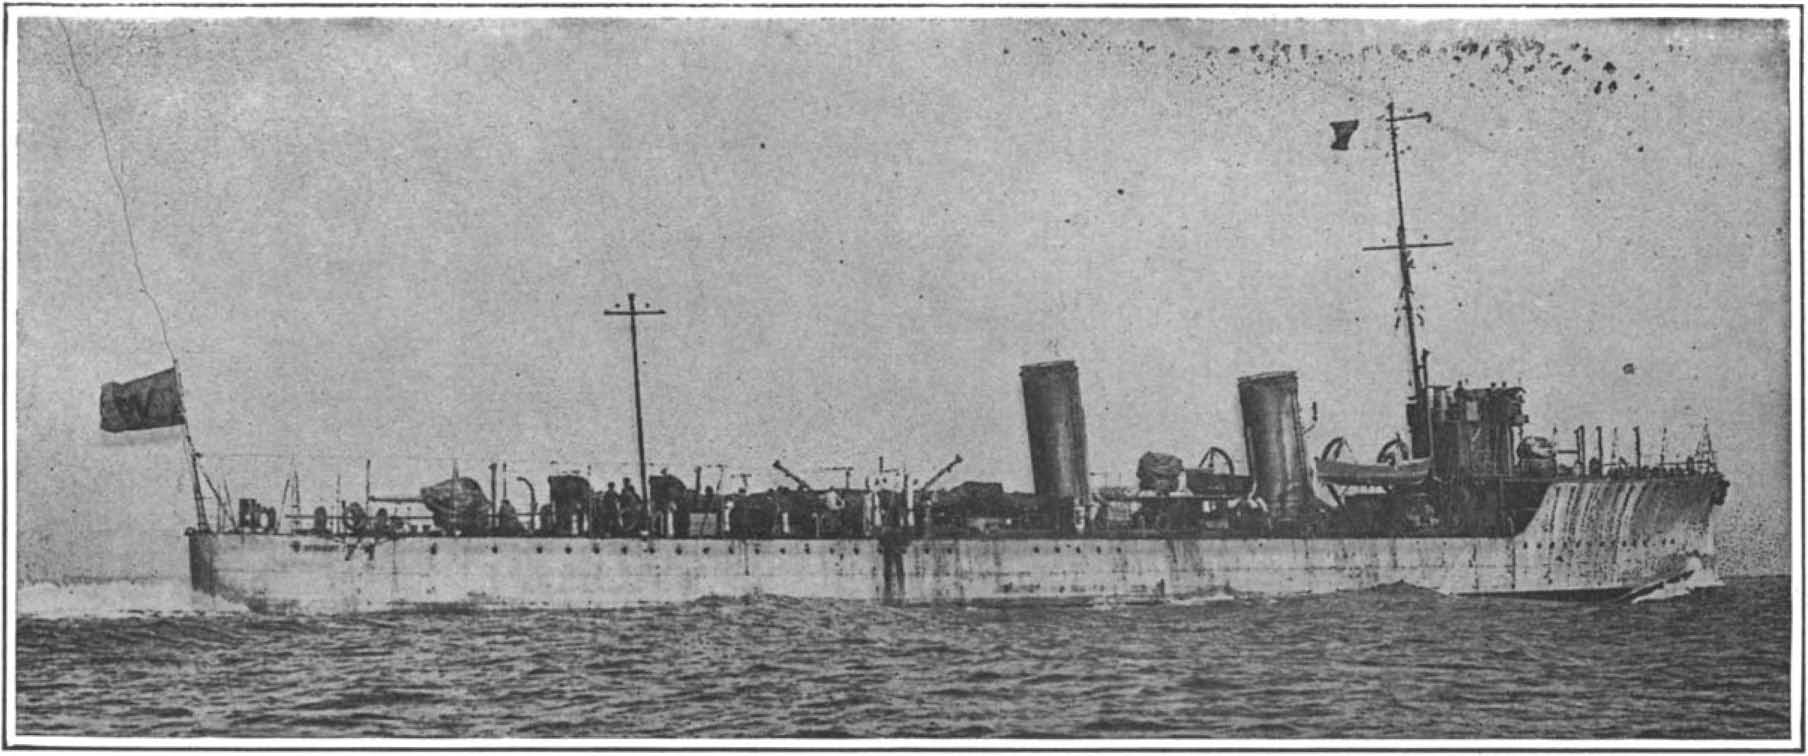
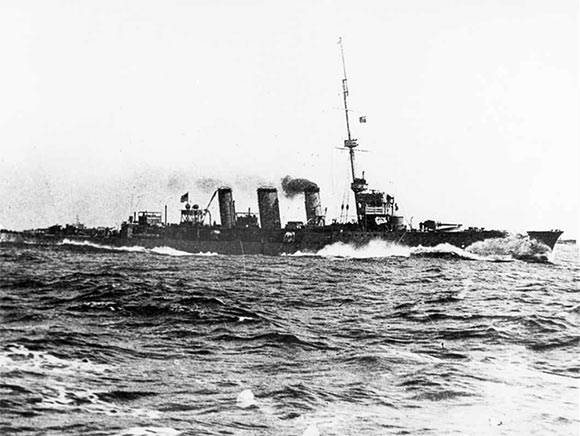
SMS V187 destroyer at Heligoland
Meanwhile, a chase ensued between Keyes aboard HMS Lurcher and light cruisers of Goodenough, each thinking the other was the enemy, because of lack of communication. This confusion ended at 9:50. Goodenough then decided to detach the Lowestoft and Nottingham of the first squadron of cruisers. These crossed the path of V187, which was hit and pursued by several destroyers led by HMS Goshawk. The German destroyer was sunk at 9:10 am and survivors rescued.
Maass’ cruisers arrives
Just when these operations were underway, while two whaleboats were at sea, destroyers had to depart hastily when watchmen signaled the Stettin. The few English sailors left in their boats and German sailors were surprised when the submersible E4 surface. There was not enough room to collect them all, and only English sailors and three prisoners boarded while the remaining Germans were given compass, food, and the direction of Heligoland. Around 8:55, the Fearless and Arethusa were traveling southwest in concert.
HMS Arethusa light cruiser
The Hela and Ariadne, warned, were too far from the action and returned to their patrols, while the Strassburg, Mainz and Cöln had sailed towards the island and were now racing towards combat. Confusion still raged on when at 9:30, HMS Southampton of the Goodenough squadron was torpedoed unsuccessfully by the E6 which took her for a German cruiser. The latter in turn took her to a German submarine and started a ramming maneuver.
Meanwhile, Tyrwhitt was trying to reform his squadron lost in the fog, which then began to rise. That’s when the Germans cruisers catch on. SMS Strassburg began shell the slow retreating, wounded Arethusa, despite and active defense from destroyers led by HMS Fearless. SMS Strassburg break off down, but the Cöln in turn started to pound the hapless Arethusa. Once again, she was saved by the bold defense of the British destroyers. In turn the Strassburg also tried to finish off te British Cruiser. Under pressure, Tyrwhitt demanded urgent intervention of David Beatty. The latter complied and came in support despite the presence of mines in the area at 11:35. Regarding the strength of Harwich, the battle raged between the English destroyers and the cruiser when the SMS Mainz arrived in turn. At 11:50 Goodenough’s squadron was reported by the Germans watchmen and the three cruisers changed course.
Sinking of the Mainz at Heligoland
Cruisers vs destroyers
The Mainz had its rudder jammed by a lucky shot from the Fearless. She continued to drive on course by modulating the speed of its two screws, but was violently attacked by destroyers Laurel, Liberty and Laertes. The latter has been badly hit in return. The British cruisers then in turn pounded her until she was evacuated by her crew. She will sink in 40 minutes at 24:50. Meanwhile, Cöln and Strassburg took advantage of this diversion to re-attack the Arethusa (almost defenseless), its destroyers being dispersed.
Beatty’s battle cruisers to the rescue
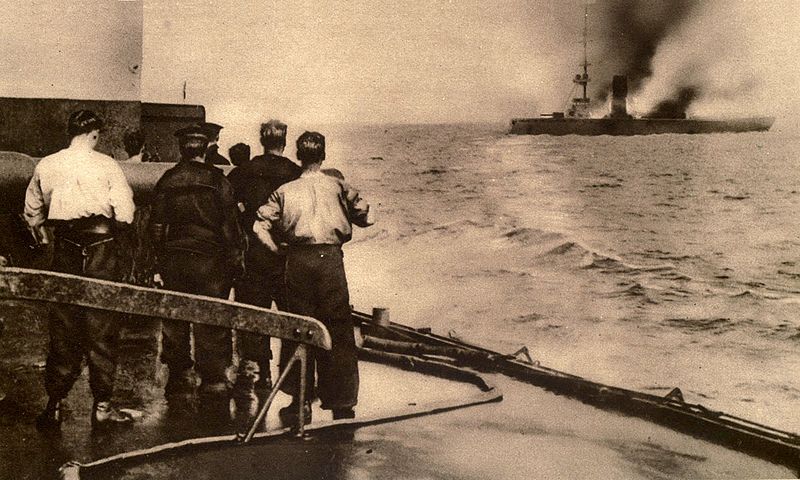
It was then David Beatty’s turn to arrive timely with his battle cruisers. They opened fire from a distance, surprising the Germans cruisers that at last break the fight and change course. The distance dwindled rapidly during this maneuver, so the Cöln was quickly hit. Ariadne then arises, attempted a diversion by taking fire. A bold more, but she was immediately hit at close range by both the Lion and the Princess Royal, and quickly set ablase. The Strassburg took advantage of the confusion, still cruising between the two lines, and managed to escape, but the Cöln was spotted by the watchmen of the Lion, and at 13:25, the German cruiser, unable to fire back because of its shorter gunnery range, was sunk.
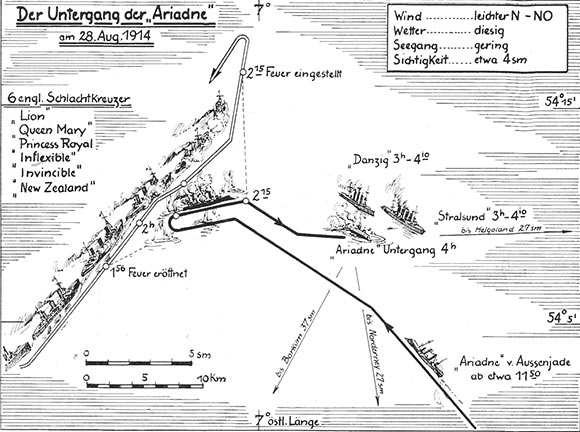
SMS Ariadne, light cruiser path on the final phase of the battle
Aftermath
At 14:00 it was all over. SMS Strassburg had escaped his pursuers, and the bulk of British forces has being folded. The latter deplored 36 victims while HMS Arethusa and three destroyers had to undergo lengthy repairs. But on their side the Germans deplored 1200 casualties or missing and prisoners, and had lost 3 cruisers and a destroyer. This battle showed firstly the serious shortcomings of the defense of the bay of Heligoland, since the German system had proved too light and that the attacks lacked coordination, reinforcements arrived too slowly. But on the other side the British showed a critical lack of communication of coordination between the different forces involved, which nearly ended in disaster. This does detract from the success of Beatty who will reap the greatest credit of this victory in the newspapers…
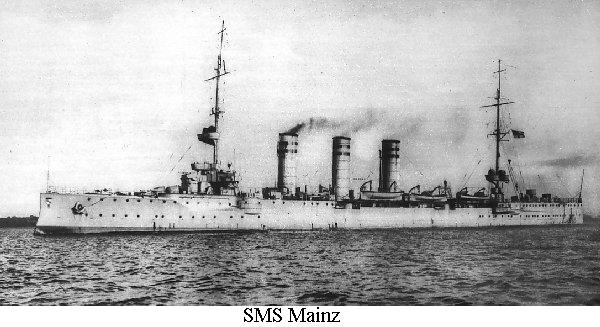
Cruiser SMS Mainz
Gallery
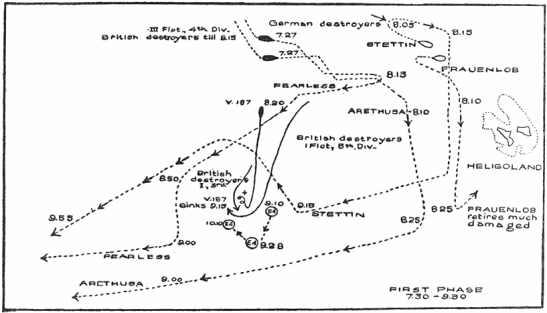
Second phase of the Battle
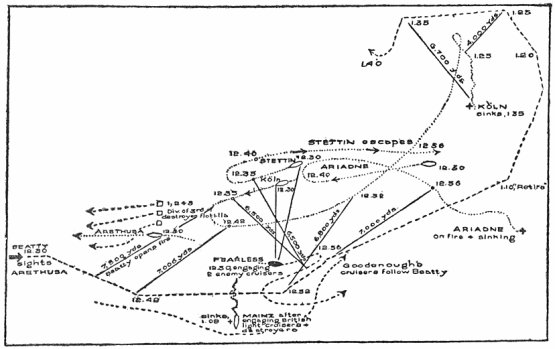
Last phase of the Battle
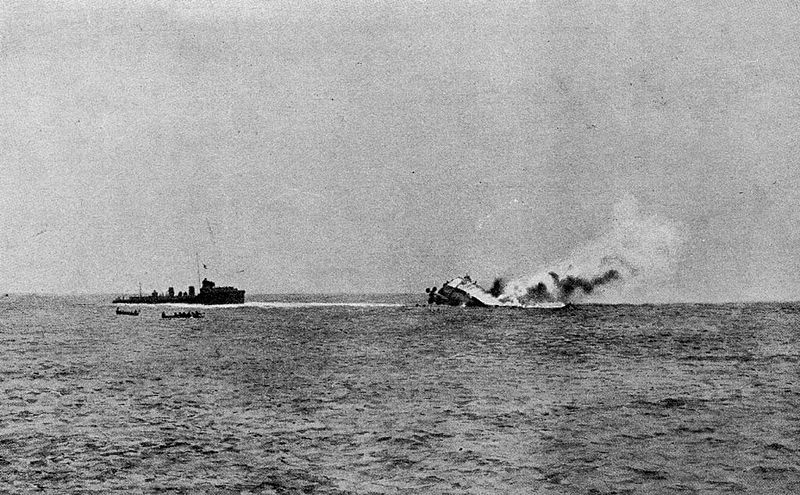
SMS Mainz sinking
Video
Links and Sources
The Battle of Heligoland bight on wikipedia
The Battle of Heligoland bight on British-Battles
The Battle of Heligoland bight on naval-history.net
 Latest Facebook Entry -
  X(Tweeter) Naval Encyclopedia's deck archive
 Instagram (@navalencyc)


 French Navy
 Royal Navy
 Russian Navy
 Armada Espanola
 Austrian Navy
 K.u.K. Kriegsmarine
 Dansk Marine
 Nautiko Hellenon
 Koninklije Marine 1870
 Marinha do Brasil
 Osmanlı Donanması
 Marina Do Peru
 Marinha do Portugal
 Regia Marina 1870
 Nihhon Kaigun 1870
 Preußische Marine 1870
 Russkiy Flot 1870
 Svenska marinen
 Søværnet
 Union Navy
 Confederate Navy
 Armada de Argentina
 Imperial Chinese Navy
 Marinha do Portugal
 Mexico
 Kaiserliche Marine
 1898 US Navy
 Sovietskiy Flot
 Royal Canadian Navy
 Royal Australian Navy
 RNZN Fleet
 Chinese Navy 1937
 Kriegsmarine
 Chilean Navy
 Danish Navy
 Finnish Navy
 Hellenic Navy
 Polish Navy
 Romanian Navy
 Turkish Navy
 Royal Yugoslav Navy
 Royal Thai Navy
 Minor Navies
 Albania
 Austria
 Belgium
 Columbia
 Costa Rica
 Cuba
Cuba Czechoslovakia
 Dominican Republic
 Haiti
Haiti Hungary
 Honduras
 Estonia
 Iceland
 Eire
Eire Equador
 Iran
Iran Iraq
Iraq Latvia
 Liberia
 Lithuania
 Mandchukuo
 Morocco
 Nicaragua
 Persia
 San Salvador
 Sarawak
 Uruguay
 Venezuela
 Zanzibar
 Warsaw Pact Navies
 Bulgaria
 Hungary

 Bundesmarine
 Dutch Navy
 Hellenic Navy
 Marina Militare
 Yugoslav Navy
 Chinese Navy
 Indian Navy
 Indonesian Navy
 JMSDF
JMSDF North Korean Navy
 Pakistani Navy
 Philippines Navy
 ROKN
ROKN Rep. of Singapore Navy
 Taiwanese Navy
 IDF Navy
 Saudi Navy
 Royal New Zealand Navy
 Egyptian Navy
 South African Navy


 Ukrainian Navy