
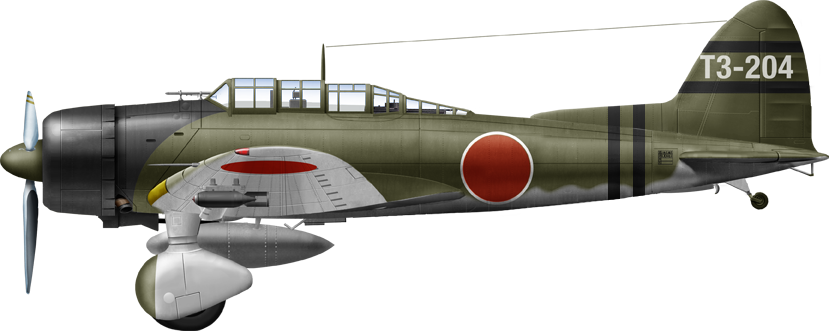
Aichi D3A (1938)
![]() Imperial Japanese Navy, 1,495 built
Imperial Japanese Navy, 1,495 built
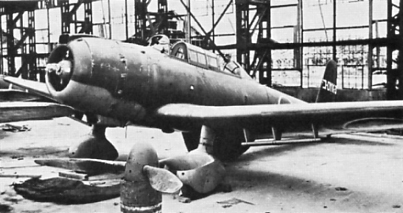
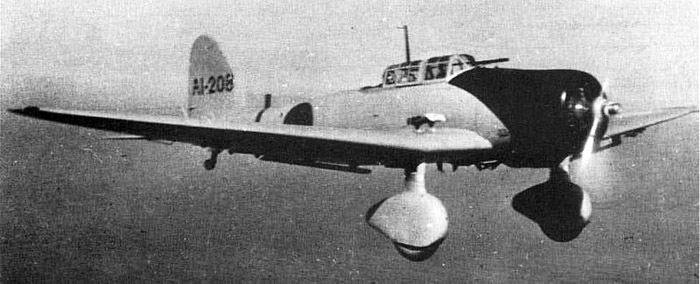
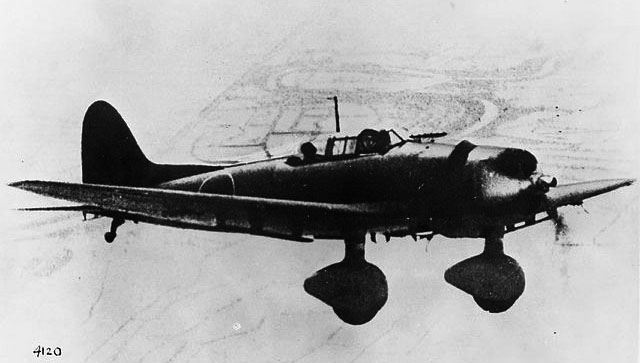
The D3A2 “Val” main IJN Dive Bomber in 1941
The “Val” as it was referred in the USN, was the main Imperial Japanese Dive Bomber of WW2, until replaced gradually from 1942 onwards by the Yokosuka D4Y Suisei, far more modern by all standards and benefiting from a higher production. But it was really the dreaded “Val” that made all the heavy lifting for the IJN in the crucial first year of the war with the US, until December 1942, with ace pilots and results: They sank single-handedly 11 destroyers, two heavy cruisers, one aircraft carrier and several auxiliaries, while assisting in many others, notably five fleet aircraft carriers.
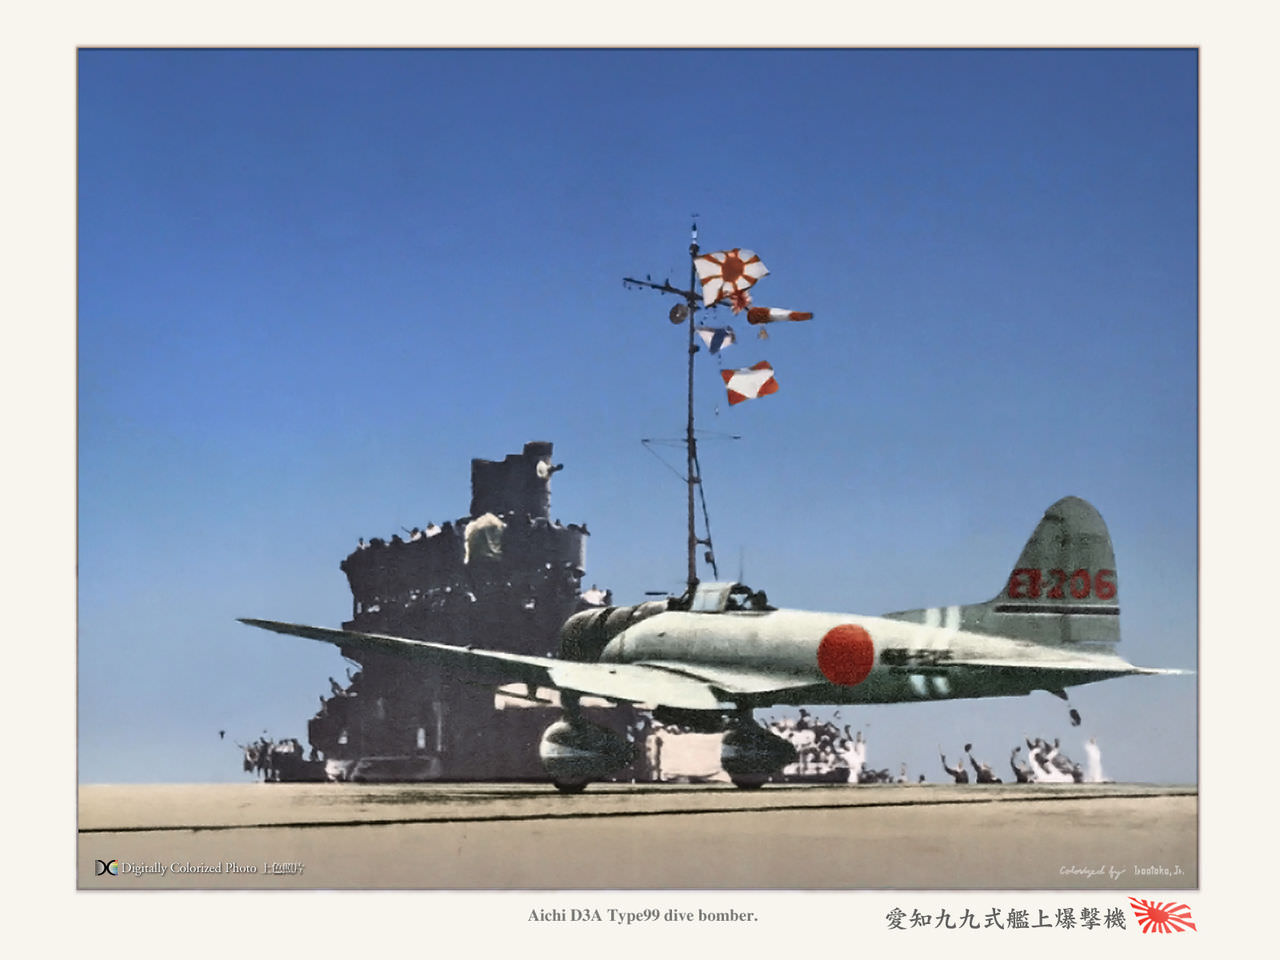
Superb colorization by irootoko Jr. of the D3A taking off from Akagi during the Indian Ocean raid.
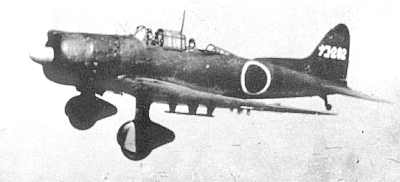
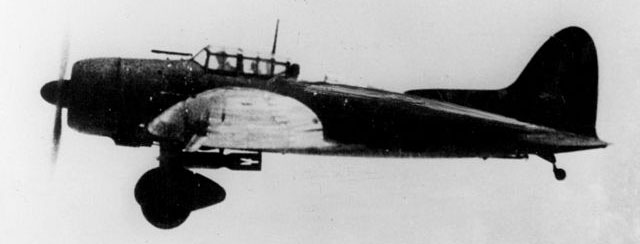
The Aichi D3A was innovative as being a cantilever monoplane, unlike the D1A/D2A “Susie” it replaced. It would be adopted in 1939, battle tested in China, and then produced three times more. The D3A was also the last fixed undercarriage model of the IJN, although it had a fully enclosed cockpit, and folding wingtips. Rugged, not very fast but surprinsingly agile, the “Val” was also accurate enough for the task intended, and performed well into the Kido Butai (1st air fleet) from all carrier decks since Pearl Harbor to the fall of Guadalcanal. It was delivered in two main variants, the D3A1 and D3A2 which soldiered on into well late 1944 in land-based units and for training in 1945.
Development: A replacement for the D2Y
The IJN wanted in mid-1936 a new dive bomber to replace the Aichi D2Y which just entered production. Looking at what other countries were working on, the days of the biplane seemed off, and the admiralty expressed the desire for a cantilever monoplane. The 11-Shi specification was specified to Aichi, Nakajima, and Mitsubishi, which all worked on, and submitted their own designs, and asked in a second phase for two prototypes each.

German Heinkel HE-70 “Blitz”, an inspiration for the wings design.
The Aichi design team worked on low-mounted elliptical wings, inspired by the Heinkel He 70 Blitz, then just purchased for evaluation. The elliptical shape was at the start a mathematical theory destined to procure the best compromise of all shapes, providing lift, agility and maintaining drag low enough for agility. This type of wing was also prototyped on Mitchell’s fighter at the same time.
The very first prototype, on paper, was to be powered by the 529 kW (709 hp) Nakajima Hikari 1. It was feeble for an engine, and flew slow enough not to worry about the drag caused by its fixed landing gear, an ideal solution to land on aicraft carriers. It was not seen as a serious issue as top speed was not a priority. Simplicity also imposed a trusted nine-cylinder radial engine. They dropped the idea of a liquid-cooled inline engine, as none was provided at the time in Japan.
The first built of the two prototype was complete in December 1937. It flew a month later in 1938, and despite poor test results, was designated by the Navy as as D3A1 (Factory wise it was the Type Navy Dive Bomber, and did not received a more “bankable” surname as later models). Initial tests showed the Type 99 was clearly underpowered, but also suffered from directional instability in wide turns while tighter turns made it to snap roll. Also when diving, its brakes vibrated a lot when extended, so much so it was feared they would shear off and damage the plane in flight. Still at the time, the Navy asked for a design speed of 200 knots (370 km/h), but made a revision to take in account faster western fighters depliyed in China, and asked for a diving speed of 240 knots (440 km/h).
The second prototype was extensively modified to address these demands and solve the flight issues:
-A new engine was adopted, the 626 kW (839 hp) Mitsubishi Kinsei 3
-There was a redesigned cowling
-The Vertical tail was enlarged and reshaped for better directional instability.
-Wings had now a larger span with leading edges hawing wash-out
-Strengthened dive brakes.
This fixed all but one problem as the prototype made its flight debut: The directional instability was still there, but still, the pckage was judged by the Navy Commission superior at the time to its competitor the Nakajima D3N1.
In December 1939, the Navy ordered the new model as the “Navy Type 99 Carrier Bomber Model 11” (“kanjō bakugekiki”). Production was adapted however, and presented slightly larger wing span, improved dive brakes, and increased power (Now the 746 kW (1,000 hp) Kinsei 43 and later 798 kW (1,070 hp) Kinsei 44, plus redesigned cowling. A long dorsal fin-strake, starting midway down the rear fuselage, caracteristic of the D3A, cured the instability problem. In fact it made, combined with the more powerful engine and elliptic wings, the D3A extremely manoeuvrable, so much so that new mission were invisioned.
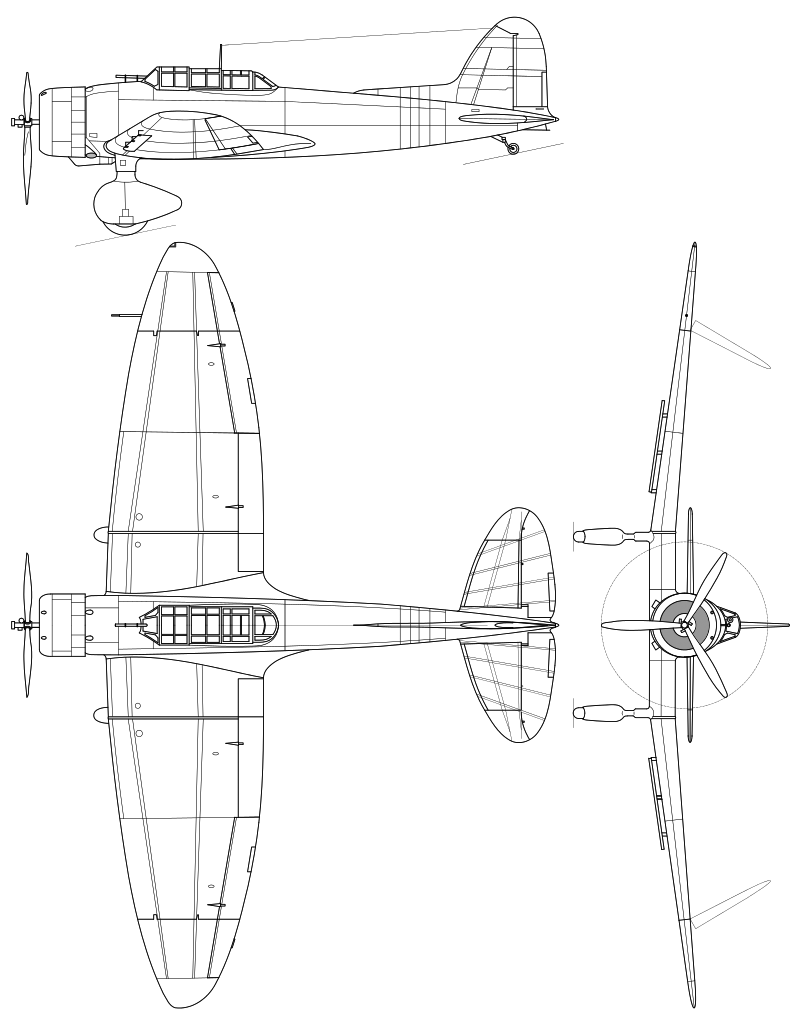
Final Design

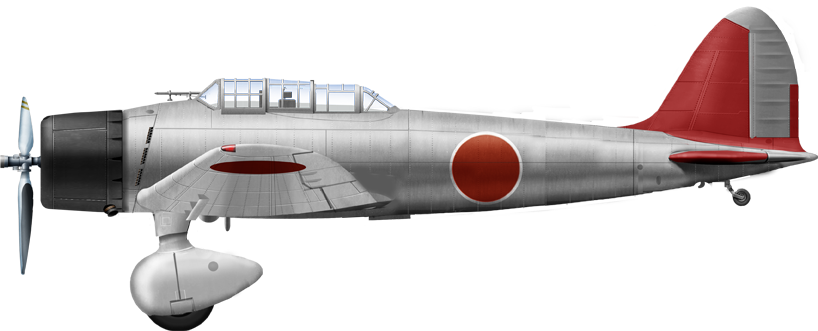
D3A1 From IJN Akagi over China, 1940
The fuselage was single-bay, of ovale section with framing and stress aluminium skin. The cockpit and its two sliding canopies was relatively short, just intended for two seats, the pilot forward and the observer/navigator/gunner aft, on a revolving seat. As seen above, the wings were ellipitic to increase manoeuvrability, as were the vertical tail and tailwings. As the britsh would have said, it “looked right” tat first glance, and indeed flight right, without any vice. Without its fixed undercarriage creating drag and a more powerful engine, plus some armor and self-sealing tanks, it could have been an excellent fight-bomber.
Engine:

kinsei 54 of a D3A3 in maintenance on an island, 1944
The The Mitsubishi Kinsei (金星, or “Venus”) was a 14-cylinder, air-cooled, twin-row radial aircraft engine. It was developed by Mitsubishi in 1934 for the IJN, wit factory designation A8 when experimental and in service, MK8 “Kinsei” (Navy designation). In 1941, the reputation of this engine was such it was also adopted by the Army as Ha-112 or 1,300hp Army Type 1 and Ha-33 in May 1943, equipping the Yokosuka D4Y3-D4Y4 and Kawasaki Ki-100 in its late version.
Kinsei 41 saw increase in compression ratio from 6.0:1 to 6.6:1 with a larger supercharger and it was introduced from 1936 produced until 1945. The D3A1 had the Kinsei 43, delivering 1,000 hp (750 kW) at 2400 rpm at sea level
or 990 hp (740 kW) at 2400 rpm at 2,800 m (9,200 ft), and later the Kinsei 44 which developed 1,070 hp (800 kW) at sea level and 1,080 hp (810 kW) at 2,000 m (6,600 ft).
The D3A2 jumped on the next iteration, in the Kinsei 50 serie. The latter had a final compression ratio of 7.0:1 and Indirect fuel injection plus a larger two-speed supercharger. The D3A2 Kinsei 54 improved output to 1,200 hp (890 kW) at 2500 rpm at 3,000 m (9,800 ft) and 1,100 hp (820 kW) at 2500 rpm at 6,200 m (20,300 ft) thanks to previous improvements, redesigned cylinder head, water injection and then higher pressure oil pump.
Armament
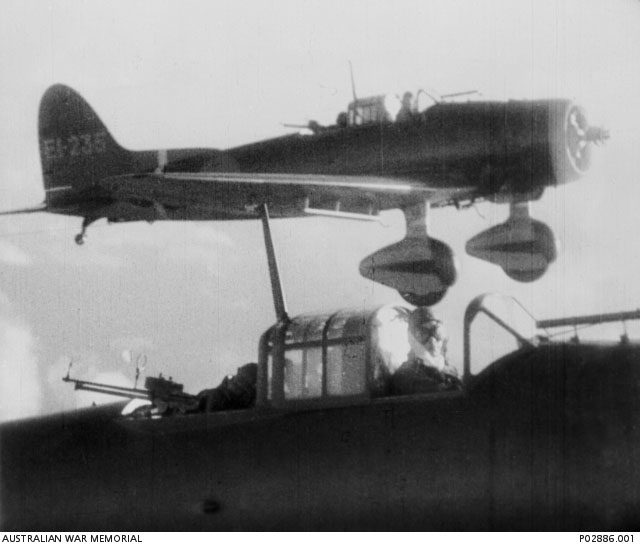
Vals from IJN Shokaku, 1942 (AWM)
The only issue with the “Val” was its relatively weak payload, especially compared to the B5N “Kate” which carried a bomb almost double the weight. The D3A1 and D3A2 both carried:
-Two fixed forward-firing 7.7 mm (0.303 in) Type 97 machine guns in the wings
-One flexible 7.7 mm (.303 in) Type 92 machine gun rear of the cockpit
-Normal bomb load: 250 kg bomb (Type 99 No 25 semi-AP or Type 98 No 25 land bomb) under the fuselage. To avoid hitting the propeller, it was swung under it and released by a trapeze.
-Two additional 60 kg bombs (Type 99 No 6 semi-AP or Type 2 No 6 land bomb) were carried underwings racks located outboard of the dive brakes.
Equipments
The pilot had a Type 95 telescopic gunsight and later Type 99 used for aiming the bomb when diving. The observer/navigator had a Type 97 Mk1 drift sight located in the front-left of his seat. A drift meter was also mounted on the floor, front-right of his seat. Between him and the pilot was located the lain Type 96 Mk2 radio set, which on top of it a Type 3 reflector compass for navigation.
Variants
Production: D3A1
In total, some 479 D3A1 were delovered by Aichi Kokuki KK, less than the D1A/D3A total production, but it filled the needs of the IJN and all its aicraft carriers when introduced in 1940. Due to the rapid progress of aviaton performances, in 1942, this model was no longer relevant and already engineers at Aichi worked out a much improved model. One of te improvements brought to the late D3A1 was a propeller spinner, which became standard with the next iteration.
Production: D3A2
In June 1942, these efforts succeeded by bringing an all improved version of the D3A1, now powered by the 969 kW (1,299 hp) Kinsei 54 engine. This, and many other modifications, like the engine cowl, srength, tail, and fuselage glasshouse tested in a modern wind tunnel, brought even more performances to what became the D3A2 (Aichi Model 12, Navy Model 22). Range was reduced by the larger engine, so engineers found a way to cram into the fuselage additional fuel tanks, bringing the total to 900 L (240 US gal) so that it could effectively roamed free all along the Solomon Islands.
The Navy Model 22 started to replace the Model 11 (D3A1) in front-line units in autumn 1942, those retired being sent to training units or land-based units. However already by late 1943, they were replaced in turn by the Yokosuka D4Y Suisei (“Judy”).
Overall, Aichi Kokuki K.K., at Funakata, Nagoya produced two 11-Shi prototypes (1937-38), six D3A1 Service trials aircraft (1939), 470 D3A1 Model 11 production (Dec 1939-Aug 1942) a single D3A2 Model 12 prototype (June 1942) and 815 D3A2 Model 22 production (Aug 1942-June 1944) for 1,294 total and Showa Hikoki Kogyo K.K. in Tokyo added to this 201 D3A2 Model 22 production (Dec 1942-Aug 1945).
The forgotten “Val”: D3Y Myojo
D3Y Myojo in 1945.
Aichi was conscious that mass production used lots of valuable materials, and in 1943, started a study to replace the D3A1 used for training by an equivalent using non-strategic materials, and in this case, wood. Therefore, The D3Y was designed as a two-seat bomber trainer, based on the successful Aichi D3A2, still with a fixed tailwheel undercarriage.
Aichi planned to allow construction by unskilled workers and the design was much simplified: Straight tapered wings were used while the fuselage was lengthened to improve stability. Only two prototypes were built in 1944, proving heavier than expected for their Mitsubishi Kinsei 54 radial engine, same as the D3A2. After much redesign to save weight, it was approved for production and in 1945, three producton models only were delivered, designated “Navy Type 99 Bomber Trainer, Myojo Model 22”. Myojo meant “venus”. Its characteristics are not well known, but it could carry at least a dummy bomb, likely to have been replaced in case by a real one:
It’s armament indeed as designed comprised two 20 mm (0.787 in) Type 99 Mark 1 machine guns in the engine cowling and a single 800 kgs (1800 ib) bomb. There was no provision of a rear gunner, just a pilot. Performances were rarther similar to the regular D3A2, 470 km/h (290 mph, 250 kn) at 5,000 m (16,000 ft) for top speed, 296 km/h cruise speed, and a range of 1,472 km (915 mi, 795 nmi). Aichi also worked on an improved version called the D5Y1 Myojo Kai (Navy Special Attacker Myojo Kai), also known as the experimental D3Y2-K Myojo, a derivative used for Kamikaze missions. To improve its performances in the air, the undrrcarriage was jettisonable. The prototype was seized incomplete in August 1945.
Detailed specs
D3A1 Specs |
|
| Crew: | 2: Pilot, observer/radio |
| Fuselage Lenght | 10.195 m (33 ft 5 in) |
| Wingspan | 14.365 m (47 ft 2 in) |
| Wing area | 34.9 m2 (376 sq ft) |
| Height | 3.84 m (12 ft 7 in) |
| Empty weight: | 2,408 kg (5,309 lb) |
| Max takeoff weight: | 3,650 kg (8,050 lb) |
| Propeller: | 3-bladed metal constant speed propeller |
| Engine: | 1,070 hp (800 kW) Mitsubishi Kinsei 44 – D3A1 Model 11 (late production) |
| Top speed: | 387 km/h (240 mph; 209 kn) at 3,000 m (9,800 ft) |
| Climb rate: | 3,000 m (9,800 ft) in 6 minutes 27 seconds |
| Endurance: | 1,472 km (915 mi) |
| Service ceiling: | 9,300 m (30,500 ft) |
| Wing Loading: | 104.6 kg/m2 (21.4 lb/sq ft) |
| Power/mass: | 4.9 kg/kW (8 lb/hp) |
| Armament | 2x forward-firing 7.7 mm Type 97, one Type 92 rear flexible moun, 1x 250 kg (550 lb) fuselage bomb, 2x 60 kg (130 lb) underwings |
| Other payloads | 2x 160 l (42.27 US gal; 35.20 imp gal) drop-tanks |
D3A2 M22 Specs |
|
| Empty weight: | 2,570 kg (5,666 lb) |
| Max takeoff weight: | 3,800 kg (8,378 lb) |
| Propeller: | 3-bladed metal propeller |
| Engine: | Mitsubishi Kinsei 54 14-cyl. AC RPE 970 kW (1,300 hp) take-off, 1,200 hp (890 kW)/3,000 m, 1,100 hp (820 kW)/6,200 m |
| Top speed: | 430 km/h (270 mph, 230 kn) at 6,200 m (20,300 ft) |
| Climb rate: | 3,000 m (9,800 ft) in 5 minutes 48 seconds |
| Endurance: | 1,352 km (840 mi, 730 nmi) |
| Service ceiling: | 9,800 m (32,200 ft) |
| Wing Loading: | 108.9 kg/m2 (22.3 lb/sq ft) |
| Power/mass: | 3.9 kg/kW (6.4 lb/hp) |
The D3A in action
Tactical use of the “Val”
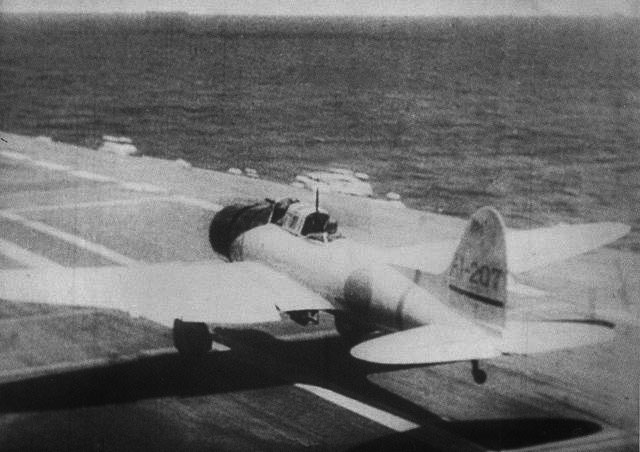
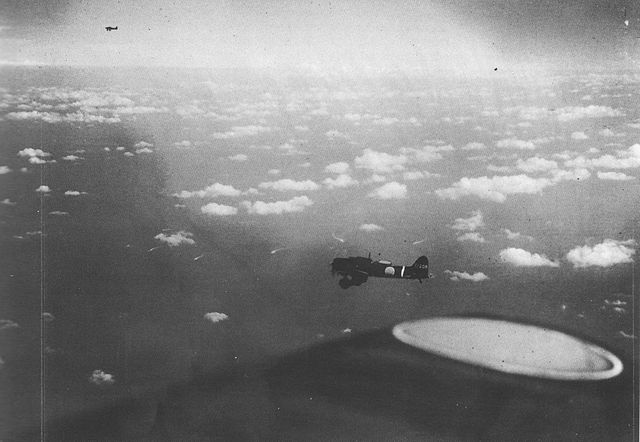
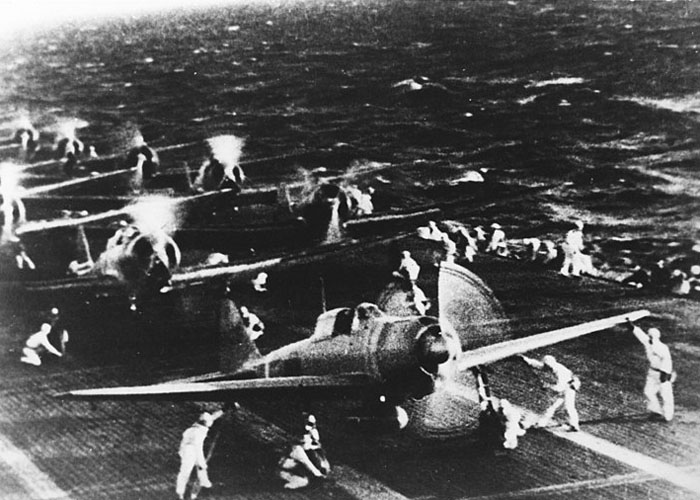
D3A taking of from Akagi for the Indian Ocean Raid
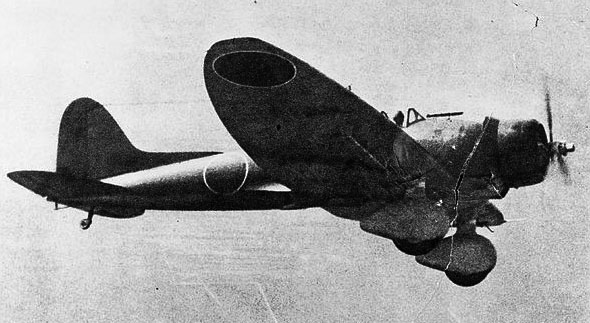
The D3A operated as a carrier-based dve bomber, able to operate decisive strikes on the often lightly protected vertical decks of USN major ships, capital ships and aicraft carriers, which had the largest surface. By doctrine, IJN pilots avoided to targets light vessels like destroyers, being a narrow, nimble and very agile ships. Cruisers were manageable using the “follow the lead” tactic by a more experience dive bomber crew. Individual D3As were commanded by the senior ranking crew member aboard. It happened to be the observer in some cases, not the pilot, unlike in the USN where the pilot was almost always commander. Both Lieutenant Takehiko Chihaya at Pearl Harbor and Lieutenant Keiichi Arima in the Solomon Islands campaign were observers/commanders.
On the tactical organization size, the First air fleet (Kido Butai) took the best advantage of these airborne combined arms tactics by using two divisions, with two carriers each, carrying divided strike forces, one division having mostly dive bombers and the other torpedo planes, while the fighter escort and CAP was contributed to all four carriers.
The D3A approached in high altitude to facilitate long range spotting by the chief observer of the squadron, the one aboard the division (Chutai, 3×3 planes) leader, although a spotting could be achievd by any “Val” in the formation, in groups of three, two “Shotai” on the wings, one on front, which was also the Chutai leader. When spotted, the targeted ship was approached from 17-22 km away (10-14 miles), ideally on its front. An attack was coming from 9,800 feets, down to 3,000 feets (3000 down to 900 m) according to the manual, the division splitting into three Shotai (sections) of three planes each to choose their own path without interference.
All three started a 20% approach, going into three direction to approach the ship on various angles, to avoid the risk of the ship avoiding the attack, before starting their final dive in a steep to almost vertical (in general in a 55-60° angle) started at least at 4900 feets (1,500 m). The pilot uses its bomb aiming forward a separate device using its own set of graduations from the main targeting sight, which could be setup via a rotating nob inside the cockpit.
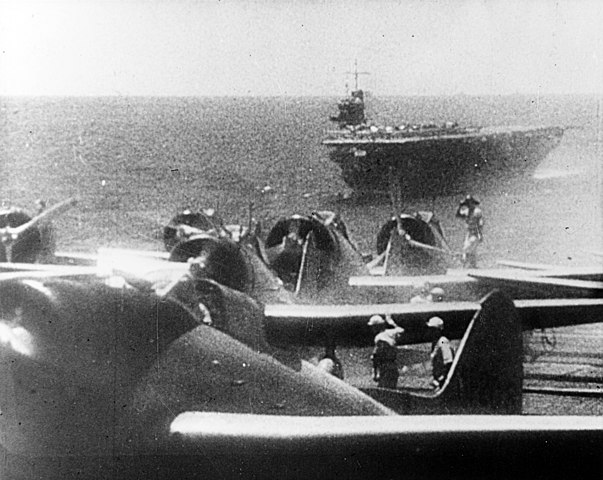
D3A preparing to take off for the Pearl Harbor attack
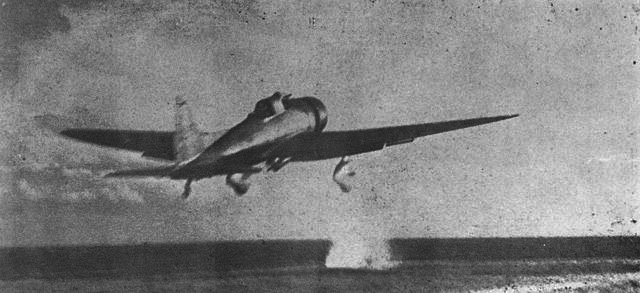
Once the bomb dropped, the “Val” started its resource at around 2000 ft (600 m) to recover t around 160 feets (50 m), basically just above the enemy vessels, to the point of having its fixed undercarriage touching or hitting water in other cases. It was likely the plane would tumble over and break apart when it happened. This was seen sometimes with some zealous veteran pilots. Rookie “Val” pilots in 1943 tended to dive, and correspondingly take their resource far earlier, leading to growing inacurracy.
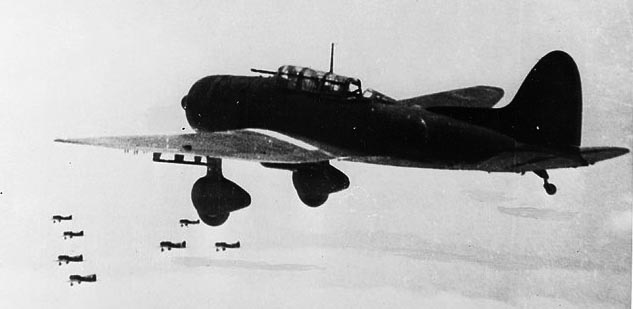
This standard tactic was often coupled in conjunction of two other squadrons: B5N “Kate” in bombing configuration, dropping their payload from well above target, and the same in torpedo-carrying configuration, if when going well combined, made their torpedo attack at the same time. The goal was for the latter to start a bit earlier in order to force the target ship an evasive turn hard to port/starboard, on which the “Val” squadron leader would calculate a trajectory ideal to meet the ship making its manoeuver.
The same was true the other way, depending on the circumstances (mainly the timing of squadrons arrival): “Vals” could dive first, and when discovered, drive AA fire to them, allowing “Kates” to operate their dangerous torpedo run where the ship was evading, just over the waves. Both USN and Japanese air crews arrived in training and simulations to the same conclusions about the best way to “corner” an enemy vessel. The strenght of USN AA was also a factor for Japanese air crews in their decision of operate immediately rather than waiting to take a better position during the pacific war. It should be added that “Zeros”, when not deadling with the enemy CAP, were used to strafe enemy vessels and targert their AA crews in particular, helping the work of torpedo-bombers.
The “Val” limited speed was comparable to its arch-rival the Dauntless, but it was criticized for its “light” payload, a single 250 kgs (550 Ibs) bomb, versus the latter which caried a much more potent 454 kgs bomb (1000 ibs). Almost double. Damage result was in relations, despite the use of timing fuse and AP cap allowing the Japanese bombs to penetrate the target’s decks before exploding, as shown by the fate of USS Arizona at Pearl. B5N Kates could carry a much larger 800 kgs (1760 Ibs), but it was only used in high altitude bombing and thus, less accurate. Nonetheless, those used at Pearl Harbor were modified, fitting AP shell cones into bomb bodies to ensure armo-piercing capabilities.
The “Val” carried two types, the Type 99 N°25 AP (armor-piercing) before Pearl Harbor and the Type 99 N°25 HE (High explosive) detonating on impact. The first could be used in early attacks, for example by the leader of each “Shutai”, exploding on AA gun mounts and blinding AA crews, clearing the way for the next two carrying an AP bomb. This was the tactic adopted at Pearl Harbor, repeated later in several battles like against USS Yorktown at Midway. In that case however, the dive bombers attacked from the rear.
Overall, given their tally, the “Vals” small bomb did its job well enough in many cases. Only the lack of training later in the war limited their success
First combat operations (1939-41)
The D3A1 first saw combat operation in November 1939, even before its official acceptance as the Navy Type 99 dive bomber. Nakajima indeed sent several early D3As to the 14th Air group, based on Hainan island and flying over the Haikou area of South China.
These formed a small “shutai” commanded by Lieutenant Sadamu Takahashi, in support of the Imperial Japanese Army. It took part in the battle of Nanning, and multiplied raids over the supply lines coming from French Indochina. After the fall of Nanning, they stayed operational there until 1940. By May 1940, the 12th Air Group gained the first production D3A1 dive bombers. They took part in the capture of Yichang and started anti-shipping patrols over the Yangtze river, to cut Chinese supplies from Chongqing. In September 1940, D3A1 from the 12th Kokutai started operations against Chongqing, by then the Chinese capital. The 14th Kokotai had the occasion to us its D3A1s in Indochina by the autumn of 1940, over (and later from) Hanoi, launching air raids over Kunming and Burma Road.
This was land-based missions, but in parallel, the D3A1 commenced carrier qualification trials: IJN Akagi and Kaga received theirs in 1940, making their combat debut from land bases in China.
Early Pacific operations (1942-43)
At Pearl Harbor, the D3A1 took a curcal part to the success of the two raids over the Hawaiian Pacific fleet stronghold, and could be credited notably with the destruction of several of the battleships present, but none single-handedly. The first 10 months of the war saw them exytremely active and during the Indian Ocean raid in April 1942 they reached their greatest tally, scoring over 80% hits and sinking two heavy cruisers and an aircraft carrier.
D3A1 dive bombers generally used semi-AP bombs and from 5 April 1942, Colombo, Ceylon was attacked by half the “Vals” active in the raid, while the other half was kept in reserve in case RN ships were reported. Later the Japanese command ordered a second strike against Colombo and the reserve D3As were rearmed with classic land bombs. In between, British heavy cruisers were spotted and the D3A with land bombs took part in the attack, unintentionally proving very effective: Their blast “cleaned up” the cruiser’s decks, nullifying anti-aircraft defense and allowing a pintpoint accuracy by the next D3A equuipped with semi-AP bombs. That accidental success led to modify the doctrine having in each Chutai, the one Shotai in the lead equipped with land bombs. This was the method use to sink HMS Hermes, and it became permanent.
1942 Netherlands, New Guinea and Solomons operations saw the better D3A2 took a grater part in operations, significantly contributing to sinking USS Lexington at the Battle of the Coral Sea, Yorktown at the Battle of Midway and USS Hornet at the Battle of the Santa Cruz Islands.
In addition, USS Enterprise was badly damaged at the Battle of the Eastern Solomons and at Santa Cruz, each time due to D3A hits. None prove fatal anyway. D3A1 in particular, superseded by the new D3A2 were often land-based, which came in handy during the Solomon Islands campaign, and the battle of Guadalcanal: Operation I-Go, Operation SE and Operation RO. In New Guinea they participated in the Battle of Milne Bay and Battle of Buna–Gona. During these operations, the veterans of the 2nd/582nd Air Group distinguishe themselves particularly, even shooting down enemy planes when the occasion presented itself.
D3A2s most often combined their attacks with the B5N Kate, which resulted in combination strikes that did not secured credits in sinkings for dive bombers alone. However, in many occasions especially for the land-based Kokutai in the Solomons and New Guinea, they operated alone. However D3A pilots were credited single-handedy to sink ships in the cases they succesfully hit destroyers: in the Indian Ocean alone in april, they sunk USS Edsall, USS Pecos, HMS Cornwall and Dorsetshire, HMS Hector, HMS Tenedos, HMS Hermes, and HMAS Vampire in march-April. In the February raid against Darwin, they sank USS Peary and in the Java sea in March, USS Pope. During the campaings of the Pacific in early 1943 they sank USS De Haven, USS Aaron Ward, USS Kanawha, and USS Brownson.
Later operations (1944-45)
The D3A was gradually replaced by the Yokosuka D4Y Suisei “Judy”, more modern, faster and heavily armed. The remaining D3A2s were left on land-based airfields and continued to perform occasional attacks. Some of these dive bombers left behind in isolated islands outpassed in the “island-hopping campaign” were pressed as impromptu fighters/interceptors. Without payload, and despite their fixed undercarriage, they proved very agile. Many encounters with the F4F saw the “Val” survive. Many more shot down allied attack planes.
Remaining D3A2s also still saw servive in small carriers of the IJN, as better suited than the heavier and fast-landing Suisei. A bit like for the F4F and GM Wildcat in 1944 operating from escort carriers, they were still a common asset abord IJN escort carriers in 1944 and 1945. When US forces recaptured the Philippines in 1944, they were attacked by scores of land-based D3A2s. Of course losses were heavy. The remaining models stayed in training units back in Japan, for D4Y pilots, while several were modified with dual controls, becoming the “Navy Type 99 Bomber Trainer Model 12” or D3A2-K.
D3A1 from IJN Akagi
Remaining D3A2s were then used in 1945 kamikaze missions, USS Abner Read, an American destroyer, being sunk by one such kamikaze on 1 November 1944 and USS William D. Porter, on 10 June 1945 off Okinawa. Aichi’s successor of the D3A, a wooden model named D3Y Myojo, was never mass-produced in time.
References
Angelucci, Enzo; Matricardi, Paolo (1978). World Aircraft: WW II, Vol II.
Brown, David (1990). Warship Losses of World War Two. Arms and Armour
Casey, Louis S. (1977). Naval Aircraft. Secaucus, Chartwell Books Inc
Chant, Christopher (1999). Aircraft of WW II Amber books 1939–45.
Eden, Paul (2007). The Encyclopedia of Aircraft of WWII. London: Amber Books
Fleischer, Seweryn; Szeremeta, Zygmunt (2001). Aichi D3A Val, Nakajima B5N Kate Wydawnictwo Militaria
Francillon, René J. (1979). Japanese Aircraft of the Pacific War (2nd ed.). Putnam
Francillon, René J. (1969). Japanese Bombers of World War Two, Volume One. Hylton Lacy Publishers.
Hata, Ikuhiko; Izawa, Yasuho; Shores, Christopher (2011). IJN Air Force Fighter Units and aces, 1932-1945.
Kinzey, Bert (2010). Attack on Pearl Harbor: Japan awakens a Sleeping Giant. Military Aviation Archives.
Lundstrom, John B. (2005a). The First Team: Pacific Naval Air Combat from Pearl Harbor to Midway
Lundstrom, John B. (2005b). First Team and the Guadalcanal Campaign: Naval Fighter Combat from August to November 1942
Millot, Bernard (December 1976). “Aichi D3A “Val”… la terreur qui tombait du ciel” Fana de l’Aviation
“Pacific Predator… the Aichi Type 99”. Air International. 33 (6)
Mikesh, Robert C. (2004). Japanese Aircraft Equipment: 1940-1945. Schiffer Publishing.
Parkin, Robert S (1995). Blood on the Sea: American Destroyers Lost in WW II. Sarpedon Publishing.
Parshall, Jonathan; Tully, Anthony (2007). Shattered Sword: The Untold Story of the Battle of Midway.
Richards, M. C.; Smith, Donald S. (1974). Aichi D3A (‘Val’) & Yokosuka D4Y (‘Judy’) Carrier Bombers of the IJNAF.
Roscoe, Theodore (1953). United States Destroyer Operations in World War II. Annapolis
Smith, Peter C. (1999). Aichi D3A1/2 Val. Ramsbury, UK: The Crowood Press.
Tagaya, Osamu (2011). Aichi 99 Kanbaku ‘Val’ Units of World War 2. Combat Aircraft #63. Osprey
Worth, Richard (2001). Fleets of World War II. New York: Da Capo Press.
aviastar.org
combinedfleet.com
historyofwar.org
planesoffame.org
j-aircraft.com
aviationofjapan.com
On militaryfactory.com
Japanese Bomber Tactics (Navy) World War 2, mil. aviation vizualized
Refs On wingspalette
Full monty on Calameo
Illustrations
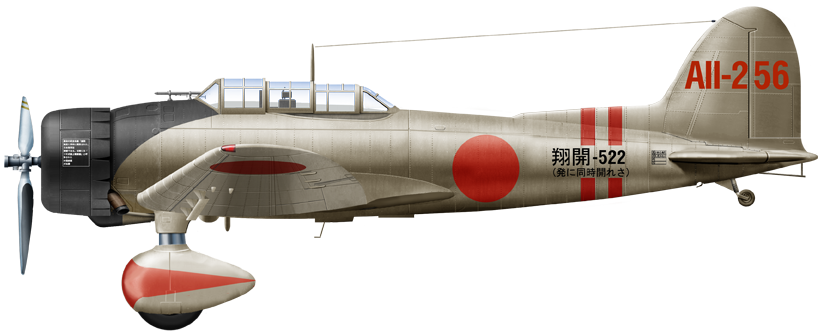
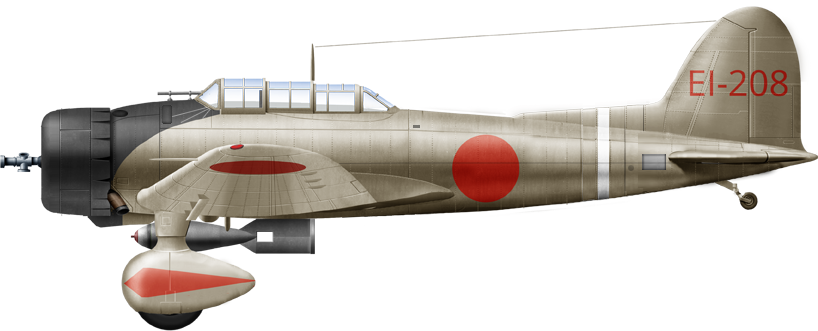
Initially, D3A dive bombers were painted silver and the engine black. Unit symbols were generally painted red, white or yellow, including on the undercarriage fairings. Bands indicated the squadron and position. During the summer of 1941 (so before Pearl Harbor started), the paint finish became by default (very)light olive grey. By early 1942, dark green, buit alsways with the engine cowling and forward fuselage paintained black. Like most of Japanese planes this paint wore out quickly leaving to interesting camouflage-like patterns, but no true camouflages were ever applied, at least as regulated.
Mitsubishi M17, 3rd prototype
D3A1 of the first production batch tests in China, early 1940.
Aichi D3A1, 14 Sentai, China 1940
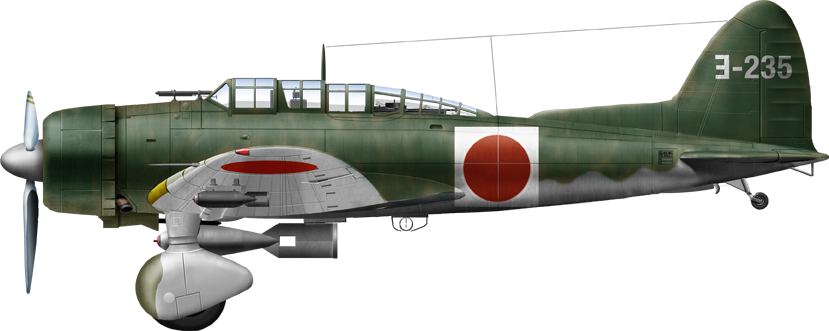
1st Shutai (Squadron), 21 st Section, October 1941
IJN Kaga, December 1941
IJN Shokaku, Pearl Harbor attack
IJN Zuikaku, Pearl Harbor attack
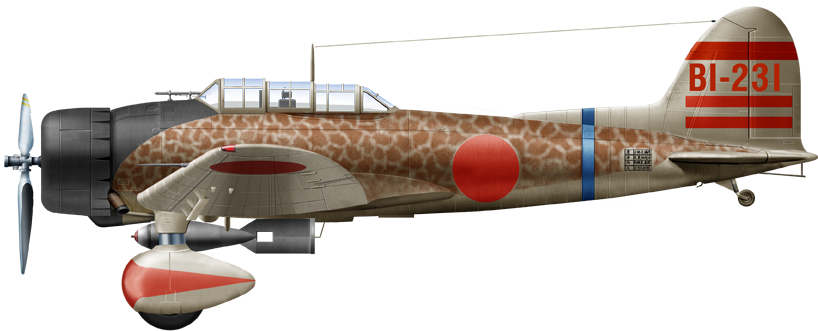
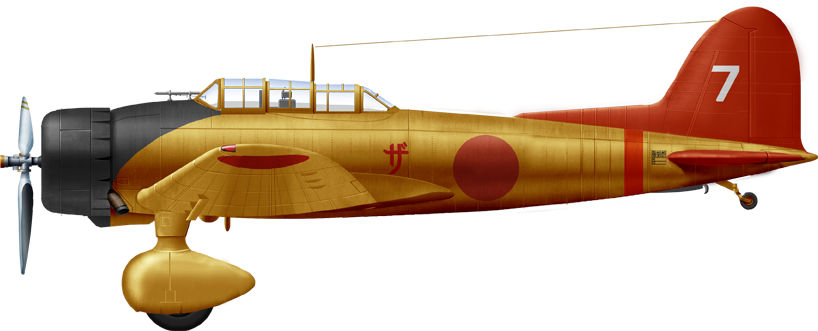
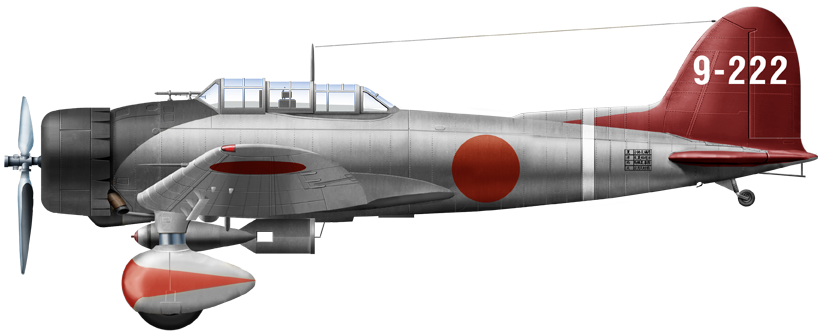
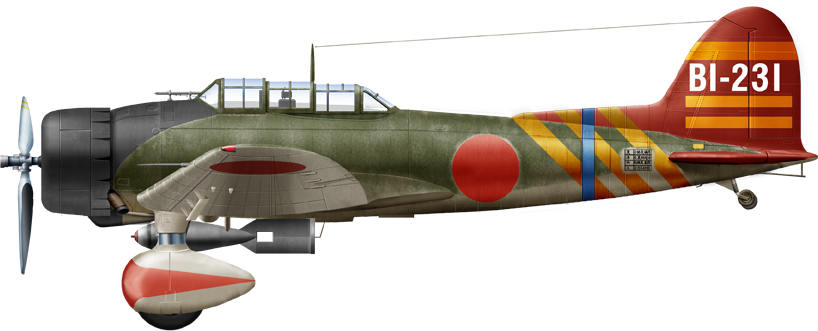
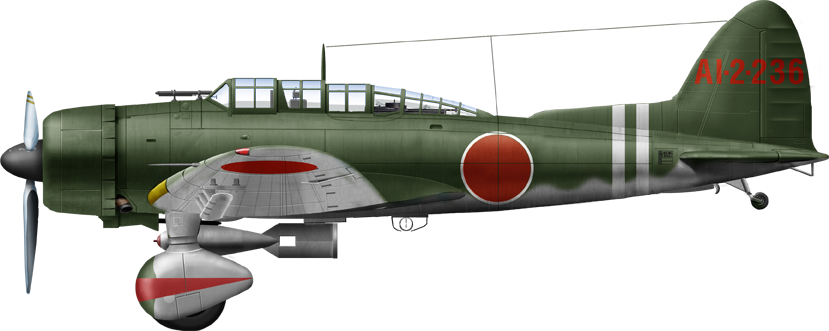
BI-231 flown by Lt. Cmdr. Egusa, 1st Sqn, 21 section, which had two different D3A aircraft garishly painted with unique schemes. The wild scheme in this profile is called ‘Jaja Uma’ (7 December 1941).
D3A1 IJN Shokaku, Battle of Coral Sea, May 1942.
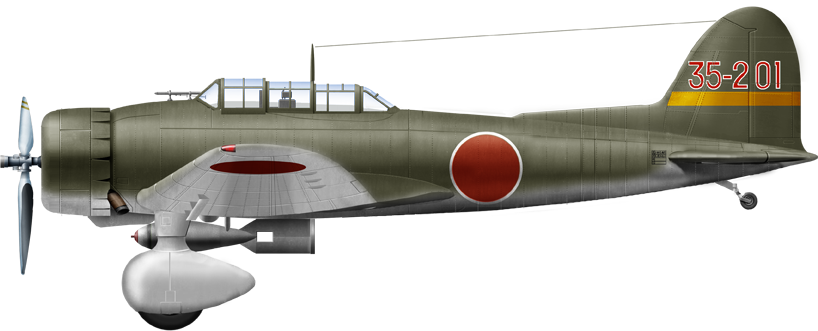
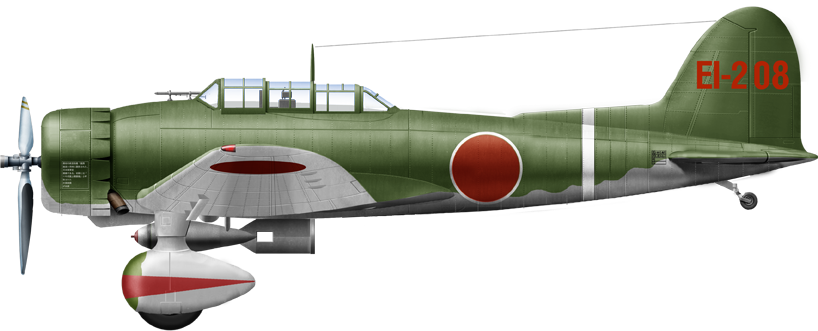
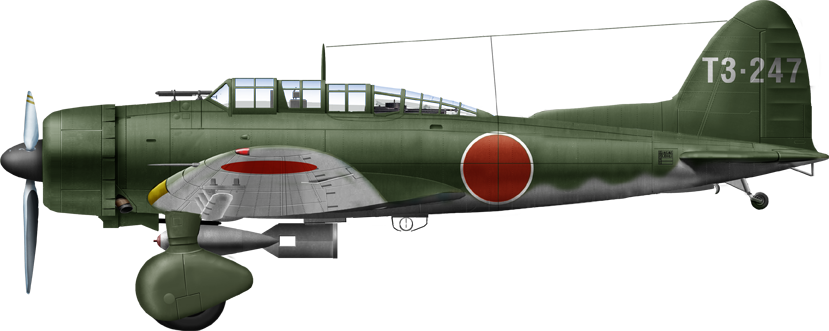
D3A1 late production, 35th Kokutai, late 1942
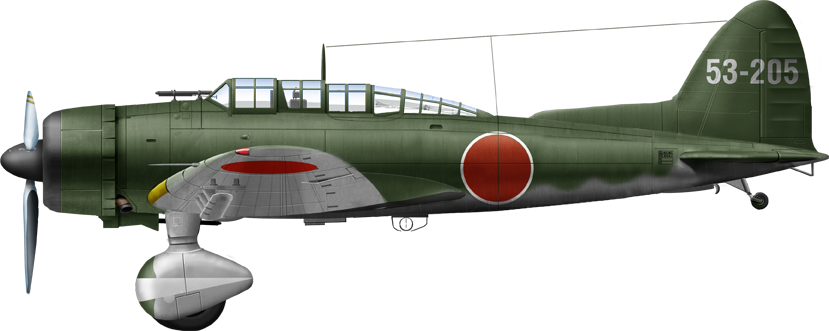
D3A2 of Yokosuka KoKutai, early 1943
D3A2 of Yokosuka Hikotai in 1943
D3A2 onboard IJN Shokaku in June 1943
D3A2 of the 553th Hikotai, April 1944
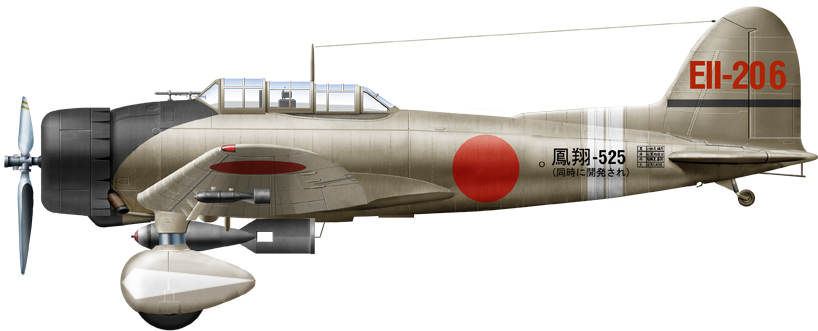
D3A2 with droppable fuel tank, late 1944 (55th Kokutai) Island Base

Poster dedicated to the Aichi D3A “Val”, common 1941-43 IJN dive bomber. Full poster with all variants in preparation.
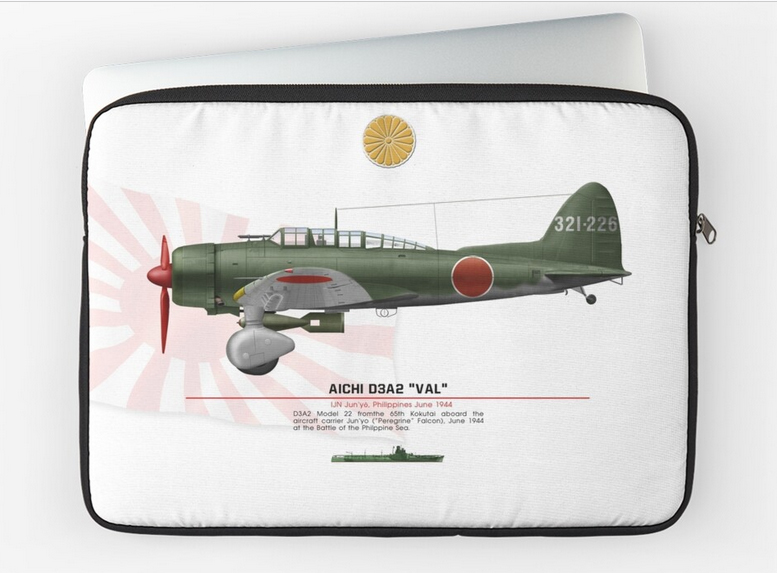
Example of macbook laptop sleeve. Dozens of variants and models possible as well as ipad skins, ipad snap cases, laptop skins, iphone skin and snap cases, soft cases, tough cases, iphone wallet, T-shirts, mouse pade, baseball and dad caps, art, canvas, framed art, metal, photographic print as all scale and effect, postcard and poster, acrylic block, clock, coaster, comforter, duver cover, shower curtain, throw pillow, drawstring bag, print tote bag, mug, cottong tote bag, mask, pin, scarf, tag mug, tarvel mug, water bottle, zipper pouch, greeting card, hardcover journal or spiral notebook… And help our website !
 Latest Facebook Entry -
  X(Tweeter) Naval Encyclopedia's deck archive
 Instagram (@navalencyc)


 French Navy
 Royal Navy
 Russian Navy
 Armada Espanola
 Austrian Navy
 K.u.K. Kriegsmarine
 Dansk Marine
 Nautiko Hellenon
 Koninklije Marine 1870
 Marinha do Brasil
 Osmanlı Donanması
 Marina Do Peru
 Marinha do Portugal
 Regia Marina 1870
 Nihhon Kaigun 1870
 Preußische Marine 1870
 Russkiy Flot 1870
 Svenska marinen
 Søværnet
 Union Navy
 Confederate Navy
 Armada de Argentina
 Imperial Chinese Navy
 Marinha do Portugal
 Mexico
 Kaiserliche Marine
 1898 US Navy
 Sovietskiy Flot
 Royal Canadian Navy
 Royal Australian Navy
 RNZN Fleet
 Chinese Navy 1937
 Kriegsmarine
 Chilean Navy
 Danish Navy
 Finnish Navy
 Hellenic Navy
 Polish Navy
 Romanian Navy
 Turkish Navy
 Royal Yugoslav Navy
 Royal Thai Navy
 Minor Navies
 Albania
 Austria
 Belgium
 Columbia
 Costa Rica
 Cuba
Cuba Czechoslovakia
 Dominican Republic
 Haiti
Haiti Hungary
 Honduras
 Estonia
 Iceland
 Eire
Eire Equador
 Iran
Iran Iraq
Iraq Latvia
 Liberia
 Lithuania
 Mandchukuo
 Morocco
 Nicaragua
 Persia
 San Salvador
 Sarawak
 Uruguay
 Venezuela
 Zanzibar
 Warsaw Pact Navies
 Bulgaria
 Hungary

 Bundesmarine
 Dutch Navy
 Hellenic Navy
 Marina Militare
 Yugoslav Navy
 Chinese Navy
 Indian Navy
 Indonesian Navy
 JMSDF
JMSDF North Korean Navy
 Pakistani Navy
 Philippines Navy
 ROKN
ROKN Rep. of Singapore Navy
 Taiwanese Navy
 IDF Navy
 Saudi Navy
 Royal New Zealand Navy
 Egyptian Navy
 South African Navy


 Ukrainian Navy
Fantastic..
Im looking at doing an Airfix one in 72nd scale so I can hone my chipping skills..
Am going to go for one based on an island in 1944 45 ..
Very helpful massive thanks naval encyclopedia.
Hi Mark, you’re welcome. I hope to have the whole IJN aviation tree covered in 2025.
David