
United Kingdom vs. Germany
Prelude and context
Since the starting of hostilities, both fleets had been wisely kept out of harm in their respective bases, Scapa Flow for the Grand Fleet and Kiel for the Hochseeflotte. Perhaps by excessive prudence, the only ships engaged were most of the time cruisers and battle cruisers, the fasters in the fleet, so capable to flee a superior opponent if needed. Therefore these were engaged on the Dogger bank and Helgoland, but no decisive engagement was in sight, whereas Germany in 1916 which lost all its worldwide assets already in 1914 and early 1915 (The Pacific fleet, ships in the Mediterranean or Africa) began to suffer from the British Naval blockade. Despite a vigorous submarine warfare campaign, perhaps too cautious admirals were pressed, both by the top, including the Kaiser, to simple sailors that badly supported their long inaction, to try at least to fight the Royal Navy.
The beginnings (January-May 1916):
In the roots of this “decisive battle” in the sense of Alfred Thayer Mahan, the American strategist, who had some influence on naval staffs at that time, certainly lays the blockade imposed by Britain since 1914 on Germany. Not only access were blocked by minefields, but destroyers and torpedo boats were massed in southern Britain harbours, to prevent any access through the Channel, why the norther access to the Atlantic were locked by the presence of the “Home Fleet” in the Scottish ports of Rosyth, Edinburgh, Cromarty and Scapa Flow, traditional stronghold for the Grand fleet since the start of this rivalry with Germany.
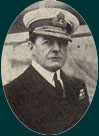
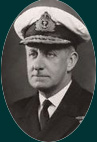
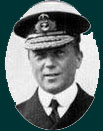
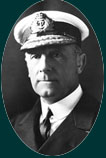
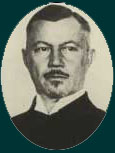
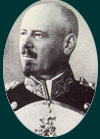
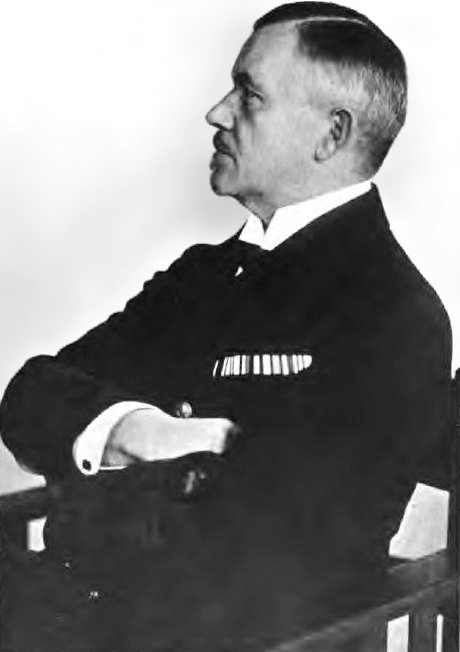
The top brass: Left to right: Admiral Beatty (battlecuiser), rear-admiral Arbuthnot (1st Dreadnought Sqn), rear-admiral Hood (2nd), grand admiral Jellicoe (Grand fleet), Admiral Scheer (Battleships), Admiral Hipper (Battlecruisers).
On the German side, the problem as been the same since 1914, an acute sense of inferiority at least on the numerical point of view. However Admiral Scheer had plans of his own to create a balance. This plan was the driving force behind the most famous naval battle of the ww1 and certainly the last of “big gun battleships” ever since ww2 battleships mass encounters were much rare.
This naval episode of the Great War is probably by far the most famous, and it is also the last major naval battle online or aviation played no role. It was finally the only major confrontation between the two great opposing fleets in the North Sea, the Royal Navy and the Hochseeflotte, and it was also the full demonstration of the weaknesses and qualities battle cruisers but also left many mysteries only answered recently with progress in deep sea exploration. In the opinion of most historians and naval experts, that was the largest naval battle of the twentieth century, and for many, the largest naval battle in history, now 100 years old. That’s the indeed its centennial in May 31, 2016.
 This blockade came to fruition thanks to the numerical superiority of the British forces, alowing permanent rotations of ships for coaling, ensuring a massive presence at sea, ready for any German attempt. German response was taken by submarines, trying to severe or at least compromising British (and later international) shipping.
On the other hand German designers managed to find a solution to carry supplies and force the blockade, designing the Deutschland, a huge cargo submersible (unarmed) that made headlines by crossing the Atlantic back and forth, bringing much-needed supplies from New York. The goods carried were symbolic in scope, but gave back hope to the Germans people that began to suffer from multiple shortages.
 The “disengagement battles” as Heligoland and the Dogger Bank, were motivated by the desire to attract the bulk of British forces in German waters, were the balance can be restore some balance by mines, coastal submarines and destroyers before the decisive confrontation.
Afterwards, the Germans relied on their fire control technology and excellent protection to make a difference. For their part the British also expected to attract the Hochseeflotte at sea into the jaws of their Grand Fleet. Admiral Von Pohl, considered too timorous, was replaced by Von Scheer. Faced with pressure from higher officers, the Kaiser, as well as public opinion in late May 1916, Scheer devised a plan. Part of it was to make the British Admiralty believe he was to continue to keep the fleet into inaction.
Animation on Vimeo (http://www.jutland1916.com)
Opening
Hipper sailed on May, 30 with a “bait” of 40 fast ships, all available battle cruisers, completed with cruisers and destroyers with orders to sail for the Danish coast, and thus attract the Royal Navy in the Baltic, where Scheer waited with all the Hochseeflotte. The Germans were preparing their plan when signals were intercepted by a British spy, and the Royal Navy was informed of Hipper’s raid soon enough to act decisively, remained however ignorant of the position of Scheer, believed still in harbor. Meanwhile, Hipper and Scheer were totally unaware of the nearby presence of major naval units.

German Von Der Tann Battlecruiser
The battle unfolds
The Royal Navy device was based on the battleships of the Grand Fleet, including its rapid squadrons of dreadnoughts, the orders of Commodore Jellicoe, and “recognition”, rapid squadrons David Beatty’s battle cruisers of the Home Fleet, from Rosyth. It is they who met at 2:00 the “tip” of the German device embodied by Hipper. The first ship to see the Germans was the light cruiser Galatea, he had time to fire a few rounds before falling to the threat of 280 mm of Scheer line vessels.
The latter had five main battlecruisers (Lützow, Derfflinger, Seydlitz, Moltke and Von der Tann), and several light cruisers and ocean destroyers. Opposite, admiral David Beatty had the Lion, Princess Royal, Queen Mary, Tiger, Indefatigable and New Zealand in two parallel columns, escorted and preceded by battleships and light cruisers and surrounded by destroyers. The young and brash rear-Admiral Horace Hood (“The Honorable”) for his part, had 3 battle cruisers (including the Invincible, bearing his mark, Indomitable, Infexible). And there were the eight armored cruisers, Defence, Formidable, Warrior, Black Prince and Duke of Edinburgh, commanded by Rear-Admiral Robert Arbuthnot.
Respective forces and weaknesses
On paper, the British artillery superiority was evident (305s and 343s against 280s and 305s). Additionally, advanced automatic sighting systems were well-oiled, controlled by the firing synchronized the director who effectively. But soon the facts would demonstrate the superiority of the Germans: Although it has a more modest artillery but also performing optical instruments, the Germans used a stepped-up firing technique, in order to bring each burst, and especially distinguished by a rate much higher shooting, almost double, consideration of a lower caliber. The English on their side had adopted a more progressive technology with shooting a piece by turret, and a full broadside when the right distance seemed found.

Maps showing the battle as it unfolded on May, 31, 1916.
But this implied the cooldown of several parts, the Germans pulling them continuously. Moreover, as it was demonstrated by studying the ships involved in the battle and repaired in dry dock, the Germans certainly cashed buildings more shots, due to better precision English but half of the English shells had a malfunction and do not explode. On their side the English lost their battle cruisers due to fires releases too quickly to their bunkers ammunition because of their cordite (exhaust gas guns, sockets residue) highly explosive stagnant in poorly ventilated compartments. Finally, the quality of the German armor is probably the most plausible explanation when the surprisingly low figure of losses Hochseeflotte facing a real deluge of fire.
The battlecruisers are fighting
Overall, the commitment was brief, indecisive, Hipper folding its ships as planned on Scheer. At 3:45, the battle between the two vanguards raged. Jellicoe Hood decided to send reinforcements to other battle cruisers. The arrangement of British ships was that despite coal smoke, the sheaves and smoke shooting, hindering visibility of the two adversaries, the silhouette of the British ships stood out on the horizon, allowing the Germans to better focus their shots. Most rapidly Beatty ships were struggling, conceding blows, until the destruction of HMS Indefatigable. Then it was the turn of the Queen Mary. Orders Beatty also were misinterpreted, the latter requiring focus shots of the first two units on the battle cruiser No. 1 of the German fleet, (but the situation was reversed for the British commanders and confusion s’ settled). The old Nelson technique of obtaining a local superiority did not work.
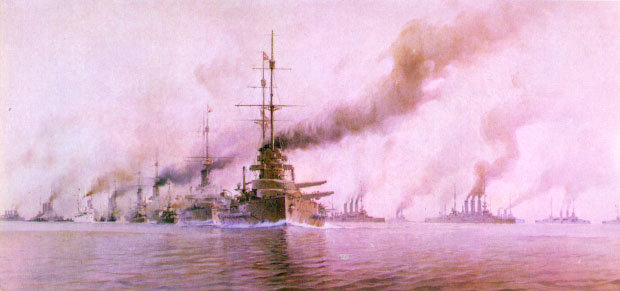
Admiral Jellicoe’s Grand Fleet at Jutland
“There seems to be something wrong with our bloody ships today”
 In turn, this mistake was paradoxically due to battle cruiser Queen Mary: Two German ships concentrated their fire on her, inadvertently applying to the letter Nelson’s tactics. British gunners were also deceived by the light cruiser at the front of the line that smoke plume was taken for that of a battle cruiser. Now, a light cruiser was significantly smaller and thus harder to hit, and precious shells were wasted while other German capital ships were spared.
Beatty did not yet renounced his plan to close in even more. Thus, however favored by the Gremans which started out-ranged and out-gunned (their 280mm only had a 16,000 meters range) and were in turn capable to return fire, compounded by the arrival of Scheer’s main battle line. The were, however, detected by a ship, that ventured to the forefront of the Grand Fleet, HMS Southampton. She hastened to warn Jellicoe. Scheer was now himself trapped, and Beatty by his daring pursuit and sacrifice succeeded to immobilize the entire German fleet, allowing Jellicoe to start wrapping masterfully the entire Hochseeflotte.
In the midst of this confrontation, a large white sailboat appeared out of nowhere, crossing like a ghosty apparition coming through the fog. Sailors from both sides were stunned as the ship crossed the “no man’s land” between the two battle lines, without emitting any signal, the sailed away and disappeared in the mist. Of course, some sailors from both sides affirmed later that this was an omen for victory, others of defeat, some even swearing they saw the infamous “Flying Dutchman”.
General melee
At 4:40, Beatty now fully aware of the situation changed course, sailing towards Jellicoe’s squadron, hoping Hipper would do the same. But dreadnoughts of the 5th squadron (Admiral Thomas Evans), could not perceive signals sent from HMS Lion, and Beatty, was found himself unsupported, in front of Scheer’s battleships. His quick dreadnoughts Valiant, Barham, Warspite and Malaya at the same stumbled upon Scheer and Hipper while changing course at 4:57. They managed to point their formidable 381 mm at the Grösser Kurfurst, Markgraf, König, Seydlitz, Lützow, and Derfflinger. One can easily imagine the astonishment of the Germans before gigantic water columns appeared suddenly, caused by these big guns from behind Beatty’s battle line (nearly 35 km)…
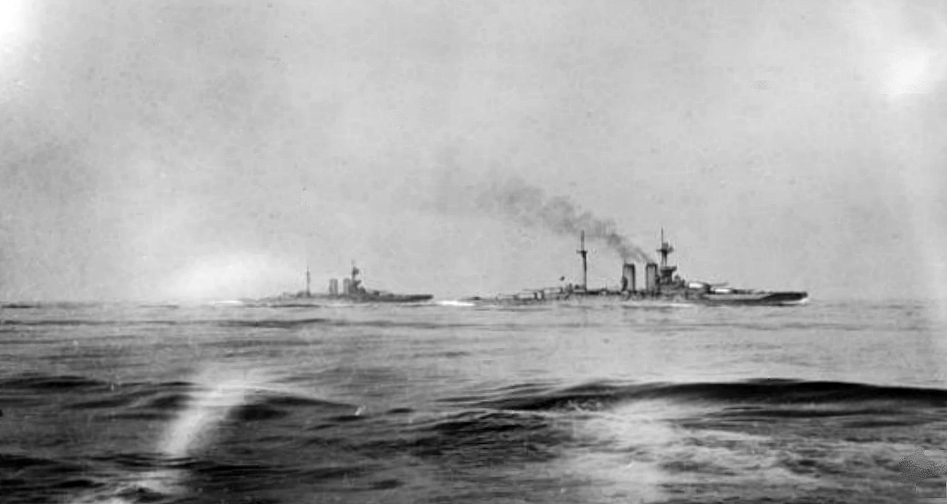
HMS Warspite and Malaya
A much larger trap was being set up: The fleet of Jellicoe tried a wide maneuver of circumvention, the famous “T”. Scheer was going to be cut off from its bases. To clear out he would then attempt a desperate maneuver which will remain legendary for its boldness, the “charge to death.” Four of his least damaged battle cruisers, guided by the heroic Derfflinger and escorted by high sea destroyers would try to cross the British line. The maneuver was daring: Taking ramming positions, but at the same time offering a reduced target for English gunners. The British knew well indeed the quality of German torpedoes: They broke their lined, but still managed to concentrate their fire on the lead ship, which was sunk. The Derfflinger was thus the single most severe loss of this battle on the German side.

HMS Lion, struck by salvos and burning
Losses
Other losses consisted in the old battleship Pommern, lagging after Scheer’s manoeuver with four light cruisers and 5 destroyers. Many Zeppelins were used without success, as U-Bootes on duty remained behind the Skagerrak Strait without seeing the promised Grand Fleet. Thus ended the last phase of the battle. Taking advantage of a huge fog bank, Scheer and Hipper escaped and returned to German waters and the port of Wilhelmshaven, helped by a rearguard distraction from the ocean destroyers, keeping distance with British ships. These latter had to deplore the loss of 3 battle cruisers, 3 armoured cruisers, a light cruiser and 5 destroyers. The balance was relatively in favor of the Germans, but they had several badly damaged capital ships that would be immobilized for several months in repairs. Controversy still emerge on exact details of operations, but as a matter of fact Beatty and Jellicoe were particularly criticized afterwards (especially by Churchill), for having either taken too much risks (Beatty) or at the contrary being too timorous (Jellicoe) ruining a unique opportunity to take care of the German fleet once and for all, while Scheer and Hipper came back to be celebrated as heroes.

HMS Queen Mary blowing up
Total, on the British side:
54 ships committed: 9 battlecruisers, 28 battleships, 34 cruisers and 78 destroyers.
Losses: 3 battle cruisers, 3 cruisers, 8 destroyers.
Total, on the German side:
42 ships engaged, 5 battlecruisers, 22 battleships, 11 cruisers, 61 destroyers.
Losses: 1 battlecruiser, 1 battleship, 4 cruisers, 5 destroyers.
Conclusion
This was the last naval battle of that scale of the Great War. After this, the bulk of both fleets would never to leave their stations. And this was an almost intact Hochseeflotte, even reinforced with many new ships, which was forced to sail under escort to captivity, at the great naval base of Scapa Flow. She scuttled there in 1919, after a mutiny and even new naval battle in the bay was narrowly avoided. Sailors and officers kept from this episode a bitter memory, and met indifference on their return to Germany, or worst in Berlin, political unrest and armed bands, often taking part in these events.

SMS Seydlitz badly damaged, after the battle
 Officers would say long after “never again Scapa Flow”, as a supreme symbol of German humiliation. Discredit of the Navy weighed much on German rearmament from 1933: Hitler considered an unnecessarily expensive surface fleet, preferring to concentrate on aviation and submarines. However from 1935 to 1936 with the Anglo-German naval agreement, the dream of a powerful surface fleet returned. Its first representative (and most famous) would be the battleship Bismarck, first and ambitious “Plan K”. But this is another story
Links
The Battle of Jutland on wikipedia
jutland1916.com – centennial website
battle-of-jutland.com
On firstworldwar.com
On worldwar1.co.uk
 Latest Facebook Entry -
  Pinterest Board


 Austrian Navy
 French Navy
 Royal Navy
 Armada Espanola
 K.u.K. Kriegsmarine
 Dansk Marine
 Nautiko Hellenon
 Koninklije Marine 1870
 Marinha do Brasil
 Osmanlı Donanması
 Marina Do Peru
 Marinha do Portugal
 Regia Marina 1870
 Nihhon Kaigun 1870
 Preußische Marine 1870
 Russkiy Flot 1870
 Svenska marinen
 Søværnet
 Union Navy
 Confederate Navy
 Armada de Argentina
 Imperial Chinese Navy
 Marinha do Portugal
 Mexico
 Kaiserliche Marine
 1898 US Navy
 Russkiy Flot
 French Naval Aviation
 Russian Naval Aviation
 Sovietskiy Flot
 Royal Canadian Navy
 Royal Australian Navy
 RNZN Fleet
 Chinese Navy 1937
 Kriegsmarine
 Chilean Navy
 Danish Navy
 Finnish Navy
 Hellenic Navy
 Polish Navy
 Romanian Navy
 Turkish Navy
 Royal Yugoslav Navy
 Royal Thai Navy
 Minor Navies
 Albania
 Austria
 Belgium
 Columbia
 Costa Rica
 Cuba
Cuba Czechoslovakia
 Dominican Republic
 Haiti
Haiti Hungary
 Honduras
 Estonia
 Iceland
 Eire
Eire Equador
 Iran
Iran Iraq
Iraq Latvia
 Liberia
 Lithuania
 Mandchukuo
 Morocco
 Nicaragua
 Persia
 San Salvador
 Sarawak
 Uruguay
 Venezuela
 Zanzibar
 Warsaw Pact Navies
 Bulgaria
 Hungary

 Bundesmarine
 Dutch Navy
 Hellenic Navy
 Marina Militare
 Taiwanese Navy
 Chinese Navy
 Indian Navy
 Indonesian Navy
 JMSDF
JMSDF North Korean Navy
 Philippines Navy
 ROKN
ROKN IDF Navy
 Royal New Zealand Navy
 Egyptian Navy
 South African Navy


 RN
RN
 Marine Nationale
 Soviet Navy